一,Spring概念总结
spring是一个集成了许多第三方框架的大杂烩,其核心技术是IOC(控制反转,也称依赖注入)和AOP(面向切面编程),所以spring既是一个IOC容器,也是一个AOP框架。我们知道没有Spring,Struts和Hibernate可以很好的工作,在开篇中我把没有Spring的架构称为“独木桥”,有Spring的架构称为“阳光大道”。说白了,Spring解决了企业应用开发的复杂性,用基本的javaBean来完成EJB的事情,从大小和开销方向说,Spring都是轻量级的。Spring具有很多的优点:
1、使我们的分层更好。
SSH框架系统从职责上分为四层:表示层、业务逻辑层、数据持久层和域模块层(实体层)。
从上图我们可以看到Spring处于业务逻辑层,担任连接Struts和Hibernate桥梁的角色。系统的整个层次关系可以一目了然。
2、对象管理更好。
从上图,我们看到Spring将Transactions、Session以及业务层服务都放到了业务逻辑层来管理。系统的条理变得更加清晰,不仅使持久化层的职责更加单一,而且提高了系统的灵活性。
3、AOP
面向切面编程,AOP让开发人员创建非行为性的关注点,并将它们插入到应用代码红。公共服务(比如日志、持久性、事务等)就可以就可以分解成方面并应用到域对象上,同时不会增加域对象的对象模型的复杂性。
二,Spring框架的搭建
1.到spring官网http://projects.spring.io/spring-framework/下载spring插件,这里使用的是spring-framework-4.2.2.RELEASE版本;
2.导入spring插件jar包到项目的lib文件夹下:
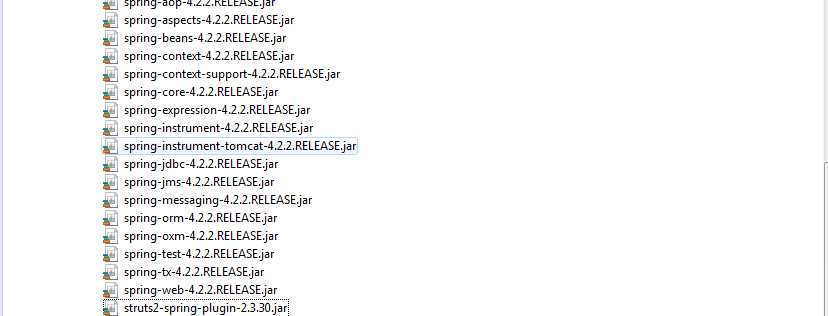
注意:其中struts2-spring-plugin-2.3.30.jar和commons-logging-1.1.3.jar在Struts2的jar包里;
2.导入包后,到web.xml中配置spring的监听器:
1   <context-param>
2     <param-name>contextConfigLocation</param-name>
3     <param-value>classpath:applicationContext.xml</param-value>
4   </context-param>
5   <listener>
6     <listener-class>org.springframework.web.context.ContextLoaderListener</listener-class>
7   </listener>
3.然后我们要把spring和Struts连起来,在Struts.xml中配置如下代码:
1 <!-- include文件用于分割,实现多人并发不冲突 -->
2 <struts>
3     <!-- 告知Struts2运行时使用Spring来创建对象 -->
4     <!--指定Struts 2默认的ObjectFactory Bean,该属性默认值是spring-->
5     <constant name="struts.objectFactory" value="spring" />//name属性值不能随便乱写
6     <include file="s001.xml" />
7     <include file="s002.xml" />
8     <include file="s003.xml" />
9 </struts>
4.配置好Struts.xml后,还要到Action类中进行依赖注入(set注入构造注入接口注入)代码如下:
1     //声明service,但不给它创建具体的实现类的实例,
2     //因为:action不应该关注具体是谁来实现service
3     //具体service实现类是谁,我们使用spring注入进来
4     private IndexService is = null;
5     public void setIs(IndexService is) {
6         System.out.println("有人帮我们注入了service的实例:"+is);
7         this.is = is;
8     }
5.配置applicationContext.xml文件;
在解压后的文件夹路径下:spring-framework-2.5.6samplespetclinic estorgspringframeworksamplespetclinicjpa
找到applicationContext.xml文件并Copy到项目src路径下,并进行如下配置:
 1 <?xml version="1.0" encoding="UTF-8"?>
 2 <beans xmlns="http://www.springframework.org/schema/beans"
 3         xmlns:xsi="http://www.w3.org/2001/XMLSchema-instance"
 4         xmlns:p="http://www.springframework.org/schema/p"
 5         xmlns:aop="http://www.springframework.org/schema/aop"
 6         xmlns:context="http://www.springframework.org/schema/context"
 7         xmlns:jee="http://www.springframework.org/schema/jee"
 8         xmlns:tx="http://www.springframework.org/schema/tx"
 9         xsi:schemaLocation="
10             http://www.springframework.org/schema/aop http://www.springframework.org/schema/aop/spring-aop-4.2.xsd
11             http://www.springframework.org/schema/beans http://www.springframework.org/schema/beans/spring-beans-4.2.xsd
12             http://www.springframework.org/schema/context http://www.springframework.org/schema/context/spring-context-4.2.xsd
13             http://www.springframework.org/schema/jee http://www.springframework.org/schema/jee/spring-jee-4.2.xsd
14             http://www.springframework.org/schema/tx http://www.springframework.org/schema/tx/spring-tx-4.2.xsd">
15     <!-- 类似于财务部门一样,类就是钱,所有需要类的实例都由srping去管理 -->
16     <bean id="myIndexAction" class="ssh.action.IndexAction" scope="prototype">
17         <!-- setIs(myIndexService) -->
18         <property name="is" ref="myIndexService"/>
19     </bean>
20
21     <!-- myIndexService = new ssh.service.IndexServiceImpl() -->
22     <bean id="myIndexService" class="ssh.service.IndexServiceImpl" scope="prototype">
23         <property name="id" ref="myIndexDao"/>
24     </bean>
25
26     <bean id="myIndexDao" class="ssh.dao.IndexDaoImpl" scope="prototype">
27         <property name="c" ref="myConnection"></property>
28     </bean>
29
30     <bean id="myConnection" class="ssh.util.MyConnectionImpl_SQLSERVER" scope="prototype">
31     </bean>
32 </beans>
33
在这里基本上搭建完成啦,可以去试试运行吧!