简述Spring-boot应用
SpringBoot简介
Create stand-alone Spring applications
Embed Tomcat, Jetty or Undertow directly (no need to deploy WAR files)
Provide opinionated 'starter' dependencies to simplify your build configuration
Automatically configure Spring and 3rd party libraries whenever possible
Provide production-ready features such as metrics, health checks and externalized configuration
Absolutely no code generation and no requirement for XML configuration
上面这段话摘自 http://spring.io/projects/spring-boot,简单介绍了Spring Boot 的优势,翻译过来就是,标准单一的Spring 应用程序,内置Tomcat,Jetty ,无需打成 war包,提供一个开始依赖来简化依赖配置,自动配置了Spring 以及第三方依赖库,提供生产特征,比如指标,健壮检查和外部化配置,绝对没有任何代码生成,并且不需要配置xml,看到这些与以往的Spring 搭建做出了巨大的优化。
环境准备
Jdk 1.7 +
Maven 项目管理工具
Eclipse + Spring 插件,Idea,STS
Mysql 数据库
Maven主要依赖
Spring Boot与简单SSM项目,做到了简化配置,它尽可能将用户所需的开发依赖集中一个父类模块,我们在搭建Spring Boot 项目的时候可以发现我们的项目继承,如下模块
<!--父类模块 -->
<parent>
    <groupId>org.springframework.boot</groupId>
    <artifactId>spring-boot-starter-parent</artifactId>
    <version>${spring-boot-version}</version>
    <relativePath /> <!-- lookup parent from repository -->
</parent>
该模块可以说整个项目重要组成部分,因为该父类模块定义了许多我们在开发中需要的依赖。
除此之外,还有下几个依赖
<dependencies>
         <!-- -->
         <dependency>
            <groupId>org.springframework.boot</groupId>
            <artifactId>spring-boot-starter-web</artifactId>
        </dependency>
        <dependency>
            <groupId>org.mybatis.spring.boot</groupId>
            <artifactId>mybatis-spring-boot-starter</artifactId>
            <version>${mybatis.spring.boot.starter.version}</version>
        </dependency>

        <!-- @ConfigurationProperties -->
        <dependency>
            <groupId>org.springframework.boot</groupId>
            <artifactId>spring-boot-configurationprocessor</artifactId>
            <optional>true</optional>
        </dependency>

        <!-- druibs数据源配置 -->
        <dependency>
            <groupId>com.alibaba</groupId>
            <artifactId>druid</artifactId>
            <version>${druid.version}</version>
        </dependency>

        <dependency>
            <groupId>mysql</groupId>
            <artifactId>mysql-connector-java</artifactId>
            <scope>runtime</scope>
        </dependency>

        <!-- mybatis pageHelper -->
        <dependency>
            <groupId>com.github.pagehelper</groupId>
            <artifactId>pagehelper</artifactId>
            <version>4.1.6</version>
        </dependency>
        <dependency>
            <groupId>org.springframework.boot</groupId>
            <artifactId>spring-boot-starter-test</artifactId>
            <scope>test</scope>
        </dependency>
        <!-- swigger 配置 -->
        <dependency>
            <groupId>io.springfox</groupId>
            <artifactId>springfox-swagger2</artifactId>
            <version>2.7.0</version>
        </dependency>
        <dependency>
            <groupId>io.springfox</groupId>
            <artifactId>springfox-swagger-ui</artifactId>
            <version>2.7.0</version>
        </dependency>
    </dependencies>
可以看到整个项目依赖是极其简单,因为我们父类模块做了许多事,把我们想要做的事情都做了,在早期开发SSM项目时候,有时候一个项目中我们可能会丢失一些依赖,现在这个问题已经没有了。我说一下几个主要的依赖,
<dependency>
            <groupId>org.springframework.boot</groupId>
            <artifactId>spring-boot-starter-web</artifactId>
 </dependency>
上面这个依赖,开启项目spring-mvc模块,大家在搭建项目的时候可以点进去看一下,可以看到如下一些细节
 <dependency>
      <groupId>org.springframework</groupId>
      <artifactId>spring-web</artifactId>
      <version>5.0.9.RELEASE</version>
      <scope>compile</scope>
  </dependency>
  <dependency>
      <groupId>org.springframework</groupId>
      <artifactId>spring-webmvc</artifactId>
      <version>5.0.9.RELEASE</version>
      <scope>compile</scope>
  </dependency>
可以看到它也是把我们的Spring Mvc 依赖给加载进来,跟我们之前做的工作差不多,用专业点的词语就是"封装"。
同理我们看一下如下这个依赖
<dependency>
      <groupId>org.mybatis.spring.boot</groupId>
      <artifactId>mybatis-spring-boot-starter</artifactId>
      <version>${mybatis.spring.boot.starter.version}</version>
</dependency>
同样点击去看一下
<dependency>
      <groupId>org.springframework.boot</groupId>
      <artifactId>spring-boot-starter-jdbc</artifactId>
  </dependency>
  <dependency>
      <groupId>org.mybatis.spring.boot</groupId>
      <artifactId>mybatis-spring-boot-autoconfigure</artifactId>
  </dependency>
  <dependency>
      <groupId>org.mybatis</groupId>
      <artifactId>mybatis</artifactId>
  </dependency>
 <dependency>
      <groupId>org.mybatis</groupId>
      <artifactId>mybatis-spring</artifactId>
  </dependency>
我可以看到MyBaits这几个大字出现在我们眼前,所以还是那个道理。
spring boot 启动介绍
Spring Boot 自身与Spring Mvc 做了无缝连接,不需要其它依赖,我们之前已经说过了,它自身已经集成了Spring Mvc,我要做是按照它的要求编写我们的代码,我可以先看看SpringBoot 项目的目录结构
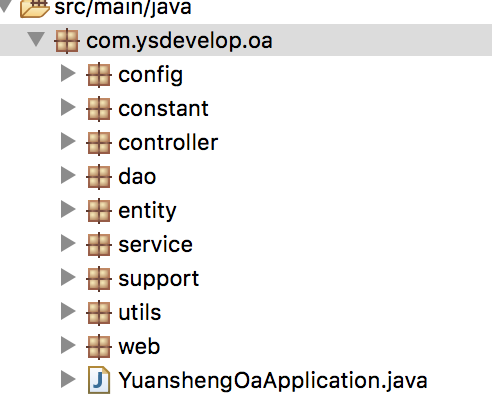
这是我的项目的目录结构,我们要注意一点,代码的包必须与主类平齐,这样我们的写的类才能被Spring Boot 程序的容器所注册或者实例化,Spring Boot 项目本身就是一个Spring 容器,在之前我们不使用Spring Boot 项目时候,我们很多时候都是用xml配置去注册bean,而现在是通过注解方式来注册,实例化bean,我看一下怎么来实例化bean,
我可以先看一下启动类
@SpringBootApplication(scanBasePackages="com.ysdevelop.oa")
@MapperScan("com.ysdevelop.oa.dao")
@EnableTransactionManagement
public class YuanshengOaApplication {

    public static void main(String[] args) {
        SpringApplication.run(YuanshengOaApplication.class, args);
    }
}
在这里我要介绍一下@SpringBootApplication,该注解开启了Spring Boot启动,我可以看看该注解做了什么
@Target(ElementType.TYPE)
@Retention(RetentionPolicy.RUNTIME)
@Documented
@Inherited
@SpringBootConfiguration
@EnableAutoConfiguration
@ComponentScan(excludeFilters = {
        @Filter(type = FilterType.CUSTOM, classes = TypeExcludeFilter.class),
        @Filter(type = FilterType.CUSTOM, classes = AutoConfigurationExcludeFilter.class) })
public @interface SpringBootApplication {

}
这个注解开启了Spring ComponentScan,通过它可以去扫描我们的自己的类中的注解,比如@Service,@Controller,@Autowired 等其他注解,除此之外还有自动化配置。这个注解一句话就是开启包扫描,以及自动化配置,我可以通过配scanBasePackages
来指定所需要的包。
可能还有一个问题,Spring Boot 程序是怎么来启动我们的web应用,与传统war部署方式相比,现在就是做了一点改进,它把Tomcat 服务器直接内置到项目中,这样省得我们去折腾,一旦到部署到线上,可以搭配Nginx来做反向代理来实现路由分发。
mybaits,spring mvc配置
之前我简单说了一下程序的启动,现在来说一下配置,Spring Boot 是支持yml配置,同时也支持properties配置,首先会读取application配置文件,
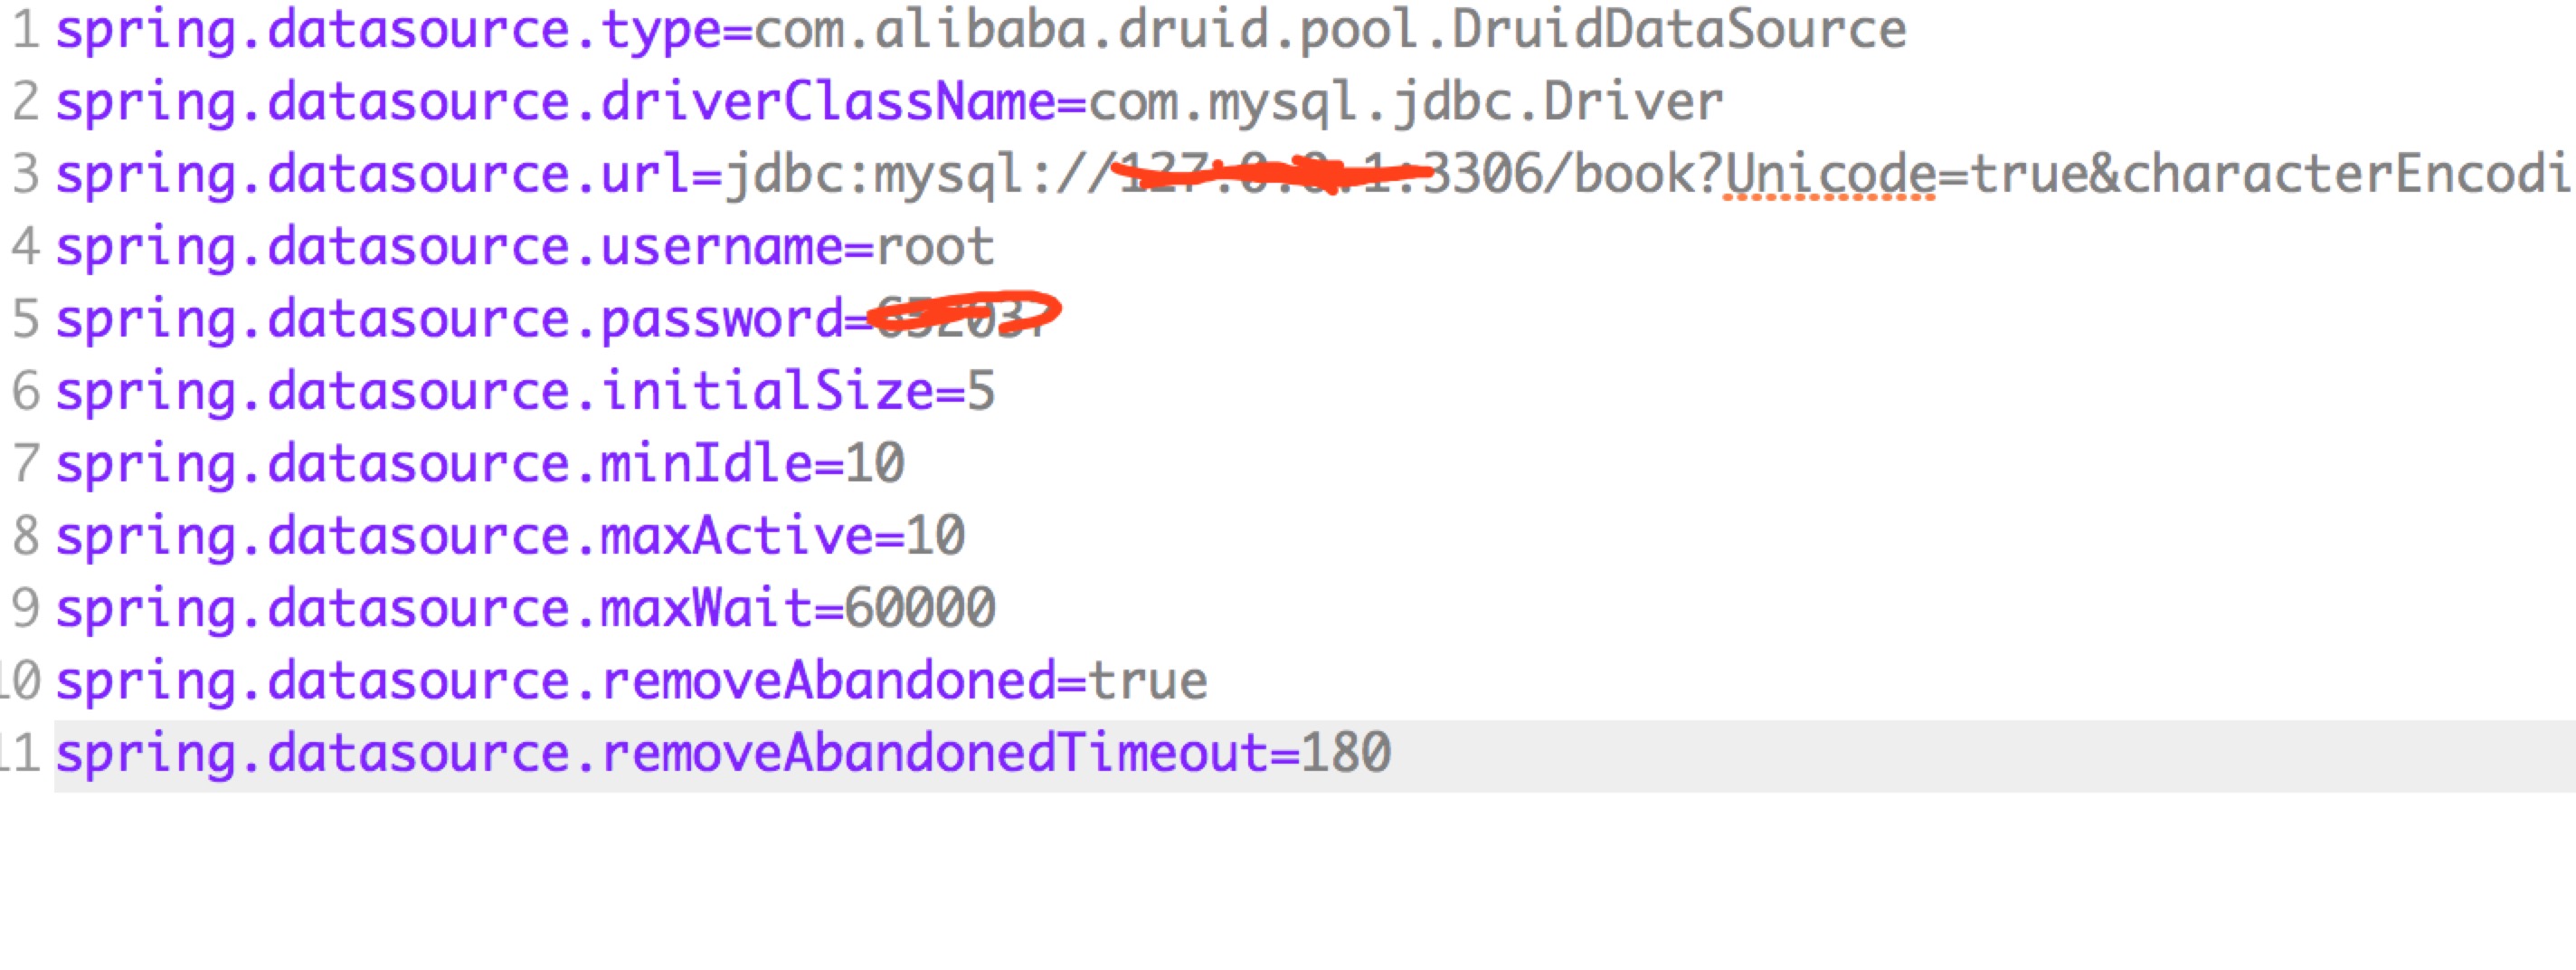
从配置文件中可以看出,Spring Boot 项目配置更加集中配置,数据库连接,数据源,这是主要配置,我没有贴出其它配置,但是这已经能说明Spring Boot 强大。如果项目是前后端分离的,我不需要对Spring Mvc 配置,这里还缺少了端口配置。
还要说明一定,为了更方便项目阶段切换,Spring Boot 支持多配置文件切换,比如test,dev,pro,也可以在启动jar的时候指定配置文件。
传统Spring对比
与之前的传统的Spring 项目相比,Spring Boot 优化了配置,内嵌Tomcat服务器,去xml化,注解多元化,这是我对Spring Boot 的简单理解,不喜勿喷。