一.安装相关依赖
在具有flask框架下的环境下安装相关依赖库:
pip install flask-mail
二.配置文件
在配置文件config.py中添加配置常量,下面的example修改为自己的邮箱
1.163的配置
# 邮件服务器地址 这边使用163,也可以使用qq:smtp.qq.com
MAIL_SERVER = 'smtp.163.com'
# 邮件服务器端口
# 163 邮件 TLS对应465/994    SSL使用 25 端口
MAIL_PORT = 25
#   True 为开启SSL
# EMAIL_USE_SSL = True
# MAIL_USE_SSL : 默认为 False
MAIL_USE_TLS = False  # 启用 TLS
# 发件人的163邮箱地址
MAIL_USERNAME = "example@163.com"
# 163授权码
MAIL_PASSWORD = "YVLYCBDQACSPGTXM"
2.qq的配置
MAIL_SERVER = 'smtp.qq.com'
# 邮件服务器端口
# qq邮件 TLS对应端口465或587
MAIL_PORT = 465
# True 为开启SSL
MAIL_USE_SSL = True
# MAIL_USE_SSL : 默认为 False
MAIL_USE_TLS = False  # 启用 TLS
# 发件人的qq邮箱地址
MAIL_USERNAME = "example@qq.com"
# qq授权码
MAIL_PASSWORD = "xsohghbumdyhggeg"    #"emca advo kbhu gjhg"
三.发送邮件的demo
1.邮件发送的三个例子接口代码
from flask import Flask, render_template
from flask_mail import Mail, Message
import config
import os

mail = Mail()
app = Flask(__name__)
app.config.from_object(config)
mail.init_app(app)

# 1.发送文本
@app.route('/send_mail/')
def email_send_charactor():
    """
    subject 为邮件标题
    recipients 为接收邮件账号
    body 为邮箱内容
    :return:
    """
    message = Message(subject='hello flask-mail', sender=app.config['MAIL_USERNAME'], recipients=['接收人邮件地址'],
                      body='flask-mail邮件内容')
    mail.send(message)
    try:
        mail.send(message)
        return '邮件发送成功,请注意查看!'
    except Exception as e:
        print(e)
        return '邮件发送失败'


# 2.发送一个html
@app.route('/email_send_html/')
def email_send_html():
    """
    email_demo.html 为发送邮件时候所带的网页
    :return:
    """
    message = Message(subject='flask-mail html', sender=app.config['MAIL_USERNAME'], recipients=['接收人邮件地址'])
    try:
        # 发送渲染一个模板
        message.html = render_template('email_demo.html')
        mail.send(message)
        return '带网页邮件发送成功,请注意查看!'
    except Exception as e:
        print(e)
        return '邮件发送失败'


# path = os.path.dirname(__file__)
# filename = os.path.join(path, 'Chopper.jpg')

# 3.发送邮件带附件
@app.route('/email_send_accessory/')
def email_send_accessory():
    """
    Chopper.jpg 为附件名
    :return:
    """
    message = Message(subject='flask-mail accessory', sender=app.config['MAIL_USERNAME'], recipients=['接收人邮件地址'],
                      body='添加了一个附件')
    try:
        # 发送一个附件的文件
        with open("Chopper.jpg", 'rb') as fp:
            # message.attach(filename, "image/jpg", fp.read())
            message.attach("Chopper.jpg", "image/jpg", fp.read())
        mail.send(message)
        return '带附件邮件发送成功,请注意查看!'
    except Exception as e:
        print(e)
        return '邮件发送失败'


if __name__ == '__main__':
    app.run(debug=True)  # host='0.0.0.0',debug=True,port=6000
2.相应的文件目录结构如下

3.访问接口发送邮件
(1)普通的邮件
访问:http://127.0.0.1:5000/send_mail/

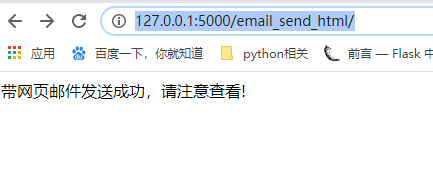
(2)带网页的邮件
访问:http://127.0.0.1:5000/email_send_html/
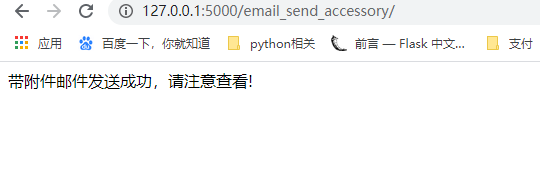
(3)带附件的邮件
访问:http://127.0.0.1:5000/email_send_accessory/
4.异步发送邮件demo
使用的配置文件还是config.py
from flask import Flask, render_template
from flask_mail import Mail, Message
import config
import os

mail = Mail()
app = Flask(__name__)
app.config.from_object(config)
mail.init_app(app)
# 4.异步发送邮件
from threading import Thread


@app.route('/send_async_email/')
def index():
    res = send_mail()
    return '异步邮件发送成功,请注意查看!'


def send_async_email(app, msg):
    with app.app_context():
        mail.send(msg)


def send_mail():
    # sender-发件人邮箱    recipients-收件人邮箱
    msg = Message("flask-mail async", sender=app.config['MAIL_USERNAME'], recipients=['1391053697@qq.com'])
    msg.body = "这个是一个异步邮件"
    # Flask支持很多,比如附件和抄送等功能,根据需要自己添加就可以
    # msg.attach 邮件附件添加
    # msg.attach("文件名", "类型", 读取文件)
    #     with app.open_resource("test.jpg") as fp:
    #         msg.attach("image.jpg", "image/jpg", fp.read())
    thr = Thread(target=send_async_email, args=[app, msg])  # 创建线程
    thr.start()
    print(thr,"线程。。。。。。。。。。。")
    return thr


if __name__ == '__main__':
    app.run(debug=True)  # host='0.0.0.0',debug=True,port=6000
访问:http://127.0.0.1:5000/send_async_email/
