本章学习内容
1.了解陕北吴旗娃的Mvc分页控件
2.利用分页控件实现MVC3下的商品分页
3.利用分页控件实现MVC3下一个页面多个分页以及ajax分页效果
1.了解陕北吴旗娃的Mvc分页控件
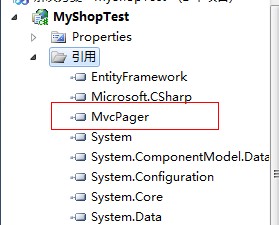
在webfrom里实现分页我们有太多强大的支持,比如微软自带的数据控件里有自带的分页,或者选用网上的很多分页控件,再不济就算在aspx页面里拼凑代码来分页也不是很难的,可是到了MVC里这些选择就变得少了,当然如果你愿意也可以在razor视图里拼凑分页代码,可是这不仅违背View的初衷,仅代码来看也是一件恶心的事,我们今天来介绍杨涛,网名Webdiyer、“陕北吴旗娃”的MVC分页控件,如果你在webform里用过他的分页控件的话,对他应该不是很陌生了,我们摘取他官网里里的简介来说明一下他的MVC分页控件,可以去官网查看详细http://www.webdiyer.com/
MvcPager主要功能有:
- 实现最基本的url route分页;
- 支持手工输入或选择页索引并对输入的页索引进行有效性验证;
- 支持使用ASP.NET MVC Ajax默认的MicrosoftAjax和MicrosoftMvcAjax客户端脚本库实现Ajax分页;
- 支持使用jQuery实现Ajax分页,生成的Html代码更精简;
- 支持Ajax分页模式下,若客户端浏览器不支持或禁用Javascript功能时安全降级为普通分页
- 搜索引擎友好,无论是普通分页还是Ajax分页,搜索引擎都可以直接搜索到所有页面。
- 支持ASP.NET MVC 1.0、2.0和3.0 版本;
- 支持IE、Firefox、Opera、Chrome及Safari等常用浏览器;
using System;
using System.Collections.Generic;
using System.Data;
using System.Data.Entity;
using System.Linq;
using System.Web;
using System.Web.Mvc;
using MyShopTest.Models;
using System.Data.Entity.Validation;
using Webdiyer.WebControls.Mvc;

namespace MyShopTest.Controllers
{
    public class ProductController : Controller
    {
        private MyShopDataEntities db = new MyShopDataEntities();


        //列表
        public ViewResult Index(string title = "")
        {
            var products = Search(title);
            ViewBag.Name = title;
            return View(products.ToList());
        }

        //商品查询
        public IQueryable<Product> Search(string titles)
        {

            var products = db.Products.Include(p => p.Category).Where(p => p.Id > 0);//此处的查询没有任何意义,只是返回所有数据
            products = products.OrderBy(p => p.AddTime);//根据时间升序排列
            //products = products.OrderByDescending(p => p.Id);//根据Id降序排列
            if (!string.IsNullOrEmpty(titles))
            {
                products = products.Where(p => p.Title.IndexOf(titles) > -1 || p.Category.Name.IndexOf(titles) > -1);
            }
            return products;
        }
        //商品浏览
        public ActionResult Browse(string title = "", int currentPage = 1)
        {
            int pageSize = 3;//每页条数
            var products = Search(title).ToPagedList(currentPage, pageSize);
            ViewBag.Name = title;

            return View(products);
        }

        //商品展示
        public ViewResult Show(int cId = 0)
        {
            var cat = db.Category.Single(c => c.Id == cId);
            //var cat = db.Category.Include(c => c.Products).Single(c => c.Id == cId);//两者作用一样,可以直接获取不用include,但是经测试发现没有给对应主外键的实体填写virtual修饰符时,不写Include得不到关联实体的值
            return View(cat);
        }

        //详细
        public ViewResult Details(int id)
        {
            Product product = db.Products.Find(id);
            return View(product);
        }

        //添加
        public ActionResult Create()
        {
            ViewBag.CategoryId = new SelectList(db.Category, "Id", "Name");
            return View();
        }


        //添加处理
        [HttpPost]
        public ActionResult Create(Product product)//此时已经自动匹配好了
        {
            try
            {
                //图片
                var file = Request.Files[0];
                var img = new CommonHelper().fileSaveAs(file, 0, 2);
                if (img.IndexOf("UpFile") > -1)
                {
                    product.ImgUrl = img;
                }
                else
                {
                    ModelState.AddModelError("error", img);//添加了key的错误信息,前台使用Html.ValidationMessage(key)的形式访问,如果key为空,用Html.ValidationSummary(true)显示
                    ViewBag.CategoryId = new SelectList(db.Category, "Id", "Name", product.CategoryId);
                    return View(product);
                }

                db.Products.Add(product);
                db.SaveChanges();
                return RedirectToAction("Index");
            }
            catch (DbEntityValidationException ex)
            {
                string mes = ex.Message;
                ViewBag.CategoryId = new SelectList(db.Category, "Id", "Name", product.CategoryId);
                return View(product);
            }
        }

        //编辑
        public ActionResult Edit(int id)
        {
            Product product = db.Products.Find(id);
            ViewBag.CategoryId = new SelectList(db.Category, "Id", "Name", product.CategoryId);
            return View(product);
        }

        //编辑处理
        [HttpPost]
        public ActionResult Edit(int id, FormCollection collection)
        {
            var product = db.Products.Find(id);
            //ModelState.IsValid,此处相当于后台验证,防止前台验证因为各种情况被跳过或失效
            try
            {
                bool updateRes = TryUpdateModel(product);//如果字段符合则会赋值,否则保持原有
                //db.Entry(product).State = EntityState.Modified;
                if (updateRes)
                {
                    //图片
                    var file = Request.Files[0];
                    var img = new CommonHelper().fileSaveAs(file, 0, 2);
                    if (img.IndexOf("UpFile") > -1)
                    {
                        product.ImgUrl = img;
                    }
                    //else
                    //{
                    //    ModelState.AddModelError("", img);
                    //    ViewBag.CategoryId = new SelectList(db.Category, "Id", "Name", product.CategoryId);
                    //    return View(product);
                    //}

                    db.SaveChanges();
                    return RedirectToAction("Index");
                }
                else
                {
                    ViewBag.CategoryId = new SelectList(db.Category, "Id", "Name", product.CategoryId);
                    ModelState.AddModelError("", "更新失败!");
                    return View(product);
                }

            }
            catch (Exception)
            {
                ViewBag.CategoryId = new SelectList(db.Category, "Id", "Name", product.CategoryId);
                return View(product);
            }

        }


        //删除处理
        [HttpPost]
        public ActionResult Delete(FormCollection coll)
        {
            string ids = coll["ckSelect"];

            foreach (var item in ids.Split(','))//循环每一项Id
            {
                if (item != "false")//筛选掉自动生成的checkbox初始值
                {
                    var user = db.Products.Find(Convert.ToInt32(item));
                    db.Products.Remove(user);
                }

            }
            db.SaveChanges();
            return RedirectToAction("Index");
        }

        protected override void Dispose(bool disposing)
        {
            db.Dispose();
            base.Dispose(disposing);
        }
    }
}
修改Browse.cshtml完整源代码如下:
@using Webdiyer.WebControls.Mvc @using MyShopTest.Models @model PagedList<MyShopTest.Models.Product> @{ ViewBag.Title = "商品浏览"; Layout = "~/Views/Shared/MyMaster.cshtml"; } <h2> 商品浏览</h2> @using (Html.BeginForm()) { <p> 名称或类别:<input type="text" name="title" value="@ViewBag.Name" /> <input type="submit" value="查询" /> </p> } <div > <table> <tr> <th> 名称 </th> <th> 价格 </th> <th> 类别 </th> <th> 上架时间 </th> <th> 操作 </th> </tr> @foreach (var item in Model) { <tr> <td> @Html.CutString(item.Title, 10) </td> <td> @Html.DisplayFor(modelItem => item.Price) </td> <td> @Html.ActionLink(item.Category.Name, "Show", new { cId = item.CategoryId }) | </td> <td> @Html.DisplayFor(modelItem => item.AddTime) </td> <td> @Html.ActionLink("查看详细", "Details", new { id = item.Id }, new { target = "_blank" }) | </td> </tr> } </table> @Html.Pager(Model, new PagerOptions { PageIndexParameterName = "currentPage" }) </div>
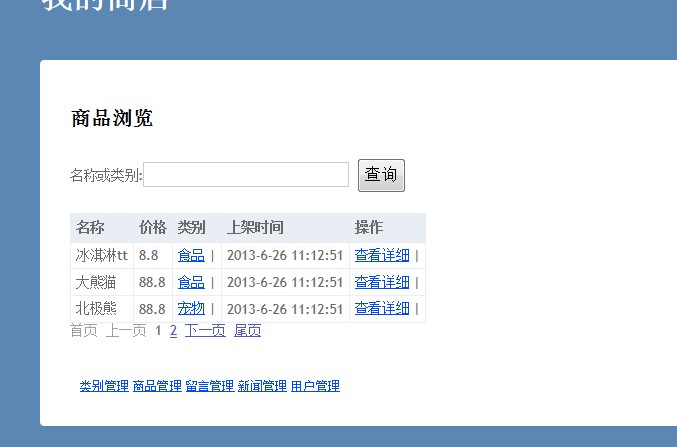
重新编译项目,运行先看一下效果,为了测试分页请先自行添加一些商品数据:
翻一下页:

翻页成功,我们来解析一下代码:
ProductController.cs
 //商品查询
        public IQueryable<Product> Search(string titles)
        {

            var products = db.Products.Include(p => p.Category).Where(p => p.Id > 0);//此处的查询没有任何意义,只是返回所有数据
            products = products.OrderBy(p => p.AddTime);//根据时间升序排列
            //products = products.OrderByDescending(p => p.Id);//根据Id降序排列
            if (!string.IsNullOrEmpty(titles))
            {
                products = products.Where(p => p.Title.IndexOf(titles) > -1 || p.Category.Name.IndexOf(titles) > -1);
            }
            return products;
        }
        //商品浏览
        public ActionResult Browse(string title = "", int currentPage = 1)
        {
            int pageSize = 3;//每页条数
            var products = Search(title).ToPagedList(currentPage, pageSize);
            ViewBag.Name = title;

            return View(products);
Brwose方法我们加了一个参数是currenPage,表示当前页索引,这个参数是从视图里传过来的,默认加载第一页,我们把查询方法的返回值改为了IQueryable,是因为我们使用的分页控件有该接口的扩展方法ToPagedList,把我们查询出的结果进行分页处理,传入参数就是当前页和每页条数,然后把分页结果返回给视图。
Browse.cshtml:
@using Webdiyer.WebControls.Mvc
@using MyShopTest.Models
@model PagedList<MyShopTest.Models.Product>
引用命名控件,声明Model类型是PagedList<MyShopTest.Models.Product>,这个应该很好理解。
@Html.Pager(Model, new PagerOptions { PageIndexParameterName = "currentPage" })
这里是实现分页的HtmlHelper方法,Pager方法它有很多重载形式,这里我们先选取了一种最简单的方式,后续会讲到复杂一些的形式,有兴趣的也可以自己研究一下。我们传入了当前分页数据的Model作为数据源,并且给分页参数指定了url页码参数名称是currentPage,这个名称可以自定义,默认是Id,要和你控制器里那个页码参数保持一致,
一个简答的分页到此基本就可以了,效果之前我们已经测试过了,为了看看分页功能是否健壮,我们再精细的测试一下,比如输入一个查询条件进行查询分页,看看结果是否正确。
点击下一页:

条件不见了,分页结果应该也是不正确的,说明我们的分页还不完善。除此之外我们还希望分页时可以显示总页数,每页条数,当前页码,假如数据多时最好还可以进行页码跳转等等,现在我们来改造我们的代码完成这些功能。
Browse.cshtml修改完整代码如下:
@using Webdiyer.WebControls.Mvc @using MyShopTest.Models @model PagedList<MyShopTest.Models.Product> @{ ViewBag.Title = "商品浏览"; Layout = "~/Views/Shared/MyMaster.cshtml"; } <h2> 商品浏览</h2> <!--不指定form提交action,会默认提交到当前url(地址栏显示的action)--> @using (Html.BeginForm()) { <p> 名称或类别:<input type="text" name="title" value="@ViewBag.Name" /> <input type="submit" value="查询" /> </p> } <div> <table> <tr> <th> 名称 </th> <th> 价格 </th> <th> 类别 </th> <th> 上架时间 </th> <th> 操作 </th> </tr> @foreach (var item in Model) { <tr> <td> @Html.CutString(item.Title, 10) </td> <td> @Html.DisplayFor(modelItem => item.Price) </td> <td> @Html.ActionLink(item.Category.Name, "Show", new { cId = item.CategoryId }) | </td> <td> @Html.DisplayFor(modelItem => item.AddTime) </td> <td> @Html.ActionLink("查看详细", "Details", new { id = item.Id }, new { target = "_blank" }) | </td> </tr> } </table> @Html.Pager(Model, new PagerOptions { PageIndexParameterName = "currentPage", ShowPageIndexBox = true, PageIndexBoxType = PageIndexBoxType.DropDownList, ShowGoButton = false, PageIndexBoxWrapperFormatString = "跳转到{0}", FirstPageText = "首页" }, "default", new { title =ViewBag.Name }) |共 @Model.TotalItemCount 条记录,页 @Model.CurrentPageIndex/@Model.TotalPageCount </div>
重新编译项目,运行:

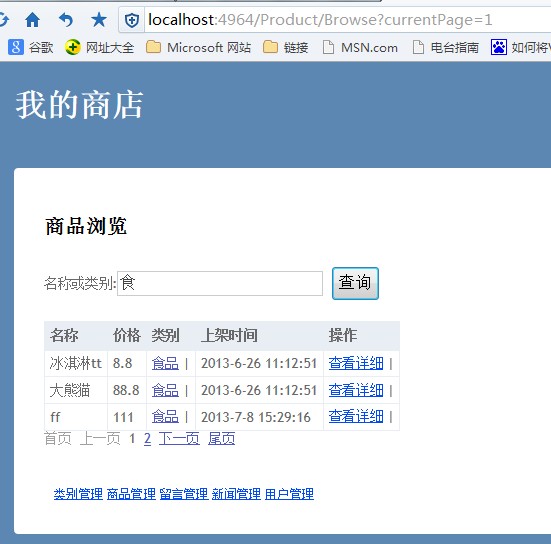
输入查询条件,点击下一页查看:

没有问题,可以实现我们要的效果,至此一个稍微健全的分页到此就可以了。
3.利用分页控件实现MVC3下一个页面多个分页以及ajax分页效果
using System;
using System.Collections.Generic;
using System.Linq;
using System.Web;
using Webdiyer.WebControls.Mvc;

namespace MyShopTest.Models
{
    public class MyDataList
    {
        public PagedList<Categeory> cList { get; set; }
        public PagedList<Product> pList { get; set; }
    }
}
这个类里我们定义了两个属性,分别用来存储类别和商品的分页数据。
修改Product控制器的Browse的Action代码如下:
 //商品浏览
        public ActionResult Browse(string title = "", int currentPage = 1, int currentPage2 = 1)
        {
            int pageSize = 3;//每页条数
            var products = Search(title).ToPagedList(currentPage, pageSize);
            var categoryes = db.Category.OrderByDescending(c => c.Id).ToPagedList(currentPage2, pageSize);

            MyDataList list = new MyDataList();
            list.cList = categoryes;
            list.pList = products;

            ViewBag.Name = title;

            return View(list);
        }
修改Browse.cshtml完整代码如下:
@using Webdiyer.WebControls.Mvc @using MyShopTest.Models @model MyShopTest.Models.MyDataList @{ ViewBag.Title = "商品浏览"; Layout = "~/Views/Shared/MyMaster.cshtml"; } <h2> 商品浏览</h2> <!--不指定form提交action,会默认提交到当前url(地址栏显示的action)--> @using (Html.BeginForm()) { <p> 名称或类别:<input type="text" name="title" value="@ViewBag.Name" /> <input type="submit" value="查询" /> </p> } <p> 商品列表 </p> <div> <table> <tr> <th> 名称 </th> <th> 价格 </th> <th> 类别 </th> <th> 上架时间 </th> <th> 操作 </th> </tr> @foreach (var item in Model.pList) { <tr> <td> @Html.CutString(item.Title, 10) </td> <td> @Html.DisplayFor(modelItem => item.Price) </td> <td> @Html.ActionLink(item.Category.Name, "Show", new { cId = item.CategoryId }) | </td> <td> @Html.DisplayFor(modelItem => item.AddTime) </td> <td> @Html.ActionLink("查看详细", "Details", new { id = item.Id }, new { target = "_blank" }) | </td> </tr> } </table> @Html.Pager(Model.pList, new PagerOptions { PageIndexParameterName = "currentPage", ShowPageIndexBox = true, PageIndexBoxType = PageIndexBoxType.DropDownList, ShowGoButton = false, PageIndexBoxWrapperFormatString = "跳转到{0}", FirstPageText = "首页" }, "default", new { title = ViewBag.Name }) |共 @Model.pList.TotalItemCount 条记录,页 @Model.pList.CurrentPageIndex/@Model.pList.TotalPageCount </div> <p> 类别列表: </p> <div> <table> <tr> <th> 类别名称 </th> <th> 该类商品数 </th> </tr> @foreach (var item in Model.cList) { <tr> <td> @item.Name </td> <td> @item.Products.Count </td> </tr> } </table> @Html.Pager(Model.cList, new PagerOptions { PageIndexParameterName = "currentPage2", ShowPageIndexBox = true, PageIndexBoxType = PageIndexBoxType.DropDownList, ShowGoButton = false, PageIndexBoxWrapperFormatString = "跳转到{0}", FirstPageText = "首页" }, "default", new { title = ViewBag.Name }) |共 @Model.cList.TotalItemCount 条记录,页 @Model.cList.CurrentPageIndex/@Model.cList.TotalPageCount </div>
重新编译项目,运行,添加几条类别测试数据:

已经实现了我们一个页面多个分页的效果。
现在我们来修改我们的代码以实现ajax分页,提高用户体验:
在Views/Product上右键,添加分部视图,命名为ProBrowse,修改完整代码如下:
@using Webdiyer.WebControls.Mvc
@using MyShopTest.Models
@model PagedList<MyShopTest.Models.Product>
<div id="divList1">
    <table>
        <tr>
            <th>
                名称
            </th>
            <th>
                价格
            </th>
            <th>
                类别
            </th>
            <th>
                上架时间
            </th>
            <th>
                操作
            </th>
        </tr>
        @foreach (var item in Model)
        {
            <tr>
                <td>
                    @Html.CutString(item.Title, 10)
                </td>
                <td>
                    @Html.DisplayFor(modelItem => item.Price)
                </td>
                <td>
                    @Html.ActionLink(item.Category.Name, "Show", new { cId = item.CategoryId }) |
                </td>
                <td>
                    @Html.DisplayFor(modelItem => item.AddTime)
                </td>
                <td>
                    @Html.ActionLink("查看详细", "Details", new { id = item.Id }, new { target = "_blank" })
                    |
                </td>
            </tr>
        }
    </table>
    @*@Html.Pager(Model, new PagerOptions { PageIndexParameterName = "currentPage" })*@
    @Html.AjaxPager(Model, "", new { title = ViewBag.Name,type=1 }, new PagerOptions() { CssClass = "mvcPager", PageIndexParameterName = "currentPage", ShowPageIndexBox = true, PageIndexBoxType = PageIndexBoxType.DropDownList, ShowGoButton = false, PageIndexBoxWrapperFormatString = "跳转到{0}", FirstPageText = "首页" }, new AjaxOptions() { UpdateTargetId = "divList1" })
</div>
在Views/Product上右键,添加分部视图,命名为CatBrowse,修改完整代码如下:
@using Webdiyer.WebControls.Mvc
@using MyShopTest.Models
@model PagedList<MyShopTest.Models.Categeory>
<div id="divList2">
    <table>
        <tr>
            <th>
                类别名称
            </th>
            <th>
                该类商品数
            </th>
        </tr>
        @foreach (var item in Model)
        {
            <tr>
                <td>
                    @item.Name
                </td>
                <td>
                    @item.Products.Count
                </td>
            </tr>
        }
    </table>
    @Html.AjaxPager(Model, "default", new { title = ViewBag.Name, type = 2 }, new PagerOptions { PageIndexParameterName = "currentPage2", ShowPageIndexBox = true, PageIndexBoxType = PageIndexBoxType.DropDownList, ShowGoButton = false, PageIndexBoxWrapperFormatString = "跳转到{0}", FirstPageText = "首页" }, new AjaxOptions() { UpdateTargetId = "divList2" })
    |共 @Model.TotalItemCount 条记录,页 @Model.CurrentPageIndex/@Model.TotalPageCount
</div>
修改Browse.cshtml完整代码如下:
@using Webdiyer.WebControls.Mvc @using MyShopTest.Models @model MyShopTest.Models.MyDataList @{ ViewBag.Title = "商品浏览"; Layout = "~/Views/Shared/MyMaster.cshtml"; } <script src="../../Scripts/jquery.unobtrusive-ajax.min.js" type="text/javascript"></script> <h2> 商品浏览</h2> <!--不指定form提交action,会默认提交到当前url(地址栏显示的action)--> @using (Html.BeginForm()) { <p> 名称或类别:<input type="text" name="title" value="@ViewBag.Name" /> <input type="submit" value="查询" /> </p> } <p> 商品列表 </p> @{Html.RenderPartial("ProBrowse",Model.pList);} <p> 类别列表: </p> @{Html.RenderPartial("CatBrowse", Model.cList);}
在这些代码里,我们把商品和类别的分页类别哦分别在分部视图里实现了,在主页面(Browse)我们引用了jquery.unobtrusive-ajax.min.js,他在Scripts文件夹下,帮助我们实现ajax分页效果。我们单独把分页内容提出来是十分必要的
@Html.AjaxPager(Model, "default", new { title = ViewBag.Name, type = 2 }, new PagerOptions { PageIndexParameterName = "currentPage2", ShowPageIndexBox = true, PageIndexBoxType = PageIndexBoxType.DropDownList, ShowGoButton = false, PageIndexBoxWrapperFormatString = "跳转到{0}", FirstPageText = "首页" }, new AjaxOptions() { UpdateTargetId = "divList2" })
我们使用UpdateTargetId指定ajax分页得到的响应数据要替换的内容域,我们使用分部视图就可以保证在替换时只返回对应分部视图的内容而不是这个Browse的ActionResult避免出错,结合控制器代码大家应该很好理解,修改Product控制器Browse的Action代码如下:
//商品浏览
        public ActionResult Browse(string title = "", int currentPage = 1, int currentPage2 = 1, int type = 0)
        {
            int pageSize = 3;//每页条数
            var products = Search(title).ToPagedList(currentPage, pageSize);
            var categoryes = db.Category.OrderByDescending(c => c.Id).ToPagedList(currentPage2, pageSize);

            MyDataList list = new MyDataList();
            list.cList = categoryes;
            list.pList = products;

            ViewBag.Name = title;
            if (Request.IsAjaxRequest() && type == 1)
            {
                return PartialView("ProBrowse", products);
            }
            if (Request.IsAjaxRequest() && type == 2)
            {
                return PartialView("CatBrowse", categoryes);
            }
            return View(list);
        }
没有复杂逻辑,我们在视图里将商品和类别分页请求分别加了type标识为1和2,当该Action收到ajax请求时,根据请求类型,返回对应分部视图,然后分页控件会替换指定内容域的内容为控制器返回的数据。
至此我们已经完成了分页功能