1、下载gwt-sdk,https://developers.google.com/web-toolkit/download
2、下载完成之后解压,我解压的目录是D:\Program Files\gwt-2.5.1
3、配置环境变量,相信安装过jdk的人都应该知道环境变量在那配置吧!设置path为你解决的的目录,set path=path;D:\Program Files\gwt-2.5.1
4、进入你要生成项目的一个目录下,按shift+右键点击打开命令行,执行
webAppCreator com.hnhcc.gwt
5、在控制台自动生成项目demo
Created directory E:\gwtDemo\src
Created directory E:\gwtDemo\src\com\hnhcc
Created directory E:\gwtDemo\src\com\hnhcc\client
Created directory E:\gwtDemo\src\com\hnhcc\server
Created directory E:\gwtDemo\src\com\hnhcc\shared
Created directory E:\gwtDemo\test
Created directory E:\gwtDemo\test\com\hnhcc
Created directory E:\gwtDemo\war
Created directory E:\gwtDemo\war\WEB-INF
Created file E:\gwtDemo\src\com\hnhcc\gwt.gwt.xml
Created file E:\gwtDemo\src\com\hnhcc\client\GreetingService.java
Created file E:\gwtDemo\src\com\hnhcc\client\GreetingServiceAsync.java
Created file E:\gwtDemo\src\com\hnhcc\client\gwt.java
Created file E:\gwtDemo\src\com\hnhcc\server\GreetingServiceImpl.java
Created file E:\gwtDemo\src\com\hnhcc\shared\FieldVerifier.java
Created file E:\gwtDemo\war\WEB-INF\web.xml
Created file E:\gwtDemo\war\gwt.css
Created file E:\gwtDemo\war\gwt.html
Created file E:\gwtDemo\war\favicon.ico
Created file E:\gwtDemo\.classpath
Created file E:\gwtDemo\.project
Created file E:\gwtDemo\gwt.launch
Created file E:\gwtDemo\README.txt
Created file E:\gwtDemo\build.xml
6、生成的文件中我们看到有build.xml为ant的构建文件和熟悉的.classpath和.project,所以可以直接把项目导入到myeclipse或eclipse下,其中gwt.java为主程序

7、先用ant构建一下项目,右键点击build.xml文件run as antbuild
8、右键点击gwt.java,profile as先建一个运行方式
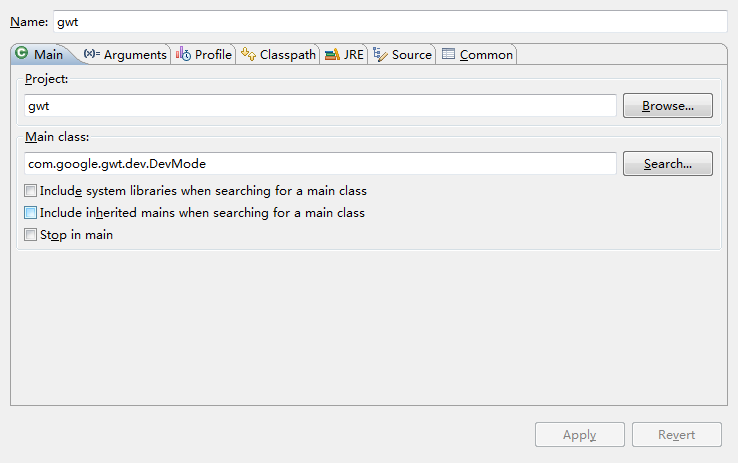

9、点击运行将弹出如下对话框

10、选择在默认浏览器中打开,可能会出现没有安装浏览器插件之类的,为了以后开发可以安装上,不过其实也不需要,gwt提供有两种运行模式,Hosted Model和Web Model。

11、如果只是想简单了解一下gwt的话,把浏览器的地址去掉gwt.codesvr=127.0.0.1:9997,改为http://127.0.0.1:8888/gwt.html