UIView主要负责视图和用户的交互
真正的内容显示是通过UIView里面的一个图层CALayer来完成的(没有交互能力)
UIView和CALayer两者其实差不多,每一个UIView都有一个主CALayer。主CALayer上可以添加子CALayer,CALayer跟UIView一样有子类,有枝干。UIView上可以添加手势,CALayer是不可以的。但是也不是说它没什么用处,像很多动画效果,都是用它或者他的子类(子类一说有点不贴切)来完成的。打个容易理解的比分,UIView想到于一片叶子,而CALayer则相当于叶子一条条的经络。
1.新建一个CALayer并且设置一些属性
CALayer *layer = [CALayer layer];//新建一个图层
layer.backgroundColor = [UIColor yellowColor].CGColor;//图层的背景颜色
layer.bounds = CGRectMake(0, 0, 100, 100);//图层的尺寸
layer.cornerRadius = 50;//圆角的半径 当值为宽度和高度的一半的时候就是一个圆形
layer.borderColor = [UIColor blackColor].CGColor;//边缘颜色
layer.borderWidth = 2.0;边缘的宽度
layer.position = self.view.center;//图层的位置为当前视图的中点
layer.anchorPoint = CGPointMake(0.5, 0.5);////使用anchorPoint一定要用到position 默认的position是(0, 0)
[self.view.layer addSublayer:layer];//把新建的图层加到当前视图的图层中
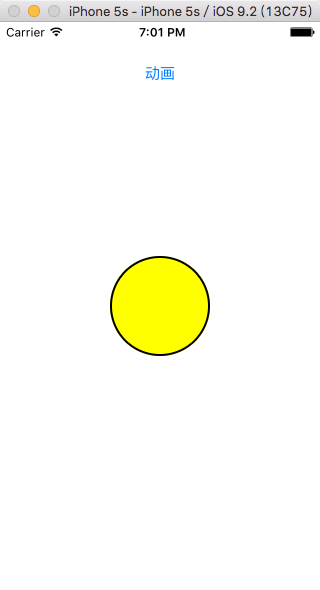
这样子就把一个新建的图层添加上去了!
2.CALayer中的两个重要属性
CALayer有2个非常重要的属性:position和anchorPoint
@property CGPoint position;
用来设置CALayer在父层中的位置
以父层的左上角为原点(0, 0)
@property CGPoint anchorPoint;
称为“定位点”、“锚点”
决定着CALayer身上的哪个点会在position属性所指的位置
以自己的左上角为原点(0, 0)
它的x、y取值范围都是0~1,默认值为(0.5, 0.5)
添加一个红色图层到绿色图层上,红色图层显示到什么位置,由position属性决定
假设红色图层的position是(100,100)
到底把红色图层的哪个点移动到(100,100)的坐标位置,锚点。
红色图层的锚点是(0,0)

红色图层的锚点是(0.5,0.5)

红色图层的锚点是(1,1)

红色图层的锚点是(0.5,0)

3.改变transform的动画
1 //旋转
2 _layer.transform = CATransform3DRotate(_layer.transform, 10/180.0*M_PI, 0, 0, 1);
3 //放大缩小
4 _layer.transform = CATransform3DScale(_layer.transform, 2, 2, 2);
5 //平移
6 _layer.transform = CATransform3DTranslate(_layer.transform, 10, 10, 0);
4.基本动画CABasicAnimation
 1 //渐变
 2 CABasicAnimation *opacityAnimation = [CABasicAnimation animationWithKeyPath:@"opacity"];
 3 opacityAnimation.fromValue = @1;
 4 opacityAnimation.toValue = @0;
 5
 6 //旋转
 7 CABasicAnimation *rotateAnimation = [CABasicAnimation animationWithKeyPath:@"transform"];
 8 rotateAnimation.fromValue = [NSValue valueWithCATransform3D:CATransform3DIdentity];
 9 rotateAnimation.toValue = [NSValue valueWithCATransform3D:CATransform3DRotate(_layer.transform, M_PI, 0, 0, 1)];
10
11 //放大缩小
12 CABasicAnimation *scaleAnimation = [CABasicAnimation animationWithKeyPath:@"transform.scale"];
13 scaleAnimation.fromValue = @0.5;
14 scaleAnimation.toValue = @2;
15
16 //平移
17 CABasicAnimation *moveAnimation = [CABasicAnimation animationWithKeyPath:@"position"];
18 moveAnimation.toValue = [NSValue valueWithCGPoint:CGPointMake(200, 200)];
5.组动画CAAnimationGroup
当一次需要实现多个种类的动画效果是就需要用到组动画了
1 CAAnimationGroup *groupAnimation = [CAAnimationGroup animation];
2 groupAnimation.duration = 1;
3 //groupAnimation.removedOnCompletion = NO;
4 groupAnimation.fillMode = kCAFillModeBackwards;//用动画执行完毕前的画面作为当前画面
5 groupAnimation.timingFunction = [CAMediaTimingFunction functionWithName:kCAMediaTimingFunctionEaseIn];
6 groupAnimation.animations = @[opacityAnimation, rotateAnimation, scaleAnimation, moveAnimation];
7 [_layer addAnimation:groupAnimation forKey:nil];