一、环境准备
1、关闭防火墙及配置yum源
为了方便,我这里直接使用脚本一键环境配置(仅限于redhat系列6和7)。
[root@centos7 ~]# cat cofig.sh
#!/bin/bash
str=`cat /etc/redhat-release |awk '{print $4}'|awk -F '.' '{print $1}'`
version=0
mkdir /etc/yum.repos.d/bak &>/dev/null
mv /etc/yum.repos.d/* /etc/yum.repos.d/bak/ &>/dev/null
if [ $str == 7 ];then
	version=7
else
	version=6
fi
echo $version
if [ $version -eq  7 ];then
    #关闭防火墙及开机自启
    systemctl stop firewalld
    systemctl disable firewalld
    #关闭selinux
    setenforce 0
    sed -i 7s/enforcing/disabled/g /etc/selinux/config
    wget -O /etc/yum.repos.d/CentOS-Base.repo http://mirrors.aliyun.com/repo/Centos-7.repo
    #配置yum源
    wget -O /etc/yum.repos.d/epel.repo http://mirrors.aliyun.com/repo/epel-7.repo
elif [ $version -eq 6 ];then
    #关闭防火墙及开机自启
    iptables -F
    service iptables stop
    chkconfig iptables off
    #关闭selinux
    setenforce 0
    sed -i 7s/enforcing/disabled/g /etc/selinux/config
    #配置yum源
    wget -O /etc/yum.repos.d/CentOS-Base.repo http://mirrors.aliyun.com/repo/Centos-6.repo
    wget -O /etc/yum.repos.d/epel.repo http://mirrors.aliyun.com/repo/epel-6.repo
else
    echo "please check your /etc/redhat-release file "
fi
yum clean all
yum makecache
2、安装相关依赖
yum -y install gcc* pcre-devel openssl openssl-devel zlib-devel ncurses-devel cmake bison libxml2-devel libpng-devel
二、开始安装
1、安装nginx
1、下载ngix源码包
[root@centos ~]# wget http://nginx.org/download/nginx-1.12.2.tar.gz #如果linux下载慢的话,可以先在windows上下载好了以后再上传。
2、创建nginx用户
[root@centos ~]# useradd -r -s /sbin/nologin nginx
3、安装nginx
[root@centos nginx-1.12.2]# ./configure --prefix=/usr/local/nginx --user=nginx --group=nginx --with-http_stub_status_module --with-http_ssl_module &&make && make install
2、安装mysql
1、下载mysql源码包
[root@centos mysql]# wget https://cdn.mysql.com//Downloads/MySQL-5.5/mysql-5.5.62.tar.gz
2、添加mysql账户
[root@centos mysql]# useradd -r -s /sbin/nologin mysql
3、解压并且安装
[root@centos mysql-5.5.48]#  cmake -DCMAKE_INSTALL_PREFIX=/usr/local/mysql -DMYSQL_UNIX_ADDR=/tmp/mysql.sock -DEXTRA_CHARSETS=all -DDEFAULT_CHARSET=utf8 -DDEFAULT_COLLATION=utf8_general_ci -DWITH_MYISAM_STORAGE_ENGINE=1 -DWITH_INNOBASE_STORAGE_ENGINE=1 -DWITH_MEMORY_STORAGE_ENGINE=1 -DWITH_READLINE=1 -DENABLED_LOCAL_INFILE=1 -DMYSQL_USER=mysql -DMYSQL_TCP_PORT=3306
[root@centos mysql-5.5.48]# make && make install
[root@centos mysql-5.5.48]# ln -s /usr/local/mysql/bin/*  /usr/local/bin
4、修改目录权限
[root@centos mysql-5.5.48]# cd /usr/local/mysql/
[root@centos mysql]# chown -R root .
[root@centos mysql]# chown -R mysql data
5、生成mysql配置文件
[root@centos mysql]# cp /root/mysql-5.5.48/support-files/my-medium.cnf /etc/my.cnf
6、初始化
[root@centos mysql]# cd /usr/local/mysql
[root@centos mysql]# ./scripts/mysql_install_db --user=mysql
7、生成自启动脚本,及开机自启
[root@centos mysql]# cd /root/mysql-5.5.48/support-files/
[root@centos support-files]# cp -a mysql.server /etc/init.d/mysqld
[root@centos support-files]# chmod +x /etc/init.d/mysqld
[root@centos support-files]# chkconfig --add mysqld
[root@centos support-files]# chkconfig mysqld on
8、启动mysql,设置管理员密码
[root@centos support-files]# service mysqld start
[root@centos support-files]# mysqladmin -uroot password 123456
3、安装php
1、下载php
wget http://tw2.php.net/distributions/php-7.1.29.tar.gz
2、解压安装
[root@centos php-7.1.29]# ./configure --prefix=/usr/local/php/ --with-config-file-path=/usr/local/php/etc/ --with-mysqli=/usr/local/mysql/bin/mysql_config --enable-soap --enable-mbstring=all --enable-sockets --with-pdo-mysql=/usr/local/mysql --with-gd --without-pear --enable-fpm
[root@centos php-7.1.29]# make && make install
3、生成php配置文件,创建软连接
[root@centos php-7.1.29]# cp -a /root/php-7.1.29/php.ini-production /usr/local/php/etc/php.ini
[root@centos php-7.1.29]# ln -s /usr/local/php/bin/* /usr/local/bin/
[root@centos php-7.1.29]# ln -s /usr/local/php/sbin/* /usr/local/sbin/
4、连接php与nginx
1、生成配置文件
[root@centos php-7.1.29]# cd /usr/local/php/etc/
[root@centos etc]# cp -a php-fpm.conf.default php-fpm.conf
[root@centos etc]# vim php-fpm.conf
    pid = run/php-fpm.pid
[root@centos etc]# cd php-fpm.d/
[root@centos php-fpm.d]# cp www.conf.default www.conf
2、修改 Nginx 的配置文件,使其识别.php 后缀的文件
location / {
    root html;
    index index.php index.html; #设置默认加载的页面,以及优先级
         }
#取消注释
        location ~ .php$ {
            root           html;
            fastcgi_pass   127.0.0.1:9000;
            fastcgi_index  index.php;
            fastcgi_param  SCRIPT_FILENAME  /scripts$fastcgi_script_name;
            include        fastcgi_params; #修改为 fsatcgi.conf
        }
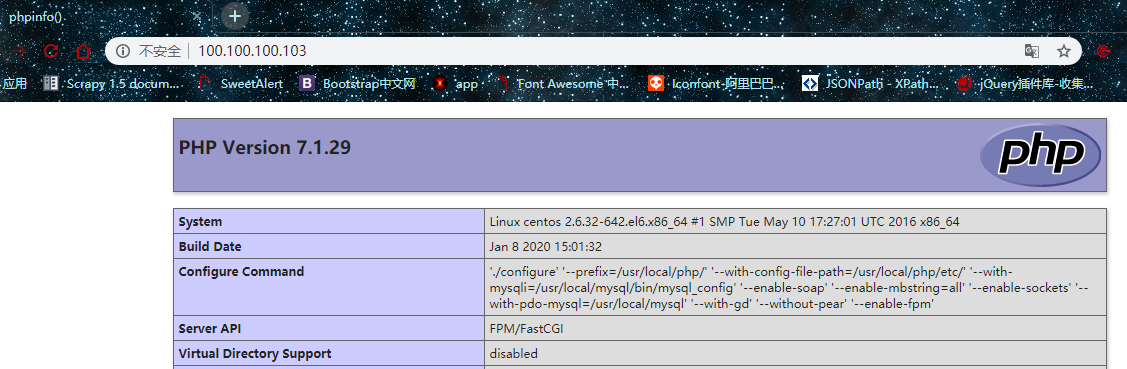
3、编写php测试页面
[root@centos conf]# cd /usr/local/nginx/html/
[root@centos html]#  vim index.php
   <?php
     phpinfo();
   ?>
4、nginx启动脚本
[root@centos ~]# vim nginx
#!/bin/bash
#chkconfig: 2345 66 66
#description: nginx server script
ngxc="/usr/local/nginx/sbin/nginx"
pidf="usr/local/nginx/logs/nginx.pid"
ngxc_fpm="/usr/local/php/sbin/php-fpm"
pidf_fpm="/usr/local/php/var/run/php-fpm.pid"
case "$1" in
	start)
		$ngxc -t &> /dev/null
		if [ $? -eq 0 ];then
			$ngxc
			$ngxc_fpm
			echo "nginx service start success!"
		else
			$ngxc -t
		fi
			;;
	stop)
		kill -s QUIT $(cat $pidf)
		kill -s QUIT $(cat $pidf_fpm)
		echo "nginx service stop success!"
		;;
	restart)
		$0 stop
		$0 start
		;;
	reload)
		$ngxc -t &> /dev/null
		if [ $? -eq 0 ];then
			kill -s HUP $(cat $pidf)
			kill -s HUP $(cat $pidf_fpm)
			echo "reload nginx config success!"
		else
			$ngxc -t
		fi
		 ;;
	     *)
		echo "please input stop|start|restart|reload."
		exit 1
esac

[root@centos ~]# mv nginx /etc/init.d/
[root@centos ~]# chmod 777 /etc/init.d/nginx
[root@centos ~]# service nginx restart