1. 循环显示图像的原理
循环显示有些类似于循环链表,最后一个结点的下一个结点又是第1个结点。循环显示图像也可以模拟这一点。
也许细心的读者从上一节实现的ImageAdapter类中会发现些什么。对!就是getView方法中的position参数和getCount方法的关系。position参数的值是不可能超过getCount方法返回的值的,也就是说,position参数值的范围是0 至 getCount() - 1。
如果这时Gallery组件正好显示到最后一个图像,position参数值正好为getCount() - 1。那么我们如何再让Gallery显示下一个图像呢?也就是说让position参数值再增1,对!将getCount()方法的返回值也增1。
那么这里还有一个问题,如果position参数值无限地增加,就意味着resIds数组要不断地增大,这样会大大消耗系统的资源。
想到这,就需要解决两个问题:
- 既要position不断地增加,又让resIds数组中保存的图像资源ID是有限的,该怎么做呢?
- getCount()方法返回值大小设定
对于getCount()方法非常好解决,可以让getCount方法返回一个很大的数,例如,Integer.MAX_VALUE。这时position参数值就可以随着Gallery组件的图像不断向前移动而增大。现在resIds数组只有15个元素,如果position的值超过数组边界,要想继续循环取得数组中的元素(也就是说,当position的值是15时,取resIds数组的第0个元素,是16时取第1个元素),最简单的方法就是取余,代码如下:
resIds[position % resIds.length]
针对上面的分析,在本节对ImageAdapter类做了如下两个改进:
(1)使getCount方法返回一个很大的值。建议返回Integer.MAX_VALUE。
(2)在getView方法中通过取余来循环取得resIds数组中的图像资源ID。
通过上面两点改进,可以使图像列表在向右移动时会循环显示图像。当然,这种方法从本质上说只是伪循环,也就是说,如果真把图像移动到getCount方法返回的值那里,那也就显示到最后一个图像的。不过在这里getCount方法返回的是Integer.MAX_VALUE,这个值超过了20亿,除非有人真想把图像移动到第20亿的位置,否则Gallery组件看着就是一个循环显示图像的组件。
2. Gallery组件实现循环显示图像的案例
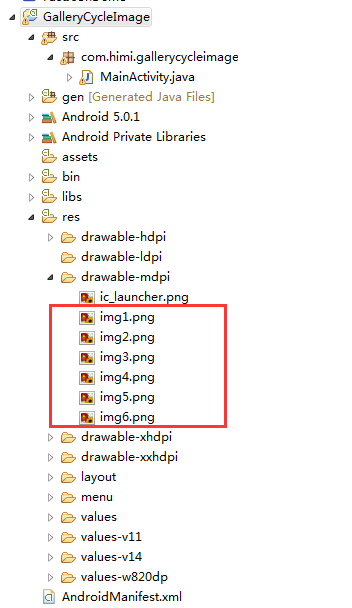
(1)新建一个Android工程,工程目录如下:
(2)首先我们来到主布局文件之中,如下:
 1 <?xml version="1.0" encoding="utf-8"?>
 2 <LinearLayout xmlns:android="http://schemas.android.com/apk/res/android"
 3     android:layout_width="fill_parent"
 4     android:layout_height="fill_parent"
 5     android:orientation="vertical" >
 6
 7     <Gallery
 8         android:id="@+id/gallery"
 9         android:layout_width="fill_parent"
10         android:layout_height="wrap_content"
11         android:layout_marginTop="30dp" />
12
13     <ImageSwitcher
14         android:id="@+id/imageswitcher"
15         android:layout_width="fill_parent"
16         android:layout_height="wrap_content"
17         android:layout_marginTop="30dp" />
18
19 </LinearLayout>
(2)接着我们来到MainActivity,如下:
 1 package com.himi.gallerycycleimage;
 2
 3 import android.app.Activity;
 4 import android.content.Context;
 5 import android.content.res.TypedArray;
 6 import android.os.Bundle;
 7 import android.view.View;
 8 import android.view.ViewGroup;
 9 import android.view.animation.AnimationUtils;
10 import android.widget.AdapterView;
11 import android.widget.AdapterView.OnItemSelectedListener;
12 import android.widget.BaseAdapter;
13 import android.widget.Gallery;
14 import android.widget.Gallery.LayoutParams;
15 import android.widget.ImageSwitcher;
16 import android.widget.ImageView;
17 import android.widget.ViewSwitcher.ViewFactory;
18
19 public class MainActivity extends Activity implements OnItemSelectedListener, ViewFactory {
20     private Gallery gallery;
21     private ImageSwitcher imageSwitcher;
22     private ImageAdapter imageAdapter;
23     private int[] resIds = new int[] { R.drawable.img1, R.drawable.img2, R.drawable.img3, R.drawable.img4,
24             R.drawable.img5, R.drawable.img6 };
25
26     @Override
27     public void onCreate(Bundle savedInstanceState) {
28         super.onCreate(savedInstanceState);
29         setContentView(R.layout.activity_main);
30
31         gallery = (Gallery) findViewById(R.id.gallery);
32         imageAdapter = new ImageAdapter(this);
33         gallery.setAdapter(imageAdapter);
34         gallery.setOnItemSelectedListener(this);
35
36         imageSwitcher = (ImageSwitcher) findViewById(R.id.imageswitcher);
37         // 设置ImageSwitcher组件的工厂对象
38         imageSwitcher.setFactory(this);
39         // 设置ImageSwitcher组件显示图像的动画效果
40         imageSwitcher.setInAnimation(AnimationUtils.loadAnimation(this, android.R.anim.fade_in));
41         imageSwitcher.setOutAnimation(AnimationUtils.loadAnimation(this, android.R.anim.fade_out));
42     }
43
44     public class ImageAdapter extends BaseAdapter {
45         int mGalleryItemBackground;
46         private Context mContext;
47
48         public ImageAdapter(Context context) {
49             mContext = context;
50             TypedArray typedArray = obtainStyledAttributes(R.styleable.Gallery);
51             mGalleryItemBackground = typedArray.getResourceId(R.styleable.Gallery_android_galleryItemBackground, 0);
52         }
53
54         // 第1点改进,返回一个很大的值,例如,Integer.MAX_VALUE
55         public int getCount() {
56             return Integer.MAX_VALUE;
57         }
58
59         public Object getItem(int position) {
60             return position;
61         }
62
63         public long getItemId(int position) {
64             return position;
65         }
66
67         public View getView(int position, View convertView, ViewGroup parent) {
68             ImageView imageView = new ImageView(mContext);
69             // 第2点改进,通过取余来循环取得resIds数组中的图像资源ID
70             imageView.setImageResource(resIds[position % resIds.length]);
71             imageView.setScaleType(ImageView.ScaleType.FIT_XY);
72             imageView.setLayoutParams(new Gallery.LayoutParams(163, 106));
73             imageView.setBackgroundResource(mGalleryItemBackground);
74             return imageView;
75         }
76     }
77
78     @Override
79     public void onItemSelected(AdapterView<?> parent, View view, int position, long id) {
80         // 选中Gallery中某个图像时,在ImageSwitcher组件中放大显示该图像
81         imageSwitcher.setImageResource(resIds[position % resIds.length]);
82     }
83
84     @Override
85     public void onNothingSelected(AdapterView<?> parent) {
86     }
87
88     // ImageSwitcher组件需要这个方法来创建一个View对象(一般为ImageView对象)
89     // 来显示图像
90     public View makeView() {
91         ImageView imageView = new ImageView(this);
92         imageView.setBackgroundColor(0xFF000000);
93         imageView.setScaleType(ImageView.ScaleType.FIT_CENTER);
94         imageView.setLayoutParams(new ImageSwitcher.LayoutParams(LayoutParams.FILL_PARENT, LayoutParams.FILL_PARENT));
95         return imageView;
96     }
97
98 }
与此同时,在上面的ImageAdapter类的构造方法中获得了Gallery组件的属性信息。这些信息被定义在resvaluesattrs.xml文件中,代码如下:
1 <?xml version="1.0" encoding="utf-8"?>
2 <resources>
3   <declare-styleable name="Gallery">
4     <attr name="android:galleryItemBackground" />
5   </declare-styleable>
6 </resources>
上面的属性信息用于设置Gallery的背景风格。
(3)布署程序到手机上如下:
- 应用程序初次启动

- 滑动一下