一、 扫描二维码登录的实现机制:
详细流程图:

(1)PC端打开网页(显示出二维码),这时候会保存对应的randnumber(比如:12345678)。
(2)Android客户端扫码登录,Android客户端就会获取到这个randnumber这条信息,这个时候Android客户端携带username(比如:jikexueyuan)保存到数据库中对应于randnumber 的字段中。
(3)PC端网页就会轮询服务器(数据库),查看当前randnumber是否有username,如果有的话就跳转登录页面,没有的话就继续轮询。
二、扫描二维码实现网页登录具体实现过程
1. 建立数据库
(1)开启Apache服务器,开启MySQL数据库,然后在360浏览器中地址栏输入网址:http://localhost/phpmyadmin/index.php(启用phpMyAdmin),如下:

(2)在上面站点上,新建一个数据库命名为"qrlogin",在这个数据库中新建一个表命名为"login_record",字段数目为 3,如下:

(3)具体新建的字段内容如下:

2. PHP网页端生成简单的二维码
(1)这里要提到一个生成二维码的API,这个API是联图网提供的,如下:

接下来简单演示一下如何使用上面的API,如下:
• 复制上面的API接口地址,在360地址栏中输入API接口地址:http://qr.topscan.com/api.php?text=hello,这里的"hello"表示是生成二维码携带的数据内容。

(2)编写PHP代码生成二维码,如下:
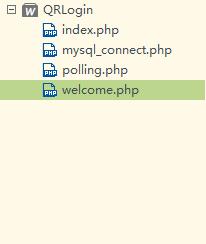
使用HBuilder创建Web工程,如下图:

其中:index.php,如下:
 1 <html>
 2     <head>
 3         <title>JikexueyuanQRLogin</title>
 4         <meta charset="utf-8"/>
 5     </head>
 6     <body>
 7         <?php
 8             require 'mysql_connect.php';
 9             $randnumber = "";
10             for($i=0; $i<8; $i++)
11                 $randnumber .=rand(0, 9);
12             mysql_query("insert into login_record (randnumber) values ('$randnumber')");
13         ?>
14         <img src="http://qr.topscan.com/api.php?text=<?php echo $randnumber; ?>" width="300px"/>
15
16     </body>
17 </html>
还有就是mysql_connect.php(功能块:连接数据库):
1 <?php
2     $con = mysql_connect("localhost", "root", "123456");
3     mysql_select_db("qrlogin");
4
5 ?>
使用浏览器访问QRLogin/index.php文件,如下就会出现一个二维码图片,而且每一次刷新都会根据不同的随机数,对应产生不同的二维码图片。(二维码携带信息就是随机数)。

刷新当前页面两次,我们来到数据库qrlogin中,如下:

3. PHP 轮询数据库
页面只显示了二维码,但是没有登录,这是为什么呢? 这是因为数据库中randnumber字段对应的username是空(null),不知道如何登录(不提供用户名等信息,谈何登录?),还有就是页面中没有添加登录页面跳转。
回到我们创建的Web工程"QRLogin",来到index.php文件,如下:
 1 <html>
 2     <head>
 3         <title>JikexueyuanQRLogin</title>
 4         <meta charset="utf-8"/>
 5     </head>
 6     <body>
 7         <?php
 8             require 'mysql_connect.php';
 9             $randnumber = "";
10             for($i=0; $i<8; $i++)
11                 $randnumber .=rand(0, 9);
12             mysql_query("insert into login_record (randnumber) values ('$randnumber')");
13         ?>
14         <img src="http://qr.topscan.com/api.php?text=<?php echo $randnumber; ?>" width="300px"/>
15         <!--将在php代码中生成的randnumber,通过下面的方式出传递到JavaScript代码中 ,这个步骤是隐藏的-->
16         <input hidden="hidden" type="text" name="randnumber" id="randnumber" value="<?php echo $randnumber; ?>" />
17
18     </body>
19
20     <script>
21         function polling() {
22             /*
23              * 执行轮询的操作
24              */
25             var xmlHttp;
26             //判断浏览器的类型
27             if(window.XMLHttpRequest){//---针对大多数浏览器
28                 xmlHttp = new XMLHttpRequest();
29             } else {//---针对IE内核的浏览器
30                 xmlHttp = new ActiveXObject("Microsoft.XMLHTTP")
31             }
32             //添加监听事件
33             xmlHttp.onreadystatechange = function() {
34                 if(xmlHttp.status == 200 && xmlHttp.readyState == 4) {//200---表示服务器响应正常;4---表示已经准备就绪
35                     result=  xmlHttp.responseText;
36                     if(result == "true") {
37                         window.location.href = 'welcome.php';
38                     }
39                 }
40             }
41
42
43
44             randnumber = document.getElementById('randnumber').value;
45             /*
46              * open(method, uri,async):打开网页
47              *         参数method(String):方法名称GET/POST
48              *         参数uri(URIString):待打开的网页资源
49              *         参数async(boolean):是否进行异步加载
50              */
51             xmlHttp.open("GET","polling.php?randnumber"+randnumber,true);
52             xmlHttp.send();//发送请求
53
54         }
55         setInterval("polling()",1000);//每隔1000ms,执行一次polling()
56     </script>
57 </html>
polling.php代码(轮询数据库):
 1 <?php
 2     require 'mysql_connect.php';
 3     $randnumber = $_GET['randnumber'];
 4
 5     $result = mysql_query("select * from login_record where randnumber='$randnumber'");
 6     $row = mysql_fetch_array($result); //向下移动一行游标
 7     if($row['username'] != "") {
 8         echo "true";
 9     }else {
10         echo "false";
11     }
12
13 ?>
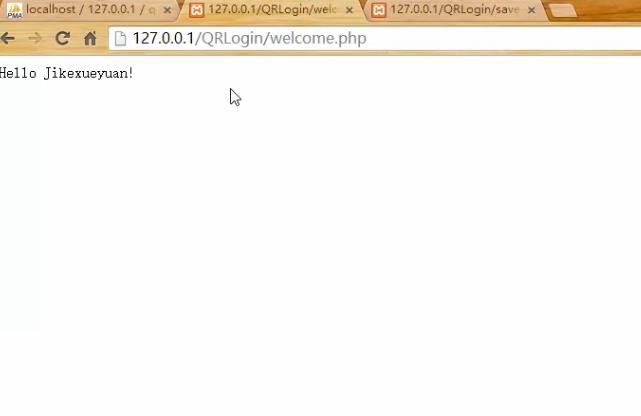
welcome.php代码(登录欢迎页面):
1 hello Jikexueyuan
此时web工程如下:
接着我们来验证我们上面的逻辑是否正确,如下:
• 访问QRLogin/index.php,显示如下二维码信息(携带随机数):

• 刷新数据库,如下:

• 根据我们上面的轮询逻辑,此时如果我们指定randnumber=62988625 的 username不为空的话,页面就会跳转:
我们手动修改randnumber=62988625对应的字段中 username为:jikexueyuan,如下:

这时候回到上面我们访问的/QRLogin/index.php页面已经跳转到/QRLogin/welcome.php,如下:

上面的逻辑成功。
4. PHP自定API接口
回顾一下之前的逻辑过程:
• 当我们访问QRLogin/index.php网页的时候,PC端浏览器会产生一个二维码,这个二维码对应着一个随机数,这里我们假设这个随机为"12345678",此时在代码中会把这个随机数randnumber=12345678存储到数据库中,如下:

• 只要这里randnumber对应字段中的username不为空,页面就会跳转,怎么才能让它自动设置username实现页面跳转呢?
这里就需要我们自己定义PHP接口,如下:

接下来我们就来到QRLogin的Web工程,编写PHP的API接口,如下:

saveUsername.php:
 1 <?php
 2 /*
 3  * 自定义API用于android客户端扫码后访问,请指定的username保存的相应的位置
 4  * 接收参数 randnumber username
 5  * 无返回值
 6  */
 7
 8  $randnumber = $_GET['randnumber'];
 9  $username = $_GET['username'];
10
11  require 'mysql_connect.php';
12  mysql_query("update login_record set username = '$username' where randnumber = '$randnumber'");
13 ?>
测试上面的PHP的API接口,如下:
浏览器访问/QRLogin/index.php,刷新显示二维码,如下:

这个时候我们查看数据库,发现新增了一条随机数,如下:

执行PHP的定义的接口,如下:

页面成功发生跳转,如下:
5. Android客户端扫描二维码
在使用Android实现扫描二维码之前,不得不提一下下面这个开源库,https://github.com/zxing/zxing/

上面提到的zxing这个开源库很强大,zxing其中可以实现二维码登录,有人在zxing这个开源库的基础上简剪出一个轻量级的库BarCodeLibary(专门实现扫描二维码):
(1)首先导入BarCodeLibrary到Eclipse中,如下:

(2)新建一个二维码扫描的Android项目,命名为"QRLogin",如下:

这时候我们想让当前的"QRLogin"项目是 依赖于 "BarCodeTest",如下操作:
• 右击项目"QRLogin",选择属性,如下:

• 点击"Add"按钮,如下:

这时候QRLogin这个项目依赖于BarCodeTest。
(3)进入"QRLogin"开发:
• 首先来到了布局文件activity_main.xml,如下:
 1 <LinearLayout xmlns:android="http://schemas.android.com/apk/res/android"
 2     xmlns:tools="http://schemas.android.com/tools"
 3     android:layout_width="match_parent"
 4     android:layout_height="match_parent"
 5     android:orientation="vertical"
 6     tools:context="com.himi.qrlogin.MainActivity" >
 7     <Button
 8         android:id="@+id/btnScan"
 9         android:layout_width="match_parent"
10         android:layout_height="wrap_content"
11         android:text="扫码登录"/>
12 </LinearLayout>
布局效果如下:

• 然后来到MainActivity,如下:
 1 package com.himi.qrlogin;
 2
 3 import android.app.Activity;
 4 import android.content.Intent;
 5 import android.os.Bundle;
 6 import android.view.View;
 7 import android.view.View.OnClickListener;
 8 import android.widget.Button;
 9 import android.widget.Toast;
10
11 import com.zxing.activity.CaptureActivity;
12
13 public class MainActivity extends Activity implements OnClickListener {
14     private Button btnScan;
15
16     @Override
17     protected void onCreate(Bundle savedInstanceState) {
18         super.onCreate(savedInstanceState);
19         setContentView(R.layout.activity_main);
20         btnScan = (Button) findViewById(R.id.btnScan);
21         btnScan.setOnClickListener(this);
22     }
23
24     public void onClick(View v) {
25         //扫码操作
26         //CaptureActivity这个Activity功能就是:打开相机扫码二维码
27         Intent intent = new Intent(this, CaptureActivity.class);
28         startActivityForResult(intent, 0);
29
30     }
31
32     /**
33      * onActivityResul方法功能:将CaptureActivity扫码获得的结果反馈给MainActivity
34      */
35     @Override
36     protected void onActivityResult(int requestCode, int resultCode, Intent data) {
37         // TODO 自动生成的方法存根
38         super.onActivityResult(requestCode, resultCode, data);
39
40         if(resultCode == Activity.RESULT_OK) {
41             String result = data.getExtras().getString("result");
42             Toast.makeText(this, result, 1).show();
43         }
44     }
45
46 }
• 想必大家看到了上面MainActivity中我们使用到了CaptureActivity,但是我们在项目QRLogin项目的AndroidMainfest.xml文件中没有声明使用CaptureActivity,运行程序自然会报错强退。
来到上面的BarCodeTest开源库的AndroidMainfest.xml文件中,复制上面第2个activity的标签项内容,到"QRLogin"项目的Androidmainfest.xml中,同时记得添加两个权限如下:
1 <uses-permission android:name="android.permission.CAMERA"/>
2 <uses-permission android:name="android.permission.VIBRATE"/>
这个时候我们看看"QRLogin"项目的AndroidMainfest.xml内容如下:
 1 <?xml version="1.0" encoding="utf-8"?>
 2 <manifest xmlns:android="http://schemas.android.com/apk/res/android"
 3     package="com.himi.qrlogin"
 4     android:versionCode="1"
 5     android:versionName="1.0" >
 6
 7     <uses-sdk
 8         android:minSdkVersion="15"
 9         android:targetSdkVersion="17" />
10     <uses-permission android:name="android.permission.CAMERA"/>
11     <uses-permission android:name="android.permission.VIBRATE"/>
12
13     <application
14         android:allowBackup="true"
15         android:icon="@drawable/ic_launcher"
16         android:label="@string/app_name"
17         android:theme="@style/AppTheme" >
18         <activity
19             android:name=".MainActivity"
20             android:label="@string/app_name" >
21             <intent-filter>
22                 <action android:name="android.intent.action.MAIN" />
23
24                 <category android:name="android.intent.category.LAUNCHER" />
25             </intent-filter>
26         </activity>
27         <!-- 这个activity标签内容是从BarCodeTest的Androidmainfest.xml中复制过来的 ,
28              因为要使用BarCodeTest中的CaptureActivity
29         -->
30         <activity
31             android:configChanges="orientation|keyboardHidden"
32             android:name="com.zxing.activity.CaptureActivity"
33             android:screenOrientation="portrait"
34             android:theme="@android:style/Theme.NoTitleBar.Fullscreen"
35             android:windowSoftInputMode="stateAlwaysHidden" >
36         </activity>
37     </application>
38
39 </manifest>
(4)布署"QRLogin"项目到真机上,如下:

6. Android客户端访问自定义的API实现这个网页登录:
我们再来回顾一下流程图,如下:

(1)回到上面"QRLogin"项目中,其中activity_main.java,如下:
 1 <LinearLayout xmlns:android="http://schemas.android.com/apk/res/android"
 2     xmlns:tools="http://schemas.android.com/tools"
 3     android:layout_width="match_parent"
 4     android:layout_height="match_parent"
 5     android:orientation="vertical"
 6     tools:context="com.himi.qrlogin.MainActivity" >
 7     <EditText
 8         android:id="@+id/etUsername"
 9         android:layout_width="match_parent"
10         android:layout_height="wrap_content"/>
11     <Button
12         android:id="@+id/btnScan"
13         android:layout_width="match_parent"
14         android:layout_height="wrap_content"
15         android:text="扫码登录"/>
16 </LinearLayout>
布局效果如下:

(2)接着来到MainActivity,如下:
 1 package com.himi.qrlogin;
 2
 3 import android.app.Activity;
 4 import android.content.Intent;
 5 import android.os.Bundle;
 6 import android.view.View;
 7 import android.view.View.OnClickListener;
 8 import android.widget.Button;
 9 import android.widget.EditText;
10 import android.widget.Toast;
11
12 import com.zxing.activity.CaptureActivity;
13
14 public class MainActivity extends Activity implements OnClickListener {
15     private Button btnScan;
16     private EditText etUsername;
17     private static final String WEB_URL="http://172.31.19.202/QRLogin/";
18
19     @Override
20     protected void onCreate(Bundle savedInstanceState) {
21         super.onCreate(savedInstanceState);
22         setContentView(R.layout.activity_main);
23         btnScan = (Button) findViewById(R.id.btnScan);
24         etUsername = (EditText) findViewById(R.id.etUsername);
25
26         btnScan.setOnClickListener(this);
27     }
28
29     public void onClick(View v) {
30         //扫码操作
31         //CaptureActivity这个Activity功能就是:打开相机扫码二维码
32         Intent intent = new Intent(this, CaptureActivity.class);
33         startActivityForResult(intent, 0);
34
35     }
36
37     /**
38      * onActivityResul方法功能:将CaptureActivity扫码获得的结果反馈给MainActivity
39      */
40     @Override
41     protected void onActivityResult(int requestCode, int resultCode, Intent data) {
42         // TODO 自动生成的方法存根
43         super.onActivityResult(requestCode, resultCode, data);
44
45         if(resultCode == Activity.RESULT_OK) {
46             String randnumber = data.getExtras().getString("result");
47             String username = etUsername.getText().toString();
48             String url = WEB_URL+"saveUsername.php?randnumber=" + randnumber + "&username=" +
49             username;
50
51             //访问url
52             HttpUtils.login(url);
53         }
54     }
55
56 }
这里用到一个我们自定义的工具类HttpUtils,如下:
 1 package com.himi.qrlogin;
 2
 3 import java.net.HttpURLConnection;
 4 import java.net.URL;
 5
 6 public class HttpUtils {
 7     public static void login(final String url) {
 8         new Thread(new Runnable() {
 9
10             public void run() {
11                 HttpURLConnection connection;
12                 try {
13                     connection = (HttpURLConnection) new URL(url).openConnection();
14                     connection.setRequestMethod("GET");
15                     connection.getInputStream();
16                 } catch (Exception e) {
17                     // TODO 自动生成的 catch 块
18                     e.printStackTrace();
19                 }
20
21             }
22
23         }).start();
24     }
25 }
(3)特别注意要添加一个网络权限,如下:
1 <uses-permission android:name="android.permission.INTERNET"/>
(4)此时"QRLogin"项目工程一览图,如下:

(5)布署程序到真机上,如下:

