1. 为新控件添加自定义的属性:
主要步骤:
(1)在attrs.xml文件中声明属性,有 属性名:name 和 格式:format:
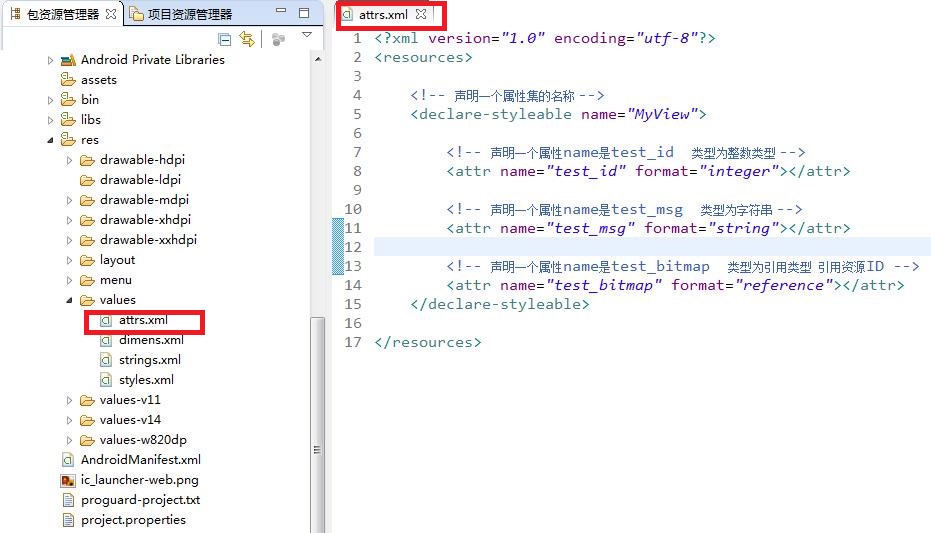
1 <declare-styleable name="MyToggleBtn">     // 声名属性集的名称,即这些属性是属于哪个控件的。
2       <attr name="current_state" format="boolean"/> // 声名属性 current_state   格式为 boolean 类型
3       <attr name="slide_button" format="reference"/> // 声名属性 slide_button   格式为 reference 类型
4 </declare-styleable>
所有的format类型,如下:
1 reference        引用
2 color            颜色
3 boolean          布尔值
4 dimension        尺寸值
5 float            浮点值
6 integer          整型值
7 string           字符串
8 enum             枚举值
(2)在布局文件中使用新属性,使用之前必须先声明自己的命名空间,如:
1 xmlns:heima="http://schemas.android.com/apk/res/com.himi.togglebtn"(包名)
说明:
xmlns 是XML name space 的缩写;
heima 可为任意写符
http://schemas.android.com/apk/res/ 此为android固定格式;
com.itheima.mytogglebtn 此应用的包名,如manifest配置文件中一致。
布局文件:
 1 <RelativeLayout
 2     xmlns:android="http://schemas.android.com/apk/res/android"
 3     xmlns:heima="http://schemas.android.com/apk/res/com.himi.myattrsdemo"
 4     xmlns:tools="http://schemas.android.com/tools"
 5     android:layout_width="match_parent"
 6     android:layout_height="match_parent"
 7     tools:context="com.himi.myattrsdemo.MainActivity" >
 8
 9     <com.himi.myattrsdemo.MyView
10         android:layout_width="wrap_content"
11         android:layout_height="wrap_content"
12         android:layout_centerHorizontal="true"
13         android:layout_centerVertical="true"
14         android:background="@drawable/ic_launcher"
15
16         heima:test_msg="@string/app_name"
17         heima:test_bitmap="@drawable/ic_launcher"
18          />
19
20 </RelativeLayout>
(3)在自定义View的构造方法中,通过解析AttributeSet对象,获得所需要的属性值。
1 TypedArray ta = context.obtainStyledAttributes(attrs, R.styleable.MyToggleBtn); // 由attrs 获得 TypeArray
2. 下面通过一个案例解析说明上面的过程,如下:
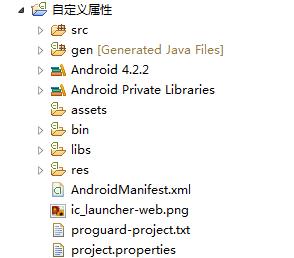
(1)首先新建一个新的"Android"工程,命名为"自定义属性",如下:
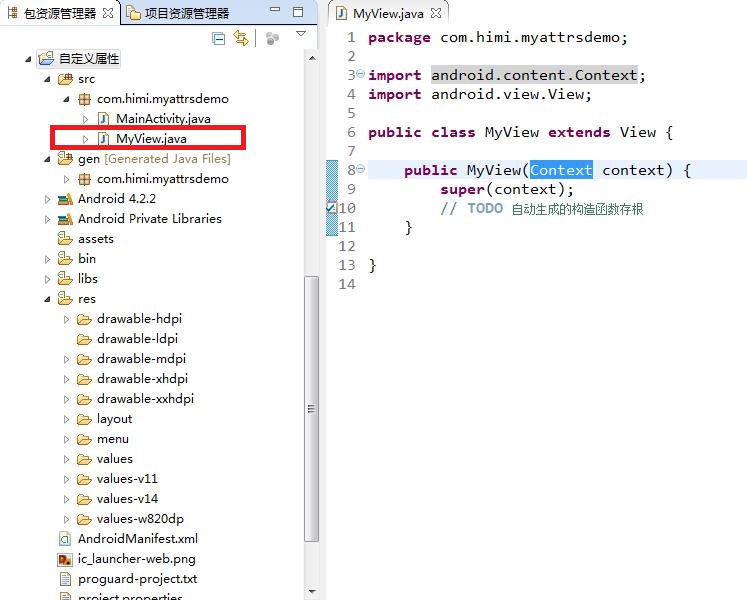
(2)自定义一个MyView继承自View,如下:
(3)新建一个xml文件,命名为attrs.xml,放在res/values文件夹下,如下:
通过查看源码SDT/platforms/android-14/data/res/values/attrs.xml,获知如何什么一个attr(属性)格式:
(4)在activity_main.xml文件下修改命名空间,使用上面定义的属性,如下:
 1 <RelativeLayout
 2     xmlns:android="http://schemas.android.com/apk/res/android"
 3     xmlns:heima="http://schemas.android.com/apk/res/com.himi.myattrsdemo"
 4     xmlns:tools="http://schemas.android.com/tools"
 5     android:layout_width="match_parent"
 6     android:layout_height="match_parent"
 7     tools:context="com.himi.myattrsdemo.MainActivity" >
 8
 9     <com.himi.myattrsdemo.MyView
10         android:layout_width="wrap_content"
11         android:layout_height="wrap_content"
12         android:layout_centerHorizontal="true"
13         android:layout_centerVertical="true"
14         android:background="@drawable/ic_launcher"
15
16         heima:test_msg="@string/app_name"
17         heima:test_bitmap="@drawable/ic_launcher"
18          />
19
20 </RelativeLayout>
(5)在自定义的MyView的构造方法中,通过解析AttributeSet对象,获得所需要的属性值:
MyView.java如下:
 1 package com.himi.myattrsdemo;
 2
 3 import android.content.Context;
 4 import android.content.res.TypedArray;
 5 import android.util.AttributeSet;
 6 import android.view.View;
 7
 8 public class MyView extends View {
 9
10     public MyView(Context context) {
11         super(context);
12         // TODO 自动生成的构造函数存根
13     }
14
15
16     /*
17      * 通过查看View的构造方法,获知MyView构造方法写法
18      */
19     public MyView(Context context, AttributeSet attrs) {
20         super(context, attrs);
21
22         /*
23          * AttributeSet 对xml布局文件解析后的结果,封装为AttributeSet对象
24          * 存储的都是原始文件。仅对数据进行简单加工
25          */
26         int count = attrs.getAttributeCount();
27         for (int i = 0; i < count; i++) {
28             String name = attrs.getAttributeName(i);
29             String value = attrs.getAttributeValue(i);
30             //System.out.println("name:"+name+"------value:"+value);
31         }
32
33         /**
34          * TypedArray:是对AttributeSet中的原始数据    按照   图纸中的说明(R.styleable.MyView中的类型声明)
35          * 创建出来具体的对象
36          */
37         //attrs参数:表示原材料.   R.styleable.MyView:表示图纸
38         TypedArray ta = context.obtainStyledAttributes(attrs, R.styleable.MyView);
39
40         /**
41          * 获得对象的个数
42          */
43         int taCount = ta.getIndexCount();
44         System.out.println("===========================");
45
46         for(int i = 0; i<taCount; i++) {
47             int itemId = ta.getIndex(i);
48             System.out.println("index:"+itemId);
49
50             switch (itemId) {
51             case R.styleable.MyView_test_bitmap:
52                 ta.getDrawable(itemId);
53                 int bitmapId = ta.getResourceId(itemId, 100);
54                 System.out.println("bitmapId::"+bitmapId);
55                 break;
56
57             case R.styleable.MyView_test_id:
58                 ta.getInt(itemId, 10);
59                 break;
60
61             case R.styleable.MyView_test_msg:
62                 String msg = ta.getString(itemId);
63                 System.out.println("test_msg::"+msg);
64                 break;
65             }
66         }
67     }
68
69 }