1.开启新的Activity的方法:
(1)Intent 意图
(2)intent.setAction("自定义") 记得在清单文件中声明
(3)intent.setData(前缀) //设置数据,记得在清单文件中声明
(4)startActivity(intent);
(5)在跳转之后新的界面Activity中,使用getIntent()方法获得开启当前Activity的Intent;
(6)之后可以用第二界面获得由第一个界面Activity传递过来的数据,getIntent().getData().toString();
2.人品计算器案例:
(1)新建一个人品计算器的Android工程,首先设置activity_main.xml,如下:
 1 <RelativeLayout xmlns:android="http://schemas.android.com/apk/res/android"
 2     xmlns:tools="http://schemas.android.com/tools"
 3     android:layout_width="match_parent"
 4     android:layout_height="match_parent"
 5     tools:context=".MainActivity" >
 6
 7
 8     <Button
 9         android:id="@+id/bt_start"
10         android:layout_centerHorizontal="true"
11         android:layout_centerVertical="true"
12         android:layout_width="wrap_content"
13         android:layout_height="wrap_content"
14         android:text="点击开始使用" />
15
16      <TextView
17         android:layout_below="@id/bt_start"
18         android:layout_centerHorizontal="true"
19         android:layout_width="wrap_content"
20         android:layout_height="wrap_content"
21         android:text="根据八卦原理开发的人品计算器" />
22
23      <EditText
24         android:id="@+id/et_name"
25         android:layout_width="300dip"
26         android:layout_height="wrap_content"
27         android:layout_centerHorizontal="true"
28         android:hint="请输入要测试的人的姓名"
29         android:layout_above="@id/bt_start"
30            />
31
32
33 </RelativeLayout>
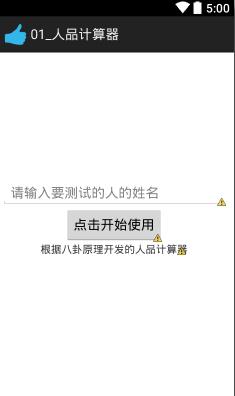
布局效果如下:
(2)接下来编写主界面MainActivity,完成界面跳转的逻辑如下:
 1 package com.itheima.rpcalc;
 2
 3 import android.app.Activity;
 4 import android.content.Intent;
 5 import android.net.Uri;
 6 import android.os.Bundle;
 7 import android.view.View;
 8 import android.view.View.OnClickListener;
 9 import android.widget.Button;
10 import android.widget.EditText;
11
12 public class MainActivity extends Activity {
13     private Button bt_start;
14     private EditText et_name;
15
16     @Override
17     protected void onCreate(Bundle savedInstanceState) {
18         super.onCreate(savedInstanceState);
19         setContentView(R.layout.activity_main);
20         bt_start = (Button) findViewById(R.id.bt_start);
21         et_name = (EditText) findViewById(R.id.et_name);
22         bt_start.setOnClickListener(new OnClickListener() {
23             @Override
24             public void onClick(View v) {
25                 // 跳转到第二个界面
26                 Intent intent = new Intent();
27                 intent.setAction("com.itheima.rpcalc.CALC");
28                 intent.setData(Uri.parse("calc://"+et_name.getText().toString()));
29                 startActivity(intent);
30             }
31         });
32     }
33 }
当我们点击这里按钮Button,会通过Intent的action定位到相应的CalcActivity,通过intent启动这个CalcActivity,intente携带数据也会传递给CalcActivity。注意我们这里的intent设置的Action和Data都是自定义的,Android系统是无法识别的,所以我们必须实现注册这些信息;
在AndroidMainfest.xml文件中注册这些信息,如下:
 1 <?xml version="1.0" encoding="utf-8"?>
 2 <manifest xmlns:android="http://schemas.android.com/apk/res/android"
 3     package="com.itheima.rpcalc"
 4     android:versionCode="1"
 5     android:versionName="1.0" >
 6
 7     <uses-sdk
 8         android:minSdkVersion="8"
 9         android:targetSdkVersion="17" />
10
11     <application
12         android:allowBackup="true"
13         android:icon="@drawable/ic_launcher"
14         android:label="@string/app_name"
15         android:theme="@style/AppTheme" >
16         <activity
17             android:name="com.itheima.rpcalc.MainActivity"
18             android:label="@string/app_name" >
19             <intent-filter>
20                 <action android:name="android.intent.action.MAIN" />
21                 <category android:name="android.intent.category.LAUNCHER" />
22             </intent-filter>
23         </activity>
24        <!--  声明一个新的界面 -->
25
26         <activity android:name="com.itheima.rpcalc.CalcActivity">
27
28             <intent-filter >
29                 <!--  注册一个action-->
30                 <action android:name="com.itheima.rpcalc.CALC"/>
31                 <!--  注册一个数据前缀,这里是calc,则是数据前缀为:calc://…… -->
32                 <data android:scheme="calc"/>
33                 <!--  声明CalcActivity运行的环境为手机(默认) -->
34                 <category android:name="android.intent.category.DEFAULT"/>
35
36             </intent-filter>
37
38         </activity>
39     </application>
40
41 </manifest>
这里我们在<intent-filter >里面必须注册action 和 categroy的信息;其他的数据信息,在具体情况具体分析。
(3)接下来完成第二个界面的布局文件activity_calc.xml,如下:
 1 <?xml version="1.0" encoding="utf-8"?>
 2 <LinearLayout xmlns:android="http://schemas.android.com/apk/res/android"
 3     android:layout_width="match_parent"
 4     android:layout_height="match_parent"
 5     android:orientation="vertical" >
 6
 7     <TextView
 8         android:layout_width="match_parent"
 9         android:layout_height="wrap_content"
10         android:text="计算结果:"
11         android:textSize="20sp"
12         android:textColor="#000000" />
13      <TextView
14          android:id="@+id/tv_result"
15          android:textSize="15sp"
16         android:layout_width="match_parent"
17         android:layout_height="wrap_content"
18         android:text="您的人品为:85分"
19         android:textColor="#88ff0000" />
20
21 </LinearLayout>
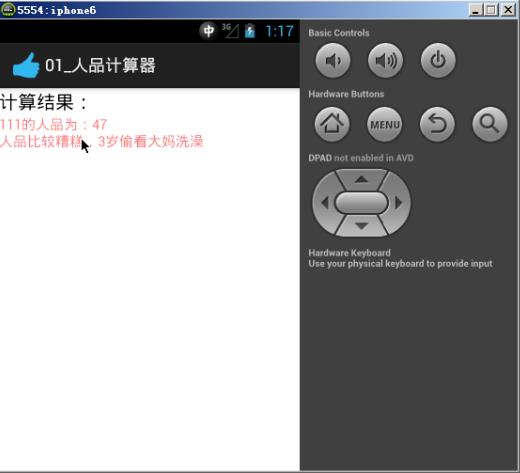
布局效果如下:

(4)编写CalcActivity,如下:
 1 package com.itheima.rpcalc;
 2
 3 import android.app.Activity;
 4 import android.content.Intent;
 5 import android.os.Bundle;
 6 import android.widget.TextView;
 7
 8 public class CalcActivity extends Activity {
 9     private TextView tv_result;
10     @Override
11     protected void onCreate(Bundle savedInstanceState) {
12         super.onCreate(savedInstanceState);
13         setContentView(R.layout.activity_calc);
14         tv_result = (TextView) findViewById(R.id.tv_result);
15
16         Intent intent = getIntent();//getIntent()获得开启当前CalcActivity的intent,也就是第一个MainActivity中传递给CalcActivity的intent
17         String data = intent.getData().toString();
18         String name = data.replace("calc://", "");
19         //计算人品了。
20
21         byte[] result = name.getBytes();
22         int total = 0 ;
23         for(byte b:result){
24             //byte是8位二进制数据,而0xff是属于java的字面常量,它属于int类型,这里b&0xff,将byte类型数据转换为int
25             //byte --->  int
26             int number = b&0xff;
27             total+=number;
28         }
29         int rp = Math.abs(total)%100;
30         String desc="";
31         if(rp>90){
32             desc = "你的人品非常好,祖坟冒青烟";
33         }else if(rp > 60){
34             desc = "你的人品还不错";
35         }else if(rp>30){
36             desc = "人品比较糟糕,3岁偷看大妈洗澡";
37         }else{
38             desc = "人品掉渣了。";
39         }
40
41         tv_result.setText(name+"的人品为:"+rp+"
"+desc);
42     }
43 }
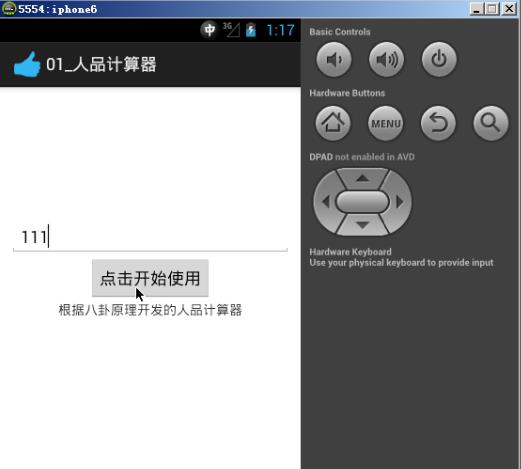
布署程序到模拟器上如下: