1. 广播接受者
>什么是广播。收音机。
电台:对外发送信号。
收音机:接收电台的信号。
>在android系统里面,系统有很多重要的事件: 电池电量低,插入充电器,sd卡被移除,有电话打出去,有短信发送进来。
静态注册,使用广播机制步骤:
(1)买收音机
public class SDStatusReceiver extends BroadcastReceiver
(2)装电池
<receiver android:name="com.itheima.sdstatus.SDStatusReceiver" >
(3)调频道,调到你关心的频道
<intent-filter >
<!-- 3.调频道 -->
<action android:name="android.intent.action.MEDIA_MOUNTED"/>
<data android:scheme="file"/>
</intent-filter>
动态注册,使用广播机制步骤:
(1)在Activity中的onCreate 或者 onResume中注册广播接受者,如下:
public Intent registerReceiver(BroadcastReceiver receiver, IntentFilter filter):Activity的方法
(2)在Activity中的onDestory方法中注销广播接受者,如下:
public void unregisterReceiver(BroadcastReceiver receiver):Activity的方法
2. 静态注册和动态注册区别:
(1)动态注册的广播 永远要快于 静态注册的广播,不管静态注册的优先级设置的多高,不管动态注册的优先级有多低。
(2)动态注册广播不是 常驻型广播 ,也就是说广播跟随activity的生命周期。注意: 在activity结束前,移除广播接收器。
静态注册是常驻型,也就是说当应用程序关闭后,如果有信息广播来,程序也会被系统调用自动运行。
(3)在同一个优先级下,谁先启动的快,谁将先接收到广播。
3. 下面查看这个广播接收者静态注册案例:
当应用程序关闭了,如果有广播信息来,写的广播接收器同样的能接收到,它的注册方式就是在应用程序的AndroidManifast.xml 中进行注册,这种注册方式通常又被称作静态注册。这种方式可以理解为通过清单文件注册的广播是交给操作系统去处理的。
下面是工程:

这里我们MainActivity.java和activity_main.xml文件,我们不做什么修改。
主要还是按照上面的使用广播机制步骤:
(1)买收音机,自定义一个SDStatusReceiver类,它继承自BroadcastReceiver(BroadcastReceiver是提供的基类API接口)
onReceive方法是接收到广播执行的操作内容。
package com.itheima.sdstatus;

import android.content.BroadcastReceiver;
import android.content.Context;
import android.content.Intent;
import android.widget.Toast;

/**
 * 1.买好了一个收音机
 */
public class SDStatusReceiver extends BroadcastReceiver {

    // 用来接收广播事件的,一旦广播消息到来,就会执行onreceive方法
    @Override
    public void onReceive(Context context, Intent intent) {
    //public String getAction():返回一个action的名称
        String action = intent.getAction();
        if ("android.intent.action.MEDIA_UNMOUNTED".equals(action)) {
            System.out.println("哈哈哈----SD卡被卸载了。");
            Toast.makeText(context, "哈哈哈----SD卡被卸载了,微信头像暂不可用", 0).show();
        }else if("android.intent.action.MEDIA_MOUNTED".equals(action)){
            Toast.makeText(context, "哈哈哈----SD卡被挂载了", 0).show();
        }
    }

}
(2)(3)装电池、调频道,在AndroidManifest.xml清单文件中进行配置。
<?xml version="1.0" encoding="utf-8"?>
<manifest xmlns:android="http://schemas.android.com/apk/res/android"
    package="com.itheima.sdstatus"
    android:versionCode="1"
    android:versionName="1.0" >

    <uses-sdk
        android:minSdkVersion="8"
        android:targetSdkVersion="17" />

    <application
        android:allowBackup="true"
        android:icon="@drawable/ic_launcher"
        android:label="@string/app_name"
        android:theme="@style/AppTheme" >
        <activity
            android:name="com.itheima.sdstatus.MainActivity"
            android:label="@string/app_name" >
            <intent-filter>
                <action android:name="android.intent.action.MAIN" />

                <category android:name="android.intent.category.LAUNCHER" />
            </intent-filter>
        </activity>
        <!-- 2.装电池 -->
        <receiver android:name="com.itheima.sdstatus.SDStatusReceiver" >
            <intent-filter >
                <!-- 3.调频道,这里我们可以设置多个action,监听多个广播频道 -->
                <action android:name="android.intent.action.MEDIA_MOUNTED"/>
                <action android:name="android.intent.action.MEDIA_UNMOUNTED"/>
                <data android:scheme="file"/>
            </intent-filter>
        </receiver>

    </application>

</manifest>
注意:就算是我们的应用程序没有启动运行,只要SD卡卸载或者安装,就会促使应用程序启动线程运行,这样的话运行onReceive()里面的代码。这里采用是注册事件的机制,一旦系统检查到SD卡卸载或者安装,Android系统会主动注册监听(SD卡卸载或者安装)的应用程序。
4. BroadcastReceiver动态注册注销:
(1)工程一览图:

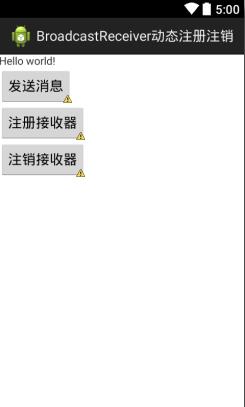
(2)activity_main.xml :
 1 <LinearLayout xmlns:android="http://schemas.android.com/apk/res/android"
 2     xmlns:tools="http://schemas.android.com/tools"
 3     android:layout_width="match_parent"
 4     android:layout_height="match_parent"
 5     android:orientation="vertical"
 6     tools:context="com.himi.BroadcastReceiverDemo.MainActivity" >
 7
 8     <TextView
 9         android:layout_width="wrap_content"
10         android:layout_height="wrap_content"
11         android:text="@string/hello_world" />
12
13     <Button
14         android:id="@+id/btnSendMsg"
15         android:layout_width="wrap_content"
16         android:layout_height="wrap_content"
17         android:text="发送消息" />
18
19     <Button
20         android:id="@+id/btnReg"
21         android:layout_width="wrap_content"
22         android:layout_height="wrap_content"
23         android:text="注册接收器" />
24
25     <Button
26         android:id="@+id/btnUnreg"
27         android:layout_width="wrap_content"
28         android:layout_height="wrap_content"
29         android:text="注销接收器" />
30
31 </LinearLayout>
布局效果,如下:
(3)AndroidManifest.xml
 1 <?xml version="1.0" encoding="utf-8"?>
 2 <manifest xmlns:android="http://schemas.android.com/apk/res/android"
 3     package="com.himi.BroadcastReceiverDemo"
 4     android:versionCode="1"
 5     android:versionName="1.0" >
 6
 7     <uses-sdk
 8         android:minSdkVersion="15"
 9         android:targetSdkVersion="17" />
10
11     <application
12         android:allowBackup="true"
13         android:icon="@drawable/ic_launcher"
14         android:label="@string/app_name"
15         android:theme="@style/AppTheme" >
16         <activity
17             android:name=".MainActivity"
18             android:label="@string/app_name" >
19             <intent-filter>
20                 <action android:name="android.intent.action.MAIN" />
21
22                 <category android:name="android.intent.category.LAUNCHER" />
23             </intent-filter>
24         </activity>
25
26
27     </application>
28
29 </manifest>
(4)MyReceiver.java:
 1 package com.himi.BroadcastReceiverDemo;
 2
 3 import android.content.BroadcastReceiver;
 4 import android.content.Context;
 5 import android.content.Intent;
 6
 7 public class MyReceiver extends BroadcastReceiver {
 8     public static final String ACTION = "com.himi.BroadcastReceiverDemo.intent.action.MyReceiver";
 9
10     public MyReceiver() {
11
12     }
13
14     @Override
15     public void onReceive(Context context, Intent intent) {
16         System.out.println("接收到消息了,消息的内容是:" + intent.getStringExtra("data"));
17
18     }
19
20 }
(5)MainActivity.java:
 1 package com.himi.BroadcastReceiverDemo;
 2
 3 import android.app.Activity;
 4 import android.content.Intent;
 5 import android.content.IntentFilter;
 6 import android.os.Bundle;
 7 import android.view.View;
 8 import android.view.View.OnClickListener;
 9
10 public class MainActivity extends Activity implements OnClickListener {
11
12     @Override
13     protected void onCreate(Bundle savedInstanceState) {
14         super.onCreate(savedInstanceState);
15         setContentView(R.layout.activity_main);
16         findViewById(R.id.btnSendMsg).setOnClickListener(this);
17         findViewById(R.id.btnReg).setOnClickListener(this);
18         findViewById(R.id.btnUnreg).setOnClickListener(this);
19     }
20
21     public void onClick(View v) {
22         switch(v.getId()) {
23         case R.id.btnSendMsg:
24             //Intent i= new Intent(this, MyReceiver.class);
25             Intent i = new Intent(MyReceiver.ACTION);
26             i.putExtra("data", "jikexueyuan");
27             sendBroadcast(i);
28             break;
29
30         case R.id.btnReg:
31             if(receiver == null) {
32                 receiver = new MyReceiver();
33                 registerReceiver(receiver, new IntentFilter(MyReceiver.ACTION));
34             }
35             break;
36
37         case R.id.btnUnreg:
38             if(receiver != null) {
39                 unregisterReceiver(receiver);
40                 receiver = null;
41             }
42             break;
43
44         }
45
46     }
47
48     private MyReceiver receiver = null;
49
50 }