利用之前观摩过的寄存器 创建uart4.c 和uart4.h文件串口相关函数发送AD数据
#include "uart4.h"

void UART4_Init(U32 BaudRate)
{
  U16 ubd, brfa;

  U8 temp;

  PORTC_PCR15 = PORT_PCR_MUX(0x3);   //引脚使能
  PORTC_PCR14 = PORT_PCR_MUX(0x3);
  SIM_SCGC1 |= SIM_SCGC1_UART4_MASK;   //时钟使能


  UART4_C2 &= ~((1<<2) | (1<<3)); //禁止发送接收   控制寄存器C2

  UART4_C1 = 0;  //控制器C1 全部使用默认配备

  ubd = (U16)((PERIPH_SYS_CLK)/(BaudRate * 16));   //波特率设置

  UART4_BDH = (U8)ubd>>8;
  UART4_BDL = (U8)(ubd);


  brfa = (((PERIPH_SYS_CLK*32)/(BaudRate * 16)) - (ubd * 32));  //波特率微调 1/32的增量

  temp = UART4_C4 & ~(UART_C4_BRFA(0x1F));
  UART4_C4 = temp | UART_C4_BRFA(brfa);


  UART4_C2 |= ((1<<2) | (1<<3));  //允许发送接收

  return;
}

void Uart4_SendByte(U8 Char)
{

    while(!(UART_S1_REG(UART4_BASE_PTR) & UART_S1_TDRE_MASK)); //UARTx_S1状态寄存器
    UART4_D = Char;
    return;
}

U8 Uart4_Receive(void)
{
    U8 Receivechar;
    while(!(UART_S1_REG(UART4_BASE_PTR) & UART_S1_RDRF_MASK));       //查询是否接受到数据
    Receivechar  =   UART4_D;                    //接受到8位的数据
    return(Receivechar);
}
UART4.h
#include "project.h"

extern void UART4_Init(U32);
extern void Uart4_SendByte(U8);
extern U8 Uart4_Receive(void);
创建project.h文件包含需要的头文件和宏定义
#include "common.h"


#include "uart.h"
//#include "LED.h"

#ifndef EnableInterrupts
#define EnableInterrupts asm(" CPSIE i");  //开总中断
#endif

#ifndef DisableInterrupts
#define DisableInterrupts asm(" CPSID i");  //关总中断
#endif

typedef unsigned short    U16;
typedef unsigned long     U32;
typedef unsigned char     U8;
例子的AD端口(PRA8)
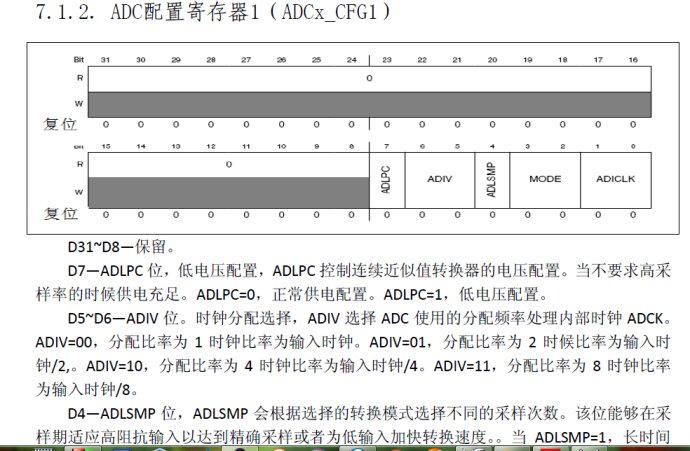
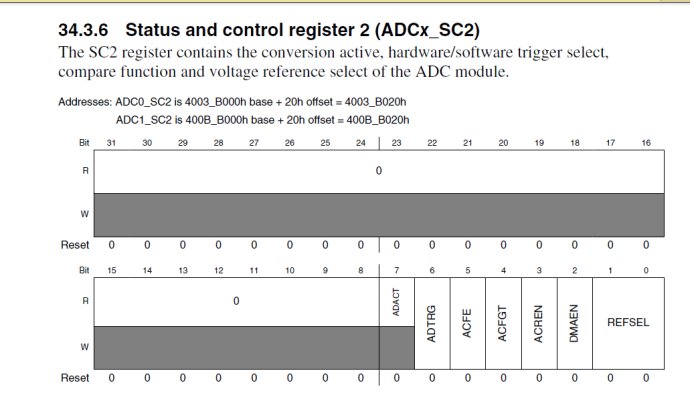
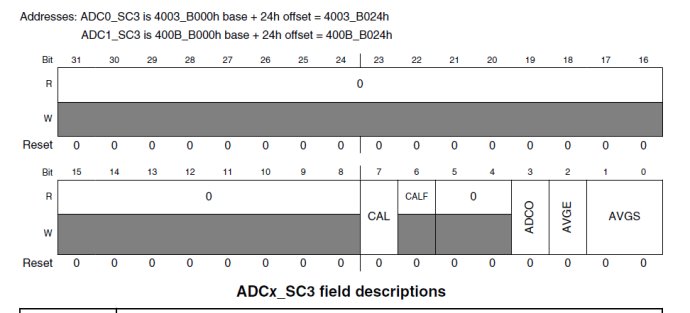
AD初始化函数
void ADC0_init(void)
{

  SIM_SCGC6 |= (1<<27);

  ADC0_CFG1 |= (1<<5) //ADIV
            |(1<<4)           // ADLSMP 1
            |(3<<2);   // MODE  11

  ADC0_CFG1 &= ~((1<<6) | (3)); //ADIV 01  ADICLK 00

  ADC0_CFG2 |= (1<<2);        // ADHSC   1

  ADC0_CFG2 &= ~(3);  //ADLSTS 00

  ADC0_SC2 &= ~(3);           // REFSEL  00 电压源选择

  ADC0_SC3 |= ((2)             // AVGS
           | (1<<2));            // AVGE 1 使能平均

  ADC0_SC3 &= ~(1);           // AVGS 10 16次采样平均

}
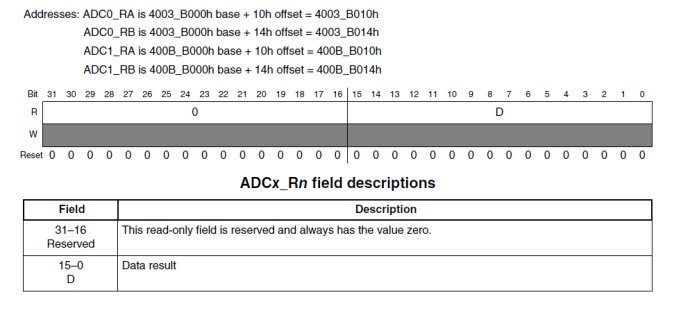
涉及的寄存器……


AD采集函数
U16 ADC0_SE11_GETDATA(void)
{

  U16 ADResult = 0;

  ADC0_SC1A &= ~((1<<5) | (1<<6)); //DIDF 0  ALEN 0

  ADC0_SC1A &= ~((1<<2) | (1<<4));  //设置AD通道  AD11(PRA8)
  ADC0_SC1A |= ((1<<3) | (3));

  while (!(ADC0_SC1A>>7));

  ADResult = ADC0_RA;

  return(ADResult);
}
涉及的寄存器……
主函数
void main(void)
{

  U8 ADC8;
  U16 ADValue;

  DisableInterrupts;

  UART4_Init(115200);

  ADC0_init();   //ADC0初始化

  EnableInterrupts;


  while(1)
  {

    ADValue = ADC0_SE11_GETDATA();
    ADC8 = ADValue;
    Uart4_SendByte(ADValue>>8);
    Uart4_SendByte(ADC8);
    delay(10000000);
  }

}
------------------------------华丽的代码分割线---------------------------------------
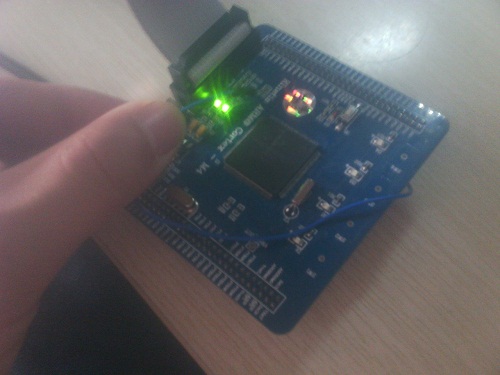
用杜邦线把电源和地分配引入AD采集引脚 观摩数据正确性