springboot集成rabbitmq
- RabbitMQ 6种模式
参考官网地址
步骤
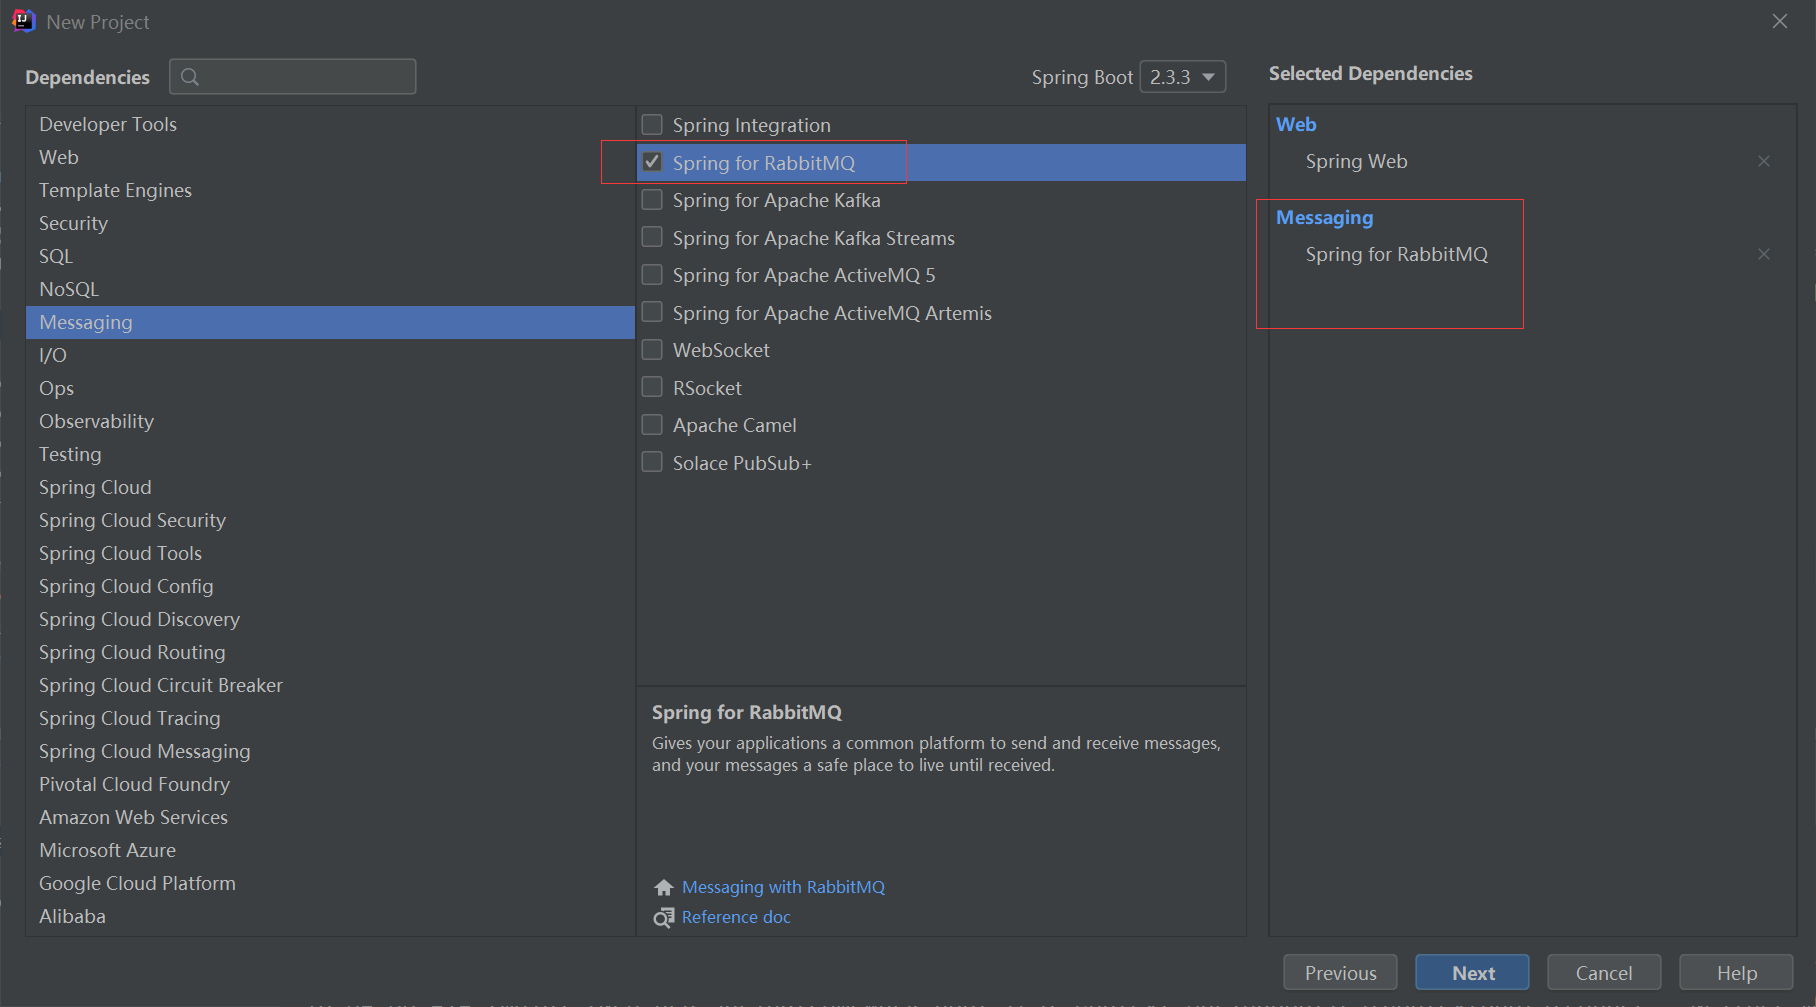
1. 导入相应模块
2. 配置yml文件
spring:
  application:
    name: springboot-rabbitmq # 工程名

  # 配置rabbitmq
  rabbitmq:
    host: localhost
    port: 5672
    username: guest
    password: guest
    virtual-host: / # 虚拟主机
第一种hello world模式
一个提供者,一个消费者
- 编写提供者
@SpringBootTest
class Spriingboot07RabbitmqApplicationTests {

    //注入rabbitmq
    @Autowired
    RabbitTemplate rabbitTemplate;

    //1. 简单模式
    @Test
    void hello_world() {
        //发送消息
        rabbitTemplate.convertAndSend("hello","你好,这是一条消息");
    }
}
- 编写消费者
@Component
//指定这个类是一个监听者,queuesToDeclare代表没有队列则创建队列,
//@Queue创建一个队列,指定队列的名字,参数等
//默认是持久化,不自动删除,不独占一个连接
@RabbitListener(queuesToDeclare = @Queue(value = "hello",autoDelete = "false",exclusive = "false"))
public class HelloConsumer {

    @RabbitHandler //代表这是一个回调函数,能接收队列中的消息
    public void resolverMsg(String message) {
        //message就是队列中的消息
        System.out.println("message = " + message);
    }

}
第二种work模式
一个提供者,两个消费者
- 编写提供者
@SpringBootTest
class Spriingboot07RabbitmqApplicationTests {

    //注入rabbitmq
    @Autowired
    RabbitTemplate rabbitTemplate;

    @Test
    void work_model() {
        //发送消息
        for (int i = 0; i < 10; i++) {
            rabbitTemplate.convertAndSend("work","工作第"+(i+1)+"天");
        }
    }
}
- 编写消费者
@Component
public class WorkConsumer {

    //消费者1
    @RabbitListener(queuesToDeclare = @Queue(value = "work"))
    public void consumer1(String message) {
        System.out.println("message1 = " + message);
    }

    //消费者2
    @RabbitListener(queuesToDeclare = @Queue(value = "work"))
    public void consumer2(String message) {
        System.out.println("message2 = " + message);
    }

}
第三种发布订阅模式
一个提供者,一个交换机,两个队列,两个消费者
- 编写提供者
@SpringBootTest
class Spriingboot07RabbitmqApplicationTests {

    //注入rabbitmq
    @Autowired
    RabbitTemplate rabbitTemplate;

        //3.广播模式
    @Test
    void fanout_model() {
        //发送消息
        for (int i = 0; i < 10; i++) {
            //广播模式不需要路由key
            rabbitTemplate.convertAndSend("fanoutExchange","","工作第"+(i+1)+"天");
        }
    }
}
- 编写消费者
package com.atguigu.fanout;

import org.springframework.amqp.rabbit.annotation.Exchange;
import org.springframework.amqp.rabbit.annotation.Queue;
import org.springframework.amqp.rabbit.annotation.QueueBinding;
import org.springframework.amqp.rabbit.annotation.RabbitListener;
import org.springframework.stereotype.Component;

/**
 * ClassName: FanoutModel
 * Description:
 * date: 2020/9/6 17:26
 *
 * @author July
 * @since JDK 1.8
 */
@Component
public class FanoutModel {

    //创建一个消费者
    @RabbitListener(
            bindings = {@QueueBinding( //将队列与交换机绑定
                    value = @Queue, //不指定队列名字则为创建一个临时队列
                    exchange = @Exchange(value = "fanoutExchange", type = "fanout") //绑定交换机
            )
            })
    public void consumer1(String message) {
        System.out.println("message1 = " + message);
    }

    //创建消费者2
    @RabbitListener(
            bindings = {@QueueBinding( //将队列与交换机绑定
                    value = @Queue, //不指定队列名字则为创建一个临时队列
                    exchange = @Exchange(value = "fanoutExchange", type = "fanout") //绑定交换机
            )
            })
    public void consumer2(String message) {
        System.out.println("message2 = " + message);
    }

}
第四种路由模式
一个提供者,一个交换机,带有路由key,两个队列,两个消费者
- 编写提供者
@SpringBootTest
class Spriingboot07RabbitmqApplicationTests {

    //注入rabbitmq
    @Autowired
    RabbitTemplate rabbitTemplate;

      //4.路由模式
    @Test
    void route_model() {
        //发送消息
        for (int i = 0; i < 10; i++) {
            //发送路由key 为 queue1的信息
            rabbitTemplate.convertAndSend("routeExchange","queue1","工作第"+(i+1)+"天");
        }
    }

}
- 编写消费者
@Component
public class RouteModel {

    //创建一个消费者
    @RabbitListener(
            bindings = {
                    @QueueBinding(
                            value = @Queue("queue1"), //创建一个名为queue1的队列
                            exchange = @Exchange(value = "routeExchange", type = ExchangeTypes.DIRECT),
                            //指定路由key,接收{"queue1","info","warn"}相关信息
                            key = {"queue1","info","warn"}
                    )
            }
    )
    public void consumer1(String message) {
        System.out.println("message = " + message);
    }

    //创建一个消费者
    @RabbitListener(
            bindings = {
                    @QueueBinding(
                            value = @Queue, //创建临时队列
                            //指定交换机
                            exchange = @Exchange(value = "routeExchange", type = ExchangeTypes.DIRECT),
                            //指定路由key,接收{"info","warn"}相关信息
                            key = {"info","warn"}
                    )
            }
    )
    public void consumer2(String message) {
        System.out.println("message2 = " + message);
    }
}
第五种通配符模式
在路由key上加了通配符,通常用.分割单词
#匹配一个或多个单词:info.#匹配info.abc.log*只匹配一个单词:info.*匹配info.log
一个提供者,一个交换机,带有路由key,两个队列,两个消费者
- 编写提供者
@SpringBootTest
class Spriingboot07RabbitmqApplicationTests {

    //注入rabbitmq
    @Autowired
    RabbitTemplate rabbitTemplate;

        //5.通配符模式
    @Test
    void topics_model() {
        //发送消息
        for (int i = 0; i < 10; i++) {
            //发送路由key 为 queue1的信息
            rabbitTemplate.convertAndSend("topicsExchange","info.abc.log","工作第"+(i+1)+"天");
        }
    }

}
- 编写消费者
package com.atguigu.topics;

import org.springframework.amqp.core.ExchangeTypes;
import org.springframework.amqp.rabbit.annotation.Exchange;
import org.springframework.amqp.rabbit.annotation.Queue;
import org.springframework.amqp.rabbit.annotation.QueueBinding;
import org.springframework.amqp.rabbit.annotation.RabbitListener;
import org.springframework.stereotype.Component;

/**
 * ClassName: TopicsModel
 * Description:
 * date: 2020/9/6 18:05
 *
 * @author July
 * @since JDK 1.8
 */

@Component
public class TopicsModel {
    //消费者1
    @RabbitListener(
            bindings = {
                    @QueueBinding(
                            value = @Queue,
                            //设置为路由模式ExchangeTypes.TOPIC
                            exchange = @Exchange(value = "topicsExchange", type = ExchangeTypes.TOPIC),
                            //接收任何多个单词.log,abc.一个单词
                            key = {"*.log", "#.log", "abc.*"}
                    )
            }
    )
    public void consumer1(String message) {
        System.out.println("message1 = " + message);
    }


    //消费者2
    @RabbitListener(
            bindings = {
                    @QueueBinding(
                            value = @Queue,
                            //设置为路由模式ExchangeTypes.TOPIC
                            exchange = @Exchange(value = "topicsExchange", type = ExchangeTypes.TOPIC),
                            //设置路由key规则
                            key = {"*.info.*", "abc.log", "info.#"}
                    )
            }
    )
    public void consumer2(String message) {
        System.out.println("message2 = " + message);
    }

}