目标:
学习不同的形态操作 例如 腐蚀、膨胀、开运算、闭运算 等。
我们要学习的函数有 cv2.erode(),cv2.dilate(),cv2.morphologyEx() 等。
原理 :
一般对二值化图像进行形态学转换操作。输入的第一个参数为原始图像;第二个参数为结构化元素(核),该参数决定操作性质。两个基本形态学操作是腐蚀膨胀,衍生出了开运算、闭运算、梯度运算等等
腐蚀 :
腐蚀操作会把前景物体的边缘腐蚀掉。原理是卷积核沿着图像滑动,如果与卷积核对应的原图像像素值都是1,那么中心元素保持原值,否则为0.
效果,靠近前景的像素被腐蚀为0,前景物体变小,图像白色区域减少,对于去除白噪声很有用,可以断开两个连接在一起的物体。
(图像当中的白噪声大概意思就是随机噪声)
如下5*5的卷积核
 1 import cv2
 2 import numpy as np
 3
 4 img = cv2.imread('9.jpg',0)
 5 kernel = np.ones((5,5),np.uint8)
 6 erosion = cv2.erode(img,kernel,iterations = 2)
 7
 8 cv2.imshow('img',img)
 9 cv2.imshow('ero',erosion)
10
11 cv2.waitKey(0)
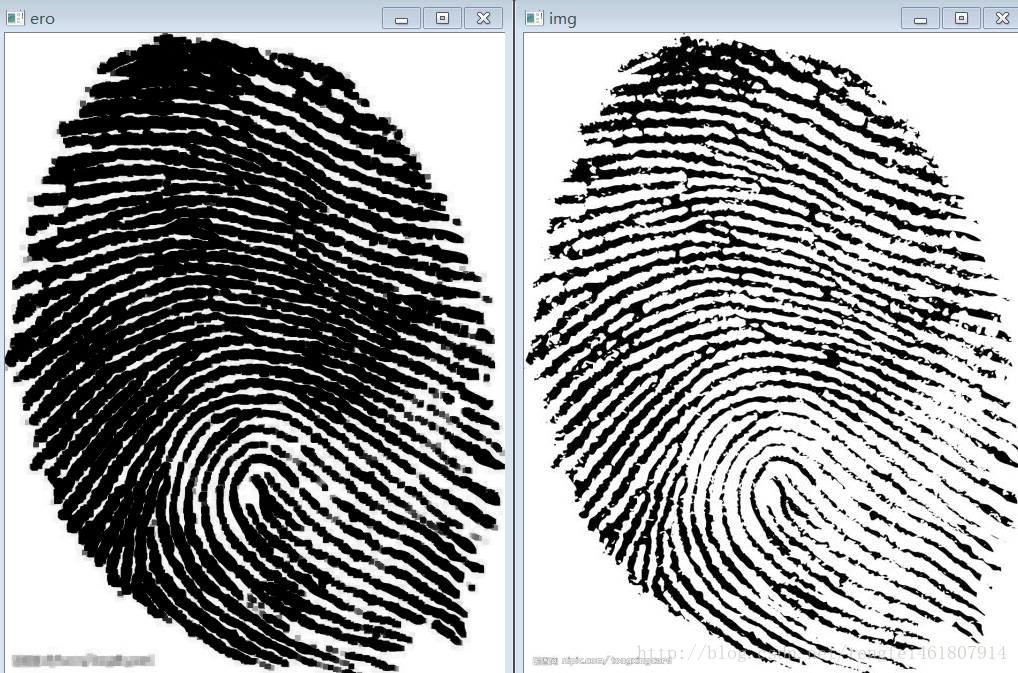
左侧为腐蚀后的图像,iterations为迭代运算次数
膨胀 :
与腐蚀相反,卷积核当中只要有一个值是1,中心元素值就是1。此操作会增加前景中的白色区域,一般在去噪声的时候都是先腐蚀再膨胀,腐蚀的过程会使得前景变小,使用膨胀操作使前景变换回来。膨胀也可以使相互分离的物体连接。
 1 import cv2
 2 import numpy as np
 3
 4 img = cv2.imread('9.jpg',0)
 5 kernel = np.ones((5,5),np.uint8)
 6 dilation = cv2.dilate(img,kernel,iterations = 1)
 7
 8 cv2.imshow('img',img)
 9 cv2.imshow('dil',dilation)
10
11 cv2.waitKey(0)
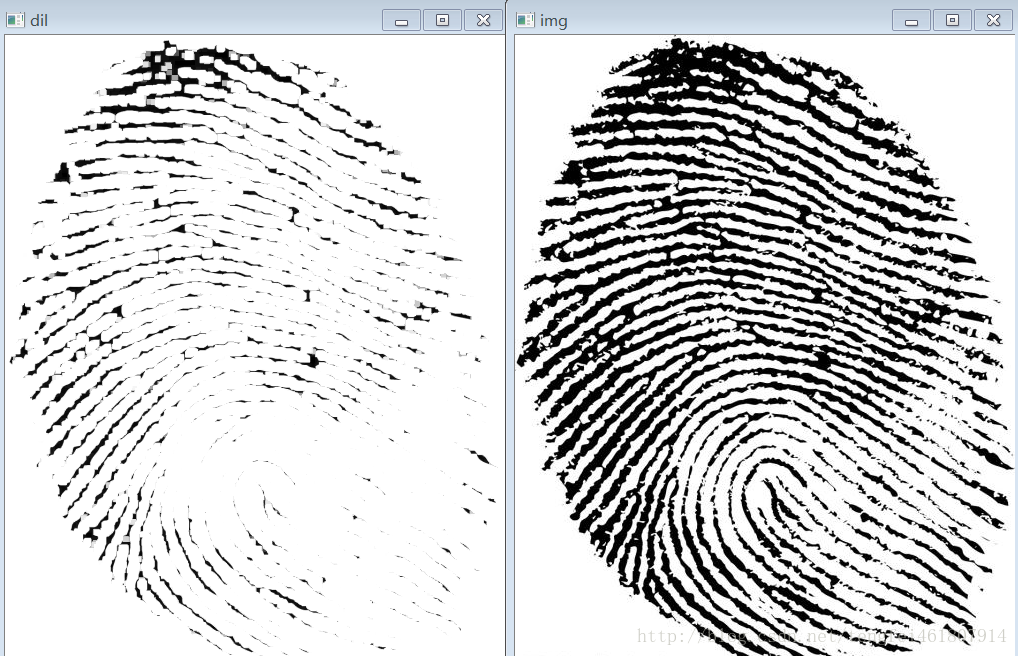
左边为膨胀
开运算 :
就是先腐蚀再膨胀,一般用来去除噪声
函数是 cv2.morphologyEx()
 1 import cv2
 2 import numpy as np
 3
 4 img = cv2.imread('9.jpg',0)
 5 kernel = np.ones((5,5),np.uint8)
 6
 7 opening = cv2.morphologyEx(img, cv2.MORPH_OPEN, kernel)
 8
 9 cv2.imshow('img',img)
10 cv2.imshow('opening',opening)
11
12 cv2.waitKey(0)
结果略
闭运算:
先膨胀再腐蚀,一般用来填充黑色的小像素点
 1 import cv2
 2 import numpy as np
 3
 4 img = cv2.imread('9.jpg',0)
 5 kernel = np.ones((5,5),np.uint8)
 6 closing = cv2.morphologyEx(img, cv2.MORPH_CLOSE, kernel)
 7
 8 cv2.imshow('img',img)
 9 cv2.imshow('closing',closing)
10
11 cv2.waitKey(0)
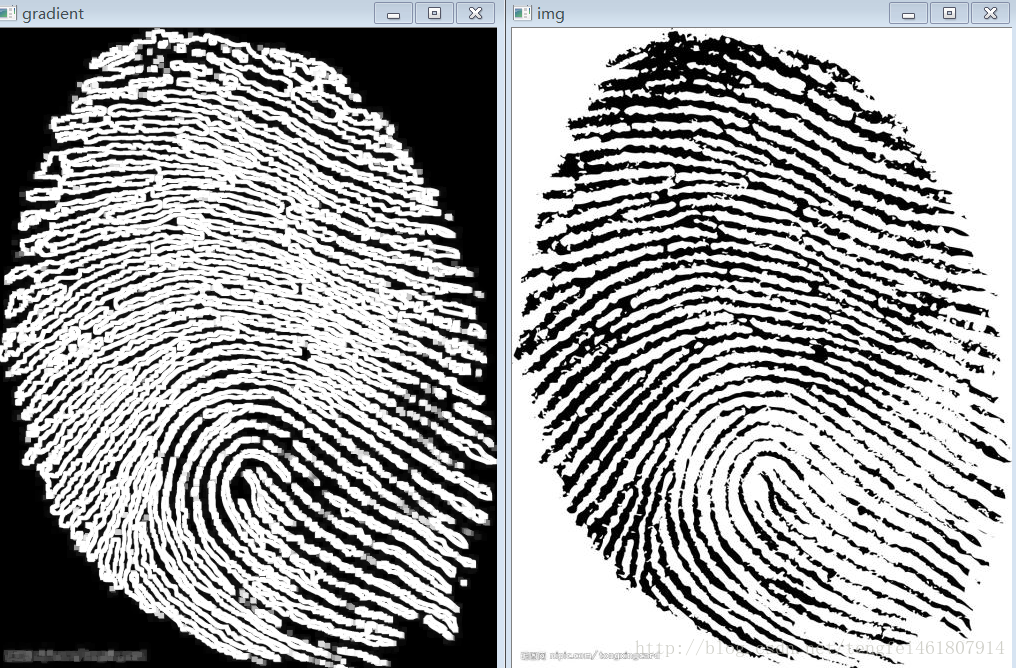
形态学梯度
此为膨胀和腐蚀的差别,结果为前景轮廓
 1 import cv2
 2 import numpy as np
 3
 4 img = cv2.imread('9.jpg',0)
 5 kernel = np.ones((5,5),np.uint8)
 6 gradient = cv2.morphologyEx(img, cv2.MORPH_GRADIENT, kernel)
 7
 8 cv2.imshow('img',img)
 9 cv2.imshow('gradient',gradient)
10
11 cv2.waitKey(0)
礼帽:
原始图像与开运算图像的差

 1 import cv2
 2 import numpy as np
 3
 4 img = cv2.imread('9.jpg',0)
 5 kernel = np.ones((5,5),np.uint8)
 6 tophat = cv2.morphologyEx(img, cv2.MORPH_TOPHAT, kernel)
 7
 8 cv2.imshow('img',img)
 9 cv2.imshow('tophat',tophat)
10
11 cv2.waitKey(0)
黑帽:
闭运算与原始图像的差(注意是闭运算减去原始图像,与礼帽不相反)
blackhat = cv2.morphologyEx(img, cv2.MORPH_BLACKHAT, kernel)- 1
结构化元素
前面使用numpy构建结构化元素,都是正方形的核。如果要构建圆形或者椭圆形的核,可以使用 cv2.getStructuringElement()函数。
参数填入形状和大小
 1 # 矩形核
 2 >>> cv2.getStructuringElement(cv2.MORPH_RECT,(5,5))
 3 array([[1, 1, 1, 1, 1],
 4        [1, 1, 1, 1, 1],
 5        [1, 1, 1, 1, 1],
 6        [1, 1, 1, 1, 1],
 7        [1, 1, 1, 1, 1]], dtype=uint8)
 8
 9 # 椭圆形核
10 >>> cv2.getStructuringElement(cv2.MORPH_ELLIPSE,(5,5))
11 array([[0, 0, 1, 0, 0],
12        [1, 1, 1, 1, 1],
13        [1, 1, 1, 1, 1],
14        [1, 1, 1, 1, 1],
15        [0, 0, 1, 0, 0]], dtype=uint8)
16
17 # 十字形核
18 >>> cv2.getStructuringElement(cv2.MORPH_CROSS,(5,5))
19 array([[0, 0, 1, 0, 0],
20        [0, 0, 1, 0, 0],
21        [1, 1, 1, 1, 1],
22        [0, 0, 1, 0, 0],
23        [0, 0, 1, 0, 0]], dtype=uint8)