Messaging Layer --> CRM --> RA
systemd:/usr/lib/systemd/system
systemd有一个特性,即便一个服务开机启动,但是在开机后这个服务依然不会启动这就是开机启动特别快的原因,只有服务第一次在真正被访问的时候才会被启动, 所以systemd真正读取的文件是/etc/systemd/system,所以处于enable状态的服务会在/etc/systemd/system/目录下创建一个连接。
如何不再借助于pcsd手动安装配置corosync+pacemaker?
高可用集群中任何节点之间必须有机制可以传递彼此的心跳和集群事务信息,传递心跳和集群事务信息的方案有哪些?
heartbeat信息传递:
Unicast(udpu):单播方式,效率低,每一次心跳要传多次。
Mutlicast(使用udp协议):多播或组播,只有在同一个组播域的主机才可以收到。建议使用
Broadcast:广播,缺点是在网络中占据很多带宽以及影响其他主机
组播地址:用于标识一个IP组播域:IANA(互联网数字分配机构)把D类地址留给组播使用,范围是:224.0.0.0-239.255.255.255
但组播地址并不是任意使用的,分为三类:
永久组播地址:224.0.0.0-224.0.0.255
临时组播地址:224.0.1.0-238.255.255.255 组播地址只需要一个,所有集群节点都在同一个组播地址上通信,配置高可用集群时可以使用临时组播地址
本地组播地址:239.0.0.0-239.255.255.255 有特殊作用
配置基于多播的、安全认证的corosync三节点集群,并在集群上配置完整的web服务
如何不再借助于pcsd手动安装配置corosync+pacemaker+crmsh?
如何配置高可用集群以组播方式进行通信?
环境:两台centos7虚拟机:192.168.128.128 192.168.128.129
高可用集群的前提条件:
1、时间同步
2、主机名能互相解析和访问,而且必须是当前使用的主机名
3、基于密钥通信
# yum install corosync pacemaker
# rpm -ql corosync
/etc/corosync //配置文件目录,有两个,基于那种方式进行通信,就使用哪种样例进行配置
/etc/corosync/corosync.conf.example //基于多播方式进行通信
/etc/corosync/corosync.conf.example.udpu //基于udpu通信
/usr/lib/systemd/system/corosync.service //服务控制脚本
# rpm -ql pacemaker
/etc/sysconfig/pacemaker //pacemaker启动时的环境配置文件,可以编辑pacemaker的很多特性
/usr/lib/systemd/system/pacemaker.service //在centos7上作为一个独立的服务运行
/usr/libexec/pacemaker/attrd
/usr/libexec/pacemaker/cib
/usr/libexec/pacemaker/cibmon
/usr/libexec/pacemaker/crmd
/usr/libexec/pacemaker/lrmd
/usr/libexec/pacemaker/lrmd_internal_ctl
/usr/libexec/pacemaker/pengine
/usr/libexec/pacemaker/stonith-test
/usr/libexec/pacemaker/stonithd
corocync的组成层次 以下参考:http://ju.outofmemory.cn/entry/225781

a.Messaging Layer(Messaging/Infrastructure):信息层,心跳信息传输层。
b.RA(Resource Allocation):资源分配层。该层的核心组件叫CRM。
1).CRM(Cluster Resources Manager): 集群资源管理器,依赖于各自底层的Messaging Layer。高可用集群中任何资源都不应该自行启动,而是由CRM管理启动的,是由CRM做决策的。
2).ha_aware: 如果一个应用程序自己能够利用底层心跳信息传递层的功能完成集群事物决策的过程的软件就叫ha_aware。
3).DC(Designated Coordinator):指定协调员 ,CRM上必须有一个资源被推举为管理者,它的工作是全局决策集群中的所有事物,当DC所在的主机挂了就会先选出一个新的DC,再由DC做出事物的决策。DC之所以能完成事务决策,主要应 用于Policy Engine,是依靠PE来实现的。DC要不断的收集所有节点和所有集群内的状态信息,一旦发现某个节点出现故障时,就要在本地做出集群事务决策的,这个事务决策要通过CRM借助于corosync/OpenAIS这个层次,通知给集群 所有其他节点corosync,再由corosync再通知给本地的CRM,由LCRM执行系统操作。
4).LRM(Local Resource Manager):本地资源管理层,该层是真正去把CRM层的决策去落实的层次。
5).PE(Policy Engine):策略引擎,决定决策的引擎。所谓策略引擎就是将底层信息层收集的整个集群中所有节点上的信息进行整合,决定策略节点运行在哪个节点上,并通知其它节点上的资源管理器来实现资源的启动和关闭等操作的引擎。
6).TE(Transition Engine):传输引擎,把PE做出的决策通告给对应节点的CRM的引擎。
7).CIB(Cluster Information Base): 集群信息库,整个集群的集群配置都在集群信息库中,每一个节点都应该一模一样。无论在任何一个节点打开CMR或者pcs执行集群配置的时候,都要连接到DC进行配置,而且在commit后DC还要把信息同步到其他所有节点,所有节点的CIB都是一样的。一个专门的进程来专门实现集群事务管理。
c.RA(Resource Agent):资源代理。资源代理就是能够接收CRM的调度,用于实现在节点上对某一资源完成管理的工具,通常是一些脚本。
1).LSB( linux standard base) :/etc/init.d/*下的脚本就属于LSB
2).OCF(Open Cluster Framework): / .isolation heartbeat linbit openstack pacemaker。开放集群架构,那些提供资源代理脚本的组织叫 provider ,pacemaker、linbit、heartbeat都是provider。
3).service: 一些系统的服务
4).stonith(Shoot-The-Other-Node-In-The-Head[爆其他节点的头]): 在某些情况下,可能会需要关闭节点的电源来保证共享数据的完整性或是完全地恢复资源。为此Pacemaker引入了STONITHd。在Pacemaker中,STONITH设备被当成资源(并且是在CIB中配置)从而轻松地监控,然而STONITHd会注意理解STONITH拓扑,比如它的客户端请求隔离一个节点,它会重启那个机器。
5).systemd: 一些系统的服务
Corosync :
Corosync是集群管理套件的一部分,它在传递信息的时候可以通过一个简单的配置文件来定义信息传递的方式和协议等,是一组通信系统与附加功能中实现高可用性的应用程序。
# cd /etc/corosync //查看里面的文件
# cp corosync.conf.example corosync.conf //将多播的示例文件改为corosync.conf,并进行修改
# vim corosync.conf https://blog.csdn.net/gzhouc/article/details/53241212
# Please read the corosync.conf.5 manual page
totem {   //定义两个节点或者多个节点是如何传递心跳信息和集群事务信息,即定义事务传递信息协议的
        version: 2
crypto_cipher: aes128 //加密方式
crypto_hash: sha1
secauth: on //开启安全认证功能
        # crypto_cipher and crypto_hash: Used for mutual node authentication.
        # If you choose to enable this, then do remember to create a shared
        # secret with "corosync-keygen".
        # enabling crypto_cipher, requires also enabling of crypto_hash.
        crypto_cipher: none
        crypto_hash: none

        # interface: define at least one interface to communicate
        # over. If you define more than one interface stanza, you must
        # also set rrp_mode.
        interface {  //定义集群事务信息传递接口的
                # Rings must be consecutively numbered, starting at 0.
                ringnumber: 0  //每个服务器的网络接口比较多,通过ring0的定义主心跳信息的传递接口,如果信息传递出去又回来了,证明这个接口是无法传递,所以就使用ring0进行传递
                ....
                bindnetaddr: 192.168.1.0   //指明interface打算绑定在那个网络内的接口上
         }
}
//下面添加节点列表,也可以不加,只要认证通过就不用加,这里先暂时不添加
#nodelist {
# node {
# ring0_addr: 192.168.128.128
# nodeid: 1
# }
# node {
# ring0_addr: 192.168.128.129
# nodeid: 2
# }
#}
corosync想要安全认证的话就要有一个认证文件
# corosync-keygen //使用命令生成,注意这里生成可能很慢,最好是下载大文件
//生成传递心跳信息时的预共享密钥,生成密钥时需要用到 /dev/random 一共需要1024位的长度,生成后的密钥文件会在配置文件目录下自行生成一个authkey文件;
Corosync Cluster Engine Authentication key generator.
Gathering 1024 bits for key from /dev/random.
Press keys on your keyboard to generate entropy.
Press keys on your keyboard to generate entropy (bits = 48).
Press keys on your keyboard to generate entropy (bits = 96).
Press keys on your keyboard to generate entropy (bits = 144).
Press keys on your keyboard to generate entropy (bits = 192).
Press keys on your keyboard to generate entropy (bits = 240).
Press keys on your keyboard to generate entropy (bits = 288).
Press keys on your keyboard to generate entropy (bits = 336).
Press keys on your keyboard to generate entropy (bits = 384).
Press keys on your keyboard to generate entropy (bits = 432).
Press keys on your keyboard to generate entropy (bits = 480).
Press keys on your keyboard to generate entropy (bits = 528).
Press keys on your keyboard to generate entropy (bits = 576).
Press keys on your keyboard to generate entropy (bits = 624).
Press keys on your keyboard to generate entropy (bits = 672).
Press keys on your keyboard to generate entropy (bits = 720).
Press keys on your keyboard to generate entropy (bits = 768).
Press keys on your keyboard to generate entropy (bits = 816).
Press keys on your keyboard to generate entropy (bits = 864).
Press keys on your keyboard to generate entropy (bits = 912).
Press keys on your keyboard to generate entropy (bits = 960).
Press keys on your keyboard to generate entropy (bits = 1008).
Writing corosync key to /etc/corosync/authkey.
注意: 参考自https://blog.csdn.net/gzhouc/article/details/53241212
corosync-keygen命令生成密钥时会用到 /dev/random,/dev/random是 Linux系统下的随机数生成器,它会从当前系统的内存中一个叫熵池的地址空间中根据系统中断来生成随机数,加密程序或密钥生成程序会用到大量的随机数,就会出现随机数不够用的情况,random 的特性就是一旦熵池中的随机数被取空,会阻塞当前系统进程等待产生中断会继续生成随机数;
由于此处会用到1024位长度的密钥,可能会存在熵池中的随机数不够用的情况,就会一直阻塞在生成密钥的阶段,两种解决办法:
1、手动在键盘上输入大量字符,产生系统中断(产生中断较慢,不建议使用)
2、通过互联网或FTP服务器下载较大的文件(产生中断较快,建议使用)
# scp -p authkey corosync.conf node2:/etc/corosync/ //将corosync的文件复制到其他节点,-p是保留原有权限,注意是corosync的文件不是集群的文件
下面在node2(192.168.128.129)节点上验证一下
# systemctl start corosync //在node1节点和node2节点启动corosync服务
# ps -aux //可以看到corosync已经启动
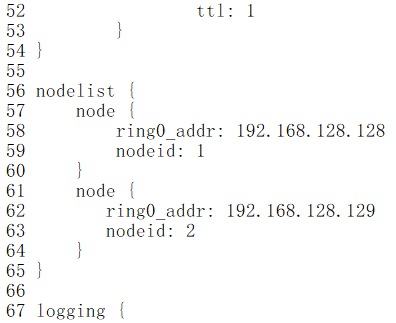
编辑corocync.conf文件,添加节点列表
[root@node1 corosync]# vim corosync.conf
# systemctl restart corosync //重启corosync后可以查看
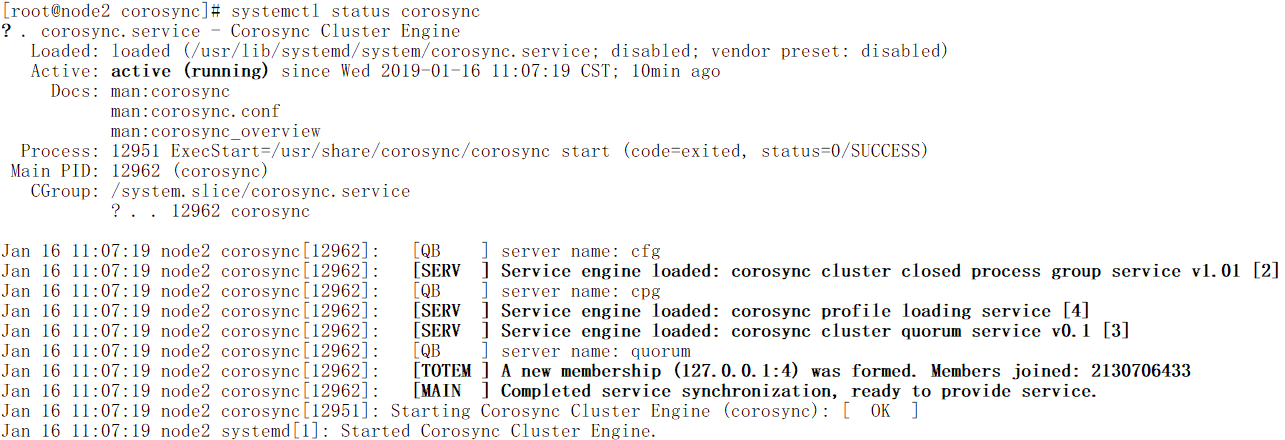
# systemctl status corosync


# corosync-cmapctl //查看集群的所有信息
# grep -v '^[[:space:]]*#' corosync.conf //corosync的完整可用配置
 1 totem {
 2     version: 2
 3         crypto_cipher: aes128
 4     crypto_hash: sha1
 5     secauth: on
 6
 8     interface {
 9         ringnumber: 0
10         bindnetaddr: 192.168.1.0
11         mcastaddr: 239.255.1.1   //这里可以修改
12         mcastport: 5405
13         ttl: 1
14     }
15 }
16
17 nodelist {
18     node {
19         ring0_addr: 192.168.128.128
20     nodeid: 1
21     }
22     node {
23        ring0_addr: 192.168.128.129
24        nodeid: 2
25     }
26 }
27
28 logging {
29     fileline: off
30     to_stderr: no
31     to_logfile: yes
32     logfile: /var/log/cluster/corosync.log
33     to_syslog: yes
34     debug: off
35     timestamp: on
36     logger_subsys {
37         subsys: QUORUM
38         debug: off
39     }
40 }
41
42 quorum {
43        provider: corosync_votequorum
44 }
以上配置证明massiging layer是没有问题的
# vim /etc/sysconfig/pacemaker //pacemaker的配置文件
PCMK_logfile=/var/log/pacemaker.log //可以单独启用日志文件
# systemctl start pacemaker
# systemctl status pacemaker
.pacemaker.service - Pacemaker High Availability Cluster Manager
   Loaded: loaded (/usr/lib/systemd/system/pacemaker.service; disabled; vendor preset: disabled)
   Active: active (running) since Wed 2019-01-16 12:12:55 CST; 22h ago
     Docs: man:pacemakerd
           https://clusterlabs.org/pacemaker/doc/en-US/Pacemaker/1.1/html-single/Pacemaker_Explained/index.html
 Main PID: 14253 (pacemakerd)
   CGroup: /system.slice/pacemaker.service
           ?..14253 /usr/sbin/pacemakerd -f
           ?..14254 /usr/libexec/pacemaker/cib
           ?..14255 /usr/libexec/pacemaker/stonithd
           ?..14256 /usr/libexec/pacemaker/lrmd
           ?..14257 /usr/libexec/pacemaker/attrd
           ?..14258 /usr/libexec/pacemaker/pengine
           ?..14259 /usr/libexec/pacemaker/crmd

Jan 17 09:59:24 node1 crmd[14259]:   notice: State transition S_IDLE -> S_POLICY_ENGINE
Jan 17 09:59:24 node1 pengine[14258]:   notice: Delaying fencing operations until there are resources to manage
Jan 17 09:59:24 node1 pengine[14258]:   notice: Calculated transition 43, saving inputs in /var/lib/pacemaker/pengine/pe-input-11.bz2
Jan 17 09:59:24 node1 crmd[14259]:   notice: Transition 43 (Complete=0, Pending=0, Fired=0, Skipped=0, Incomplete=0, Source=/var/lib/pacemaker/pengine/pe-input-11.bz2): Complete
Jan 17 09:59:24 node1 crmd[14259]:   notice: State transition S_TRANSITION_ENGINE -> S_IDLE
Jan 17 10:14:24 node1 crmd[14259]:   notice: State transition S_IDLE -> S_POLICY_ENGINE
Jan 17 10:14:24 node1 pengine[14258]:   notice: Delaying fencing operations until there are resources to manage
Jan 17 10:14:24 node1 pengine[14258]:   notice: Calculated transition 44, saving inputs in /var/lib/pacemaker/pengine/pe-input-11.bz2
Jan 17 10:14:24 node1 crmd[14259]:   notice: Transition 44 (Complete=0, Pending=0, Fired=0, Skipped=0, Incomplete=0, Source=/var/lib/pacemaker/pengine/pe-input-11.bz2): Complete
Jan 17 10:14:24 node1 crmd[14259]:   notice: State transition S_TRANSITION_ENGINE -> S_IDLE
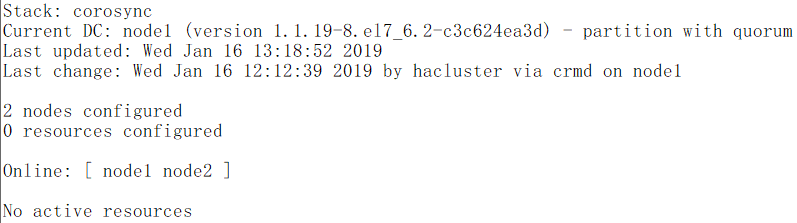
# crm_mon //这个工具是pacemaker自带的,不是crmsh的。如果可以操作xml文件的话,那么pcs和crmsh都可以不用
下面使用crmsh定义资源,注意在多个节点时,crmsh只需要在操作的节点上安装就可以,不需要在每个节点都安装
# crm_verify -L -V //开启了STONINH,需要关闭


下面安装crmsh工具管理集群 https://www.cnblogs.com/hanshanxiaoheshang/p/10227187.html
这里两台高可用节点都安装了crmsh,由于centos7中没有自带crmsh,所以不能使用yum源安装
# cd /etc/yum.repo.d/ //切换目录
# OSVERSION=$(cat /etc/centos-release | sed -rn 's/.* ([[:digit:]]).*/1/p') //取得系统的版本号
# wget http://download.opensuse.org/repositories/network:/ha-clustering:/Stable/CentOS_CentOS-${OSVERSION}/network:ha-clustering:Stable.repo //将变量OSVERSION换成系统版本号
# yum install crmsh
# yum install pssh //因为crmsh是基于ssh进行远程管理的,所以需要安装pssh,pssh依赖于python-pssh,安装时会自动解决依赖关系
# rpm -qi pssh
[root@node1 ~]# crm //下面就可以使用crm了
crm(live)# help
crm(live)#
找一个节点(192.168.128.130)配置为nfs服务
三个资源:VIP、web服务、文件系统,通过nfs提供一个文件系统,哪个节点提供web服务那么这个节点就挂载文件系统,其他节点不能挂载。
VIP:192.168.128.135 是ocf:heartbeat:IPaddr里面的资源
httpd:是systemd里面的资源
nfs shared storage:共享存储,是ocf:heartbeat:Filesystem里面的资源,可以完成文件系统的自动挂载,必要时还可以自动拆除。
HA的web service示例
先配置nfs服务,在node3节点(192.168.184.130)
# yum install nfs-utils //先安装
# mkdir /www/htdocs -pv
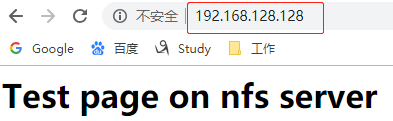
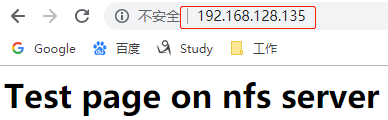
# echo "<h1>Test page on nfs server</h1>" > /www/htdocs/index.html
# vim /etc/exports //把/www/htdocs这个目录输出出去
/www/htdocs 192.168.128.0/24(rw)
# systemctl start nfs //启动
# systemctl enable nfs
在高可用集群的节点上对共享目录进行操作,这里使用node1(192.168.128.128)进行操作
# showmount -e 192.168.128.130 //查看共享目录
Export list for 192.168.128.130:
/www/htdocs 192.168.128.0/24
# yum install httpd -y //确保节点安装了httpd
# mount -t nfs 192.168.128.130:/www/htdocs /var/www/html //将共享目录挂载至web服务的目录下
# mount //使用mount就可以查看挂载的目录
192.168.128.130:/www/htdocs on /var/www/html type nfs4 (rw,relatime,vers=4.1,rsize=131072,wsize=131072,namlen=255,hard,proto=tcp,port=0,timeo=600,retrans=2,sec=sys,clientaddr=192.168.128.128,local_lock=none,addr=192.168.128.130)
# systemctl start httpd //启动node1的web服务,并在浏览器中查看挂载的共享目录的页面内容
# systemctl stop httpd //关闭web服务
# umount /var/www/html/ //测试成功,所以要把挂载的共享目录卸载了
注意每一个高可用节点都要测试一下是否可以挂载共享目录,这里经测试node2节点可以成功挂载和访问共享目录
下来就开始配置资源,这次不再通过组来配置资源,而是通过约束来配置资源。
排列约束:必须在一起
位置约束:没有必要定义,位置约束定义的是这些资源倾向于运行在哪个节点
顺序约束:先启动IP,再启动文件系统,最后启动web 服务。IP和文件系统启动顺序没有很明显区分。
# crm configure
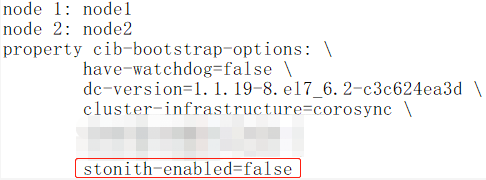
crm(live)configure# property stonith-enabled=false //先关闭stonith,在property后双击tab键就可以查看所有命令
# verify //进行检查
# commit //确认无误后即可提交
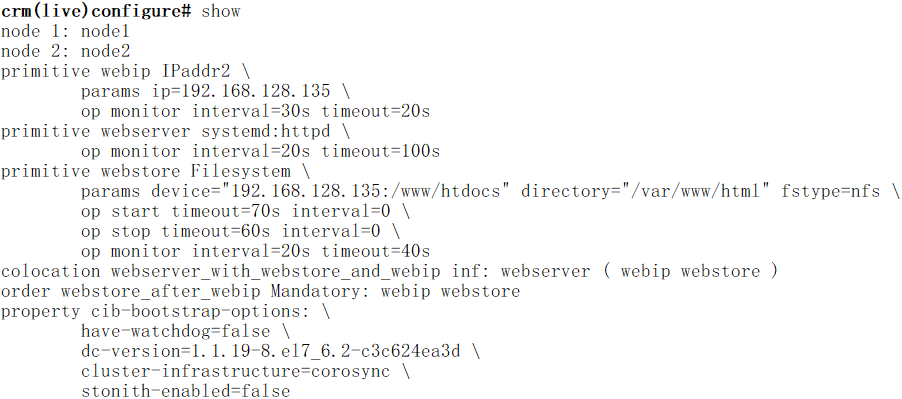
crm(live)configure# show
# crm_verify -L -V //此时就不再报错了
定义IP资源
crm(live)ra# list ocf heartbeat //列出heartbeat下的资源带来
CTDB                 Delay                Dummy                Filesystem           IPaddr               IPaddr2              IPsrcaddr            LVM                  LVM-activate
MailTo               NodeUtilization      Route                SendArp              Squid                VirtualDomain        Xinetd               aliyun-vpc-move-ip   apache
aws-vpc-move-ip      awseip               awsvip               azure-lb             clvm                 conntrackd           db2                  dhcpd                docker
ethmonitor           exportfs             galera               garbd                iSCSILogicalUnit     iSCSITarget          iface-vlan           lvmlockd             mysql
nagios               named                nfsnotify            nfsserver            nginx                oraasm               oracle               oralsnr              pgsql
portblock            postfix              rabbitmq-cluster     redis                rsyncd               slapd                sybaseASE            symlink              tomcat
vdo-vol
crm(live)ra# info IPaddr //查看资源代理IPaddr的用法
或者
crm(live)ra# info ocf:heartbeat:IPaddr
primitive扩展
crm(live)configure# help primitive
Usage:

primitive <rsc> {[<class>:[<provider>:]]<type>|@<template>}  //这里定义的主资源
  [description=<description>]
  [[params] attr_list]
  [meta attr_list]
  [utilization attr_list]
  [operations id_spec]
    [op op_type [<attribute>=<value>...] ...]  //op表示option,如果一个资源定义好了,假如在一个节点上启动IP地址,如果这个IP地址无法启动该如何处理?

attr_list :: [$id=<id>] [<score>:] [rule...]
             <attr>=<val> [<attr>=<val>...]] | $id-ref=<id>
id_spec :: $id=<id> | $id-ref=<id>
op_type :: start | stop | monitor   //op的类型,做监控操作,在刚开始启动时,如果其他节点已经启动就会冲突,此节点就无法启动,此时就要配置超时时间。monitor表示监控每隔多少秒采用status获取
                                    //当前资源的状态。

Example:

primitive apcfence stonith:apcsmart
  params ttydev=/dev/ttyS0 hostlist="node1 node2"
  op start timeout=60s
  op monitor interval=30m timeout=60s

primitive www8 apache
  configfile=/etc/apache/www8.conf
  operations $id-ref=apache_ops

primitive db0 mysql
  params config=/etc/mysql/db0.conf
  op monitor interval=60s
  op monitor interval=300s OCF_CHECK_LEVEL=10

primitive r0 ocf:linbit:drbd
  params drbd_resource=r0
  op monitor role=Master interval=60s    //这里监控主节点
  op monitor role=Slave interval=300s
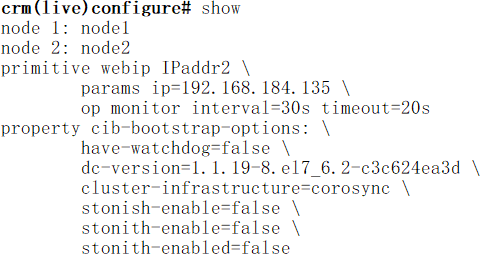
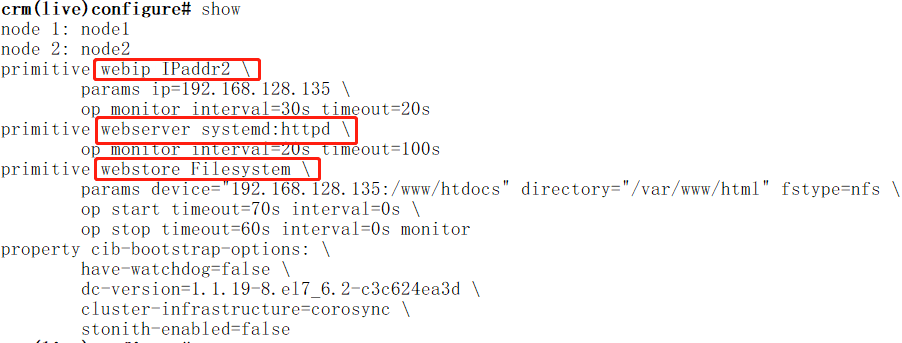
crm(live)configure# primitive webip ocf:heartbeat:IPaddr2 params ip="192.168.128.135" op monitor interval=30s timeout=20s
//moniter表示每个30秒监控一次,超时时间是20s,即每个30秒采样一次,采样不成功20s内超时
crm(live)configure# verify //校验
crm(live)configure# edit //如果发现上述定义错误,则可以使用edit进行编辑
crm(live)configure# delete webip //可以使用delete进行删除
下面定义web资源,不过在定义之前应该先确定类别systemd下有httpd
[root@node1 ~]# crm ra
crm(live)ra# list systemd //此时可以查看有httpd
crm(live)configure# primitive webserver systemd:httpd op monitor interval=20s timeout=20s
crm(live)configure# verify //注意一定要做校验

下面定义第三个资源即文件系统资源
crm(live)ra# list ocf heartbeat //列表中有一个为Filename的资源代理
crm(live)ra# info ocf:heartbeat:Filesystem
Parameters (*: required, []: default):    //下面三个选项必须指明

device* (string): block device   //指明要挂载哪个设备
    The name of block device for the filesystem, or -U, -L options for mount, or
 NFS mount specification.

directory* (string): mount point    //指明要挂载的位置
    The mount point for the filesystem.

fstype* (string): filesystem type   //指明文件系统类型
    The type of filesystem to be mounted.
crm(live)configure# primitive webstore ocf:heartbeat:Filesystem params device="192.168.128.130:/www/htdocs" directory="/var/www/html" fstype="nfs" op start timeout=70s op stop timeout=60s op monitor interval=20s timeout=40s //注意这里是130,后面的IP有错误
crm(live)configure# verify //必须做检查
同时上述对三个节点的定义一定不能提交,因为一旦提交前面定义的三个资源可能就会分不到不同的节点上。
下面据要对三个资源定义约束,即这三个资源必须要在同一个节点,定义排列约束
- location 位置约束
- colocation 排列约束
- order 顺序约束
Usage:

colocation <id> <score>: <rsc>[:<role>] <with-rsc>[:<role>]   //score表示分数,使用with的时候只能定义两个资源
  [node-attribute=<node_attr>]                                //这里定义webserver必须要和webip和webstore在一起即webserver(webip webstore)

colocation <id> <score>: <resource_sets>
  [node-attribute=<node_attr>]

resource_sets :: <resource_set> [<resource_set> ...]

resource_set :: ["("|"["] <rsc>[:<role>] [<rsc>[:<role>] ...]
                [<attributes>]  [")"|"]"]

attributes :: [require-all=(true|false)] [sequential=(true|false)]


Example:

colocation never_put_apache_with_dummy -inf: apache dummy  //inf是正无穷,
colocation c1 inf: A ( B C )
crm(live)configure# colocation webserver_with_webstore_and_webip inf: webserver ( webip webstore )
//webserver_with_webstore_and_webip是排列约束的名称

crm(live)configure# show xml
<?xml version="1.0" ?>
<cib num_updates="0" dc-uuid="1" update-origin="node1" crm_feature_set="3.0.14" validate-with="pacemaker-2.10" update-client="cibadmin" epoch="4" admin_epoch="0" update-user="root" cib-last
-written="Wed Jan 16 18:44:06 2019" have-quorum="1">
  <configuration>
    <crm_config>
      <cluster_property_set id="cib-bootstrap-options">
        <nvpair id="cib-bootstrap-options-have-watchdog" name="have-watchdog" value="false"/>
        <nvpair id="cib-bootstrap-options-dc-version" name="dc-version" value="1.1.19-8.el7_6.2-c3c624ea3d"/>
        <nvpair id="cib-bootstrap-options-cluster-infrastructure" name="cluster-infrastructure" value="corosync"/>
        <nvpair name="stonish-enable" value="false" id="cib-bootstrap-options-stonish-enable"/>
        <nvpair name="stonith-enable" value="false" id="cib-bootstrap-options-stonith-enable"/>
        <nvpair name="stonith-enabled" value="false" id="cib-bootstrap-options-stonith-enabled"/>
      </cluster_property_set>
    </crm_config>
    <nodes>
      <node id="1" uname="node1"/>
      <node id="2" uname="node2"/>
    </nodes>
    <resources>
      <primitive id="webstore" class="ocf" provider="heartbeat" type="Filesystem">
        <instance_attributes id="webstore-instance_attributes">
          <nvpair name="device" value="192.168.128.130:/www/htdocs" id="webstore-instance_attributes-device"/>
          <nvpair name="directory" value="/var/www/html" id="webstore-instance_attributes-directory"/>
          <nvpair name="fstype" value="nfs" id="webstore-instance_attributes-fstype"/>
        </instance_attributes>
        <operations>
          <op name="start" timeout="70s" interval="0" id="webstore-start-0"/>
          <op name="stop" timeout="60s" interval="0" id="webstore-stop-0"/>
          <op name="monitor" interval="20s" timeout="40s" id="webstore-monitor-20s"/>
        </operations>
      </primitive>
      <primitive id="webserver" class="systemd" type="httpd">
        <operations>
          <op name="monitor" interval="20s" timeout="100s" id="webserver-monitor-20s"/>
        </operations>
      </primitive>
      <primitive id="webip" class="ocf" provider="heartbeat" type="IPaddr2">
        <instance_attributes id="webip-instance_attributes">
          <nvpair name="ip" value="192.168.128.135" id="webip-instance_attributes-ip"/>
        </instance_attributes>
        <operations>
          <op name="monitor" interval="30s" timeout="20s" id="webip-monitor-30s"/>
        </operations>
      </primitive>
    </resources>
    <constraints>
      <rsc_colocation id="webserver_with_webstore_and_webip" score="INFINITY">
        <resource_set id="webserver_with_webstore_and_webip-0">
          <resource_ref id="webserver"/>
        </resource_set>
        <resource_set sequential="false" id="webserver_with_webstore_and_webip-1">
          <resource_ref id="webip"/>
          <resource_ref id="webstore"/>
        </resource_set>
      </rsc_colocation>
    </constraints>
  </configuration>
</cib>
(END)
下面查看顺序约束:order
crm(live)configure# help order
Usage:

order <id> [{kind|<score>}:] first then [symmetrical=<bool>]

order <id> [{kind|<score>}:] resource_sets [symmetrical=<bool>]

kind :: Mandatory | Optional | Serialize

first :: <rsc>[:<action>]

then ::  <rsc>[:<action>]

resource_sets :: resource_set [resource_set ...]

resource_set :: ["["|"("] <rsc>[:<action>] [<rsc>[:<action>] ...]
                [attributes] ["]"|")"]

attributes :: [require-all=(true|false)] [sequential=(true|false)]

Example:

order o-1 Mandatory: apache:start ip_1
order o-2 Serialize: A ( B C )
order o-3 inf: [ A B ] C
order o-4 first-resource then-resource
本次定义顺序约束:先webip,再webstore再webserver,这次是分开来定义
crm(live)configure# order webstore_after_webip Mandatory: webip webstore //Mandatory表示强制,这里定义的启动次序是webip、webstore
crm(live)configure# show xml
crm(live)configure# show xml
 <constraints>
      <rsc_colocation id="webserver_with_webstore_and_webip" score="INFINITY">
        <resource_set id="webserver_with_webstore_and_webip-0">
          <resource_ref id="webserver"/>
        </resource_set>
        <resource_set sequential="false" id="webserver_with_webstore_and_webip-1">
          <resource_ref id="webip"/>
          <resource_ref id="webstore"/>
        </resource_set>
      </rsc_colocation>
      <rsc_order id="webstore_after_webip" kind="Mandatory" first="webip" then="webstore"/>
    </constraints>
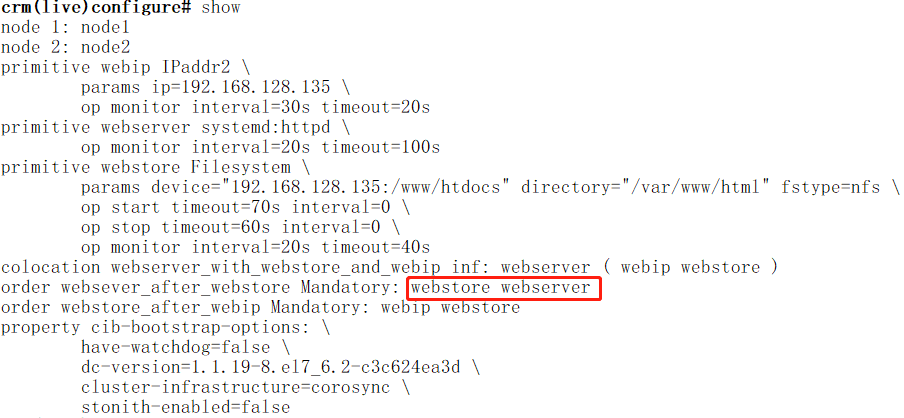
crm(live)configure# order websever_after_webstore Mandatory: webstore webserver //定义启动次序是webstore、webserver
crm(live)configure# show xml
<constraints>
      <rsc_colocation id="webserver_with_webstore_and_webip" score="INFINITY">
        <resource_set id="webserver_with_webstore_and_webip-0">
          <resource_ref id="webserver"/>
        </resource_set>
        <resource_set sequential="false" id="webserver_with_webstore_and_webip-1">
          <resource_ref id="webip"/>
          <resource_ref id="webstore"/>
        </resource_set>
      </rsc_colocation>
      <rsc_order id="websever_after_webstore" kind="Mandatory" first="webstore" then="webserver"/>
      <rsc_order id="webstore_after_webip" kind="Mandatory" first="webip" then="webstore"/>
    </constraints>
crm(live)configure# verify
crm(live)configure# commit //校验没问题后就可以提交了,注意在提交之前node1节点的httpd服务是没有启动的,commit后httpd会被cmrsh管理器启动,也同 //时会把nfs的/www/htdocs挂载到/var/www/html目录上
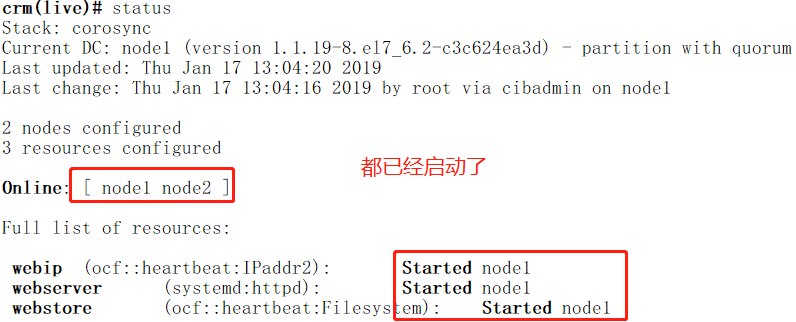
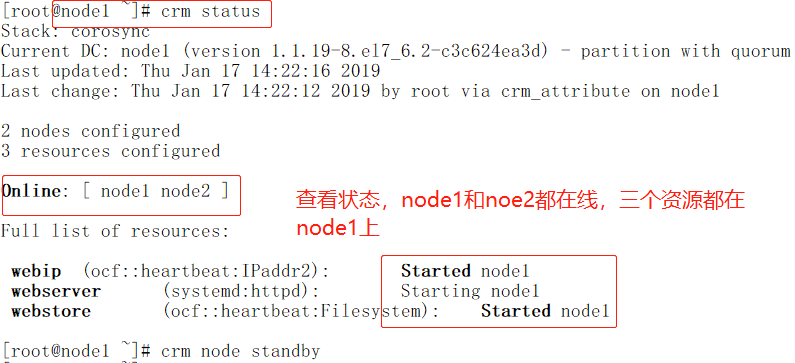
在node1上可以查看到VIP在node1上

在node1节点上查看httpd服务时已经启动的了
[root@node1 ~]# mount //在node1上查看,已经被挂载
192.168.128.130:/www/htdocs on /var/www/html type nfs4 (rw,relatime,vers=4.1,rsize=131072,wsize=131072,namlen=255,hard,proto=tcp,port=0,timeo=600,retrans=2,sec=sys,clientaddr=192.168.128.128,local_lock=none,addr=192.168.128.130)
此时在浏览器中VIP已经可以访问了
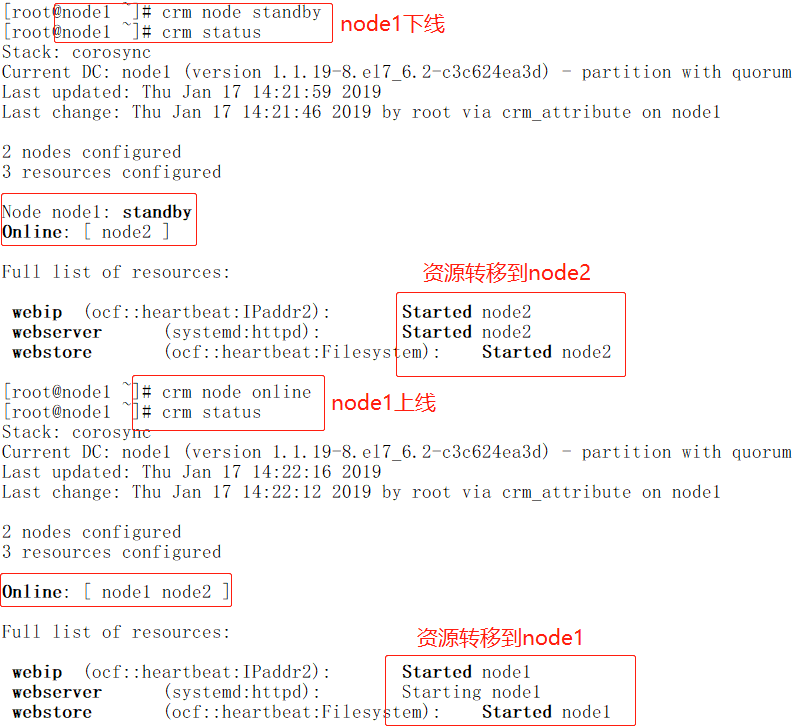
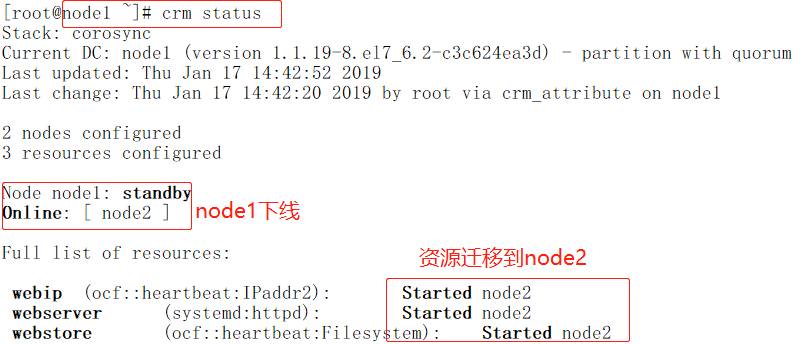
下面测试迁移

可以对ip、httpd服务和nfs共享目录是否挂载进行验证
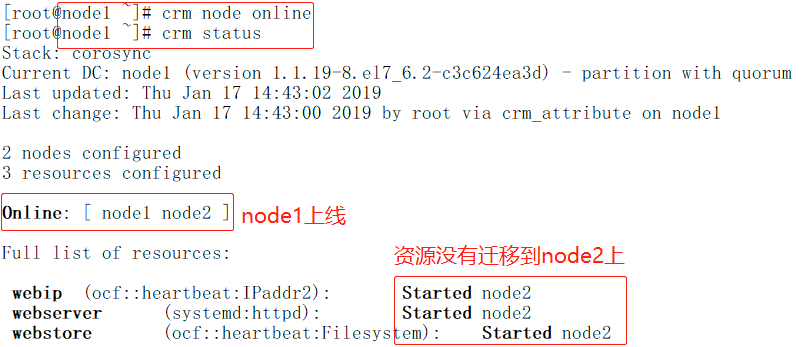
[root@node1 ~]# crm node online //让node1再回来,如果要是定义了位置约束,那么只要node1回来,资源就会转移到node1
下面定义位置约束
crm(live)configure# help location
Usage:

location <id> <rsc> [<attributes>] {<node_pref>|<rules>}   //定义资源(rsc)对节点的倾向性(node_pref)或者规则(rules)

rsc :: /<rsc-pattern>/
        | { resource_sets }
        | <rsc>

attributes :: role=<role> | resource-discovery=always|never|exclusive

node_pref :: <score>: <node>

rules ::
  rule [id_spec] [$role=<role>] <score>: <expression>
  [rule [id_spec] [$role=<role>] <score>: <expression> ...]

id_spec :: $id=<id> | $id-ref=<id>
score :: <number> | <attribute> | [-]inf
expression :: <simple_exp> [<bool_op> <simple_exp> ...]
bool_op :: or | and
simple_exp :: <attribute> [type:]<binary_op> <value>
          | <unary_op> <attribute>
          | date <date_expr>
type :: string | version | number
binary_op :: lt | gt | lte | gte | eq | ne
unary_op :: defined | not_defined

date_expr :: lt <end>
         | gt <start>
         | in start=<start> end=<end>
         | in start=<start> <duration>
         | spec <date_spec>
duration|date_spec ::
         hours=<value>
         | monthdays=<value>
         | weekdays=<value>
         | yearsdays=<value>
         | months=<value>
         | weeks=<value>
         | years=<value>
         | weekyears=<value>
         | moon=<value>

Examples:

location conn_1 internal_www 100: node1    //定义资源internal_www对node1的倾向性是100

location conn_1 internal_www     //定义资源internal_www对节点的名字(uname是node1)的倾向性分数是50分
  rule 50: #uname eq node1
  rule pingd: defined pingd

location conn_2 dummy_float
  rule -inf: not_defined pingd or pingd number:lte 0

# never probe for rsc1 on node1
location no-probe rsc1 resource-discovery=never -inf: node1
crm(live)configure# location webservice_pref_node1 webip 100: node1 //定义资源webip对node1的倾向性是100
crm(live)configure# verify
crm(live)configure# commit

定义默认粘性
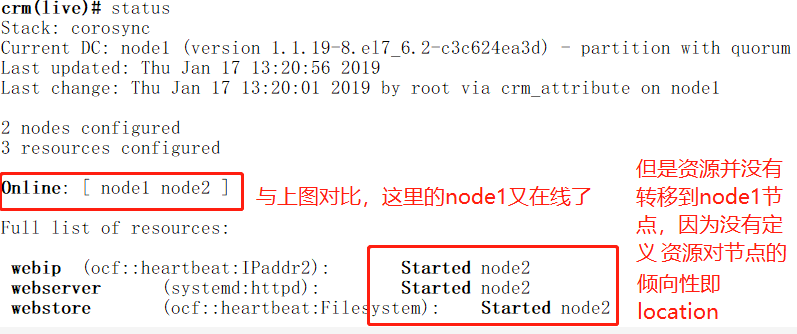
定义每一个资源对当前节点的默认粘性为100,三个资源的粘性和是300,只有webip对node1的默认倾向性是100,所以如果webip切换到node2上,那么在node1上线时webip就不会再切换到ndoe1上。
crm(live)configure# property
batch-limit=                   default-resource-stickiness=   migration-limit=               notification-agent=            start-failure-is-fatal=        stop-orphan-actions=
cluster-delay=                 election-timeout=              no-quorum-policy=              notification-recipient=        startup-fencing=               stop-orphan-resources=
cluster-ipc-limit=             enable-acl=                    node-action-limit=             pe-error-series-max=           stonith-action=                symmetric-cluster=
cluster-recheck-interval=      enable-startup-probes=         node-health-base=              pe-input-series-max=           stonith-enabled=
concurrent-fencing=            have-watchdog=                 node-health-green=             pe-warn-series-max=            stonith-max-attempts=
crmd-transition-delay=         is-managed-default=            node-health-red=               placement-strategy=            stonith-timeout=
dc-deadtime=                   load-threshold=                node-health-strategy=          remove-after-stop=             stonith-watchdog-timeout=
default-action-timeout=        maintenance-mode=              node-health-yellow=            shutdown-escalation=           stop-all-resources=
crm(live)configure# property default-resource-stickiness=50 //定义每一个资源对当前节点(注意这里是当前节点,当三个资源在node2上时,那么对于资源的node2就是当前节点,当资源在node1上时,那么对于资源node1就是当前节点)的默认粘性是50,三个资源定义的粘性和就是150。前面定义了webip对node1的倾向性是100,所以当三个资源迁移到node2上后,在node2不宕机的情况下是三个资源是不会迁移到node1上的。
crm(live)configure# commit //注意提交
粘性指对当前节点的倾向性,位置约束指对所配置的节点的倾向性,所以资源最终在哪个节点上既要取决于粘性和倾向性比值的大小
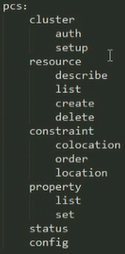
pcs的用法: