PyTorch in Action: A Step by Step Tutorial
PyTorch in Action: A Step by Step Tutorial
Installation Guide
Step 1, donwload the Miniconda and installing it on your computer.
The reason why explain installing conda is that some of classmates don`t have a conda environment on their computer.
https://mirrors.tuna.tsinghua.edu.cn/anaconda/miniconda/
Step 2, create a conda virtual envriomment
In this ariticle, we assume that there is a CPU version of PyTorch is going to be installed. To specifically distinguish CPU version and GPU version, we`re going to create a virtual environment named "PyTorch-CPU".
In the Conda Prompt run the following commands:
conda create -n PyTorch-CPU pipStep 3, install PyTorch
On the website of PyTorch(https://pytorch.org/), there is a guidance on the page. To chose the most appropriate options(e.g. as the follow figure).
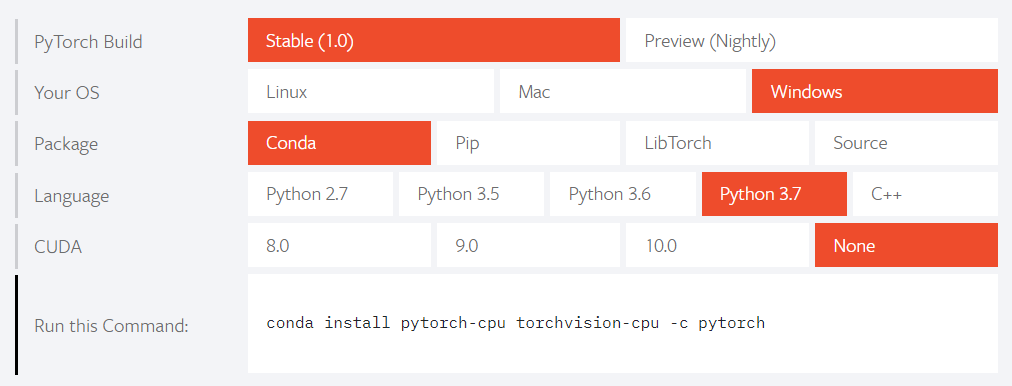
In the Conda Prompt run the following commands:
activate PyTorh-CPU
conda install pytorch-cpu torchvision-cpu -c pytorch
Congratulations, installation of PyTorch is complete!
pypi 源
国内源的地址
| 名称 | 地址 |
|---|---|
| 阿里云 | http://mirrors.aliyun.com/pypi/simple/ |
| 中国科技大学 | https://pypi.mirrors.ustc.edu.cn/simple/ |
| 豆瓣 | http://pypi.douban.com/simple/ |
| 清华大学 | https://pypi.tuna.tsinghua.edu.cn/simple/ |
使用方法
$ pip3 install {package name} -i http://mirrors.aliyun.com/pypi/simple/比如,安装 scikit-learn 的命令用例如下
$ pip3 install scikit-learn -i http://mirrors.aliyun.com/pypi/simple/