一,pom添加
我使用的bootstrap-ui。你们可以使用springfox-swagger-ui![]()
<!--    swagger    -->
        <dependency>
            <groupId>io.springfox</groupId>
            <artifactId>springfox-swagger2</artifactId>
            <version>2.8.0</version>
        </dependency>
        <dependency>
            <groupId>com.github.xiaoymin</groupId>
            <artifactId>swagger-bootstrap-ui</artifactId>
            <version>1.9.6</version>
        </dependency>
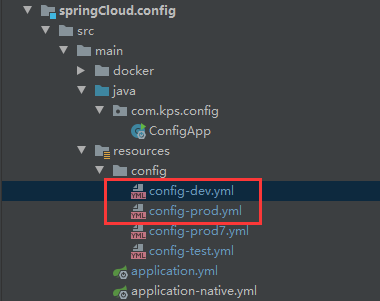
二,注册中心
在正式和测试,添加不同的配置。
![]()
dev:
#开启swagger
swagger:
  enable: true
prod:
#开启swagger
swagger:
  enable: false
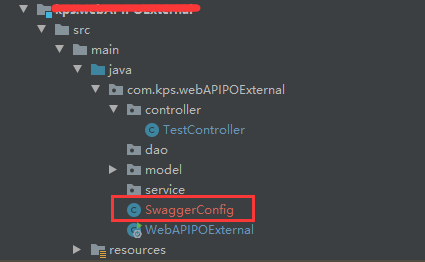
三,添加配置类
在需要的微服务上,添加配置类
![]()
package com.kps.webAPIPOExternal;

import io.swagger.annotations.ApiOperation;
import org.springframework.boot.autoconfigure.condition.ConditionalOnProperty;
import org.springframework.context.annotation.Bean;
import org.springframework.context.annotation.Configuration;
import springfox.documentation.builders.ApiInfoBuilder;
import springfox.documentation.builders.PathSelectors;
import springfox.documentation.builders.RequestHandlerSelectors;
import springfox.documentation.spi.DocumentationType;
import springfox.documentation.spring.web.plugins.Docket;
import springfox.documentation.swagger2.annotations.EnableSwagger2;

/**
 *@author Tyler
 *@date 2020/6/24
 */

@Configuration
@EnableSwagger2
@ConditionalOnProperty(name = "swagger.enable", havingValue = "true")
public class SwaggerConfig {
    @Bean
    public Docket createRestApi() {
        return new Docket(DocumentationType.SWAGGER_2)
                .apiInfo(new ApiInfoBuilder()
                        .title("API Document")
                        .description("API Document")
                        .version("1.0")
                        .build()
                )
                .select()
                .apis(RequestHandlerSelectors.withMethodAnnotation(ApiOperation.class))
                .paths(PathSelectors.any())
                .build();
    }

}
四,启动
启动注册中心,配置中心,服务
然后访问:http://localhost:9300/doc.html (记得修改端口)

![]()