通过前面的项目我们已经了解了很多和微服务项目相关的知识点,但是这些服务都没有界面,本章我们将为customer微服务项目添加一个界面,展示个别用户的详情。
注意:虽然微服务化后的系统都提倡前后端分离,但是传统的前端模版还是很有用的,本书将在后面对前后端分离进行专门讲解。
9.1 认识Thymeleaf
Spring Boot作为一个快速开发框架,本身对前端模板的支持是很完善的,比如Freemarker、Velocity以及Thymeleaf等。其中Thymeleaf对Html原型的良好支持让它备受开发人员喜欢。
Thymeleaf官网首页有如下一段话,很好地介绍了Thymeleaf这个模板的优点,具体可参看:Thymeleaf官网地址:https://www.thymeleaf.org。
Thymeleaf是作为一个服务端的Java模板引擎,虽然他的代码仍然和后台程序写在一个工程里面,和传统的JSP相似,但是在静态模式下,它的页面是可以正常展示的,可以让前端开发人员更方便地进行页面调整,在一定程度上将前端页面的工作分离开来。
9.2 引入Thymeleaf
在正式编写代码引入Thymeleaf之前,首先要了解到Spring Boot项目中模板的路径为:src/main/resources/templates。这个路径可以修改,但是一般我们使用默认的足矣。
和Spring Boot的其他集成相同,Thymeleaf也有自己的Starter包。在pom.xml中添加下面代码,向customer微服务添加Thymeleaf支持,完成一个简单的用户信息展示页。
<dependency>
     <groupId>org.springframework.boot</groupId>
     <artifactId>spring-boot-starter-thymeleaf</artifactId>
</dependency>
创建UserViewController.java文件,添加如下代码,完成单个用户的跳转:
package cn.com.hanbinit.customer.controller;

import cn.com.hanbinit.customer.model.User;
import cn.com.hanbinit.customer.service.UserService;
import org.springframework.beans.factory.annotation.Autowired;
import org.springframework.stereotype.Controller;
import org.springframework.ui.ModelMap;
import org.springframework.web.bind.annotation.GetMapping;
import org.springframework.web.bind.annotation.PathVariable;

@Controller // 这里使用@Controller注解,是因为这个文件中的接口需要进行页面跳转
public class UserViewController {

    @Autowired
    private UserService userService;

    /**
    * 根据用户Id现实用户信息
    * @param userId
    * @return
    */
    @GetMapping("/user/{userId}")
    public String userInfo(@PathVariable Integer userId, ModelMap map){

        User user = userService.getUserById(userId);
        // 将查询的user对象放入ModelMap中
        map.put("user", user);
        // 下面一行直接返回thymeleaf中的文件名(不带前缀)
        return "user_detail";
    }

}
同时,在resources/templates目录下添加文件user_detail.html。内容如下:
<!DOCTYPE html>
<html lang="en" xmlns:th="http://www.w3.org/1999/xhtml">

    <head>
        <meta charset="UTF-8">
        <title>用户基本信息</title>
    </head>

    <body>
        用户ID:<span th:text="${user['id']}">id</span> <br>
        用户名称:<span th:text="${user['nickname']}">name</span> <br>
        用户年龄:<span th:text="${user['age']}">age</span>
    </body>

</html>启动服务,如图9.1所示,通过接口http://localhost:8001/users查看当前表中已经存在的所有用户信息。
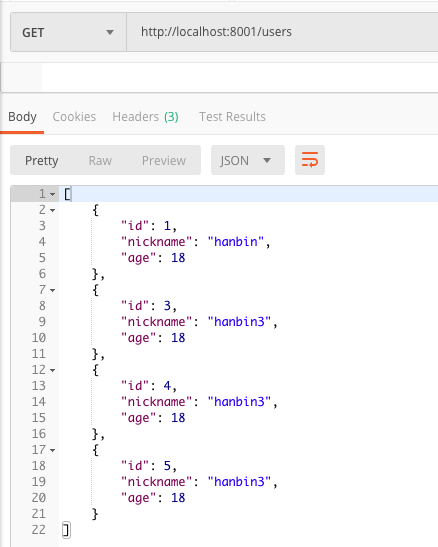 图9.1 当前已经存在的所有用户信息
我们尝试向本节新加接口中传参3,通过访问接口http://localhost:8001/users/3可以看到如图9.2的结果。
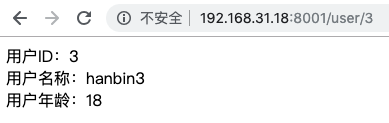 图9.2 Thymeleaf输出结果
到这里为止,我们在customer微服务中引入了Thymeleaf,并且实现了根据userId展示用户信息的功能。这里我们对Thymeleaf的语法不做过多讲解,感兴趣的同学可以直接到官网查阅(Thymeleaf
官方文档:https://www.thymeleaf.org/documentation.html)。
9.3 小结
本文通过一个很简单的例子,演示了如何在Spring Boot项目中引入Thymeleaf模板,并且通过简单的编码实现了根据userId格式化输出用户信息的接口。
除了Thymeleaf,Spring Boot对freemarker、Velocity以及JSP都有比较好的支持,但是因为JSP在嵌入式servlet容器时有部分限制,所以官方不建议使用。
在可执行的Spring Boot jar中,JSP是不能生效的,另外,Undertow不支持JSP。更详细的说明可以自行查询官方文档。
其实多说一句,JSP这个东西如果没有必要, 就不要深入学习了。