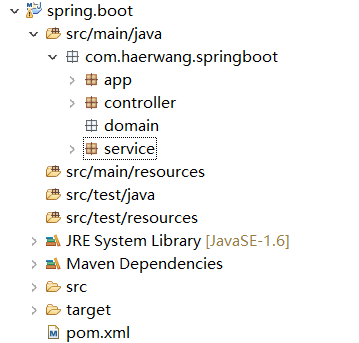
新建一个maven工程,并新建各层目录
编写pom.xml
<project xmlns="http://maven.apache.org/POM/4.0.0" xmlns:xsi="http://www.w3.org/2001/XMLSchema-instance"
	xsi:schemaLocation="http://maven.apache.org/POM/4.0.0 http://maven.apache.org/xsd/maven-4.0.0.xsd">
	<modelVersion>4.0.0</modelVersion>
	<groupId>com.haerwang</groupId>
	<artifactId>spring.boot</artifactId>
	<version>0.0.1-SNAPSHOT</version>

	<!--必须引用父模块,指明这是个springboot工程,帮我们实现很多jar包的依赖,不需要自己依赖jar包 -->
	<parent>
		<groupId>org.springframework.boot</groupId>
		<artifactId>spring-boot-starter-parent</artifactId>
		<version>1.3.6.RELEASE</version>
	</parent>

	<!--springboot默认集成mvc,遇到依赖以下web即可,相当于搭建好了web环境-->
	<dependencies>
		<dependency>
			<groupId>org.springframework.boot</groupId>
			<artifactId>spring-boot-starter-web</artifactId>
		</dependency>
	</dependencies>

</project>
新建一个controller
package com.haerwang.springboot.controller;

import org.springframework.web.bind.annotation.RequestMapping;
import org.springframework.web.bind.annotation.RestController;

/**
 * @author haerwang
 * @RestController ----相当于加了 @Controller 和 @ResponseBody(返回josn)
 */
@RestController
@RequestMapping("/hello")
public class HelloWorldController {

	@RequestMapping("/sayHello")
	public String sayHello() {
		return "hello";
	}
}
新建一个主程序main入口(启动用的,这也是网上说,springboot是一个独立的应用程序)
package com.haerwang.springboot.app;

import org.springframework.boot.SpringApplication;
import org.springframework.boot.autoconfigure.EnableAutoConfiguration;
import org.springframework.context.annotation.ComponentScan;


/**
 * @author haerwang
 * @ComponentScan 指明需要扫描的路径,扫描到的含有标签类会自动装载成bean,比如contoller层的@RestController
 * @EnableAutoConfiguration 程序启动标签,主程序入口,开始在这里加载各种配置
 */
@ComponentScan(basePackages = ("com.haerwang.springboot"))
@EnableAutoConfiguration
public class APP {
	public static void main(String[] args) {
		SpringApplication.run(APP.class, args);
	}
}
到此,可以直接右键main启动,在浏览器输入网址:http://localhost:8080/hello/sayHello即可
---------------------------------------------------------------------------------------------------------------------------------------------------------------------------------------------------------------------------------------------------------------------------------------------------
接下来新增一层,service,将逻辑延伸到新的一层
写一个service及实现类(习惯问题,可以直接写一个类)

package com.haerwang.springboot.service;

public interface HelloWorldService {
	String sayHello();
}
package com.haerwang.springboot.service.impl;


import org.springframework.stereotype.Service;

import com.haerwang.springboot.service.HelloWorldService;

@Service
public class HelloWorldServiceImpl implements HelloWorldService{

	@Override
	public String sayHello() {

		return "hello";
	}

}
注意这个@Service
修改controller
package com.haerwang.springboot.controller;

import org.springframework.beans.factory.annotation.Autowired;
import org.springframework.web.bind.annotation.RequestMapping;
import org.springframework.web.bind.annotation.RestController;

import com.haerwang.springboot.service.HelloWorldService;

/**
 * @author haerwang
 * @RestController ----相当于加了 @Controller 和 @ResponseBody(返回josn)
 */
@RestController
@RequestMapping("/hello")
public class HelloWorldController {

	@Autowired
	HelloWorldService helloWorldService;

	@RequestMapping("/sayHello")
	public String sayHello() {
		return helloWorldService.sayHello();
	}
}
老方法启动,效果依旧