基于理解了RESP原理的基础上,手写一个Redis客户端,实现一个自己的Jedis(mini版)。
RESP参考:【Redis】Redis序列化协议(RESP)
一、简洁版Jedis
分析
1、建立连接
SimpleJedis的构造方法,完成建立连接;
我们平时使用Jedis时,其实本质也是一样的实现;
1 // 创建client
2 Jedis jedis = new Jedis("127.0.0.1", 6379);
3 // 创建socket连接,发送socket流
4 String ret = jedis.set("aaa", "11");
2、set 命令
SimpleJedis#set(K, V)方法执行set命令;
客户端发给redis-server的序列串,就是按前面的分析,分别替换K的长度和实际K内容,以及V的长度和V的内容;
3、get 命令
get(Key)命令,应该给redis-server发送什么样的协议串呢?
这个需要按 上篇文章那样,去拦截TCP传输的数据,以此来窥探。拦截get命令的TCP数据,就不具体演示了,可以参考上一篇文章。
完整示例
 1 public class SimpleJedis {
 2
 3     private Socket socket = null;
 4
 5     public SimpleJedis() {
 6         try {
 7             socket = new Socket("127.0.0.1", 6379);
 8
 9             socket.setReuseAddress(true);
10             socket.setKeepAlive(true);
11             socket.setTcpNoDelay(true);
12             socket.setSoLinger(true, 0);
13         } catch (IOException e) {
14             e.printStackTrace();
15         }
16     }
17
18     public String set(final String key, String value) throws IOException {
19
20         StringBuilder stringBuilder = new StringBuilder();
21
22         stringBuilder.append("*3").append("
");
23
24         stringBuilder.append("$3").append("
");
25
26         stringBuilder.append("SET").append("
");
27
28         stringBuilder.append("$").append(key.length()).append("
");
29
30         stringBuilder.append(key).append("
");
31
32         stringBuilder.append("$").append(value.length()).append("
");
33
34         stringBuilder.append(value).append("
");
35         socket.getOutputStream().write(stringBuilder.toString().getBytes());
36
37         InputStream inputStream = socket.getInputStream();
38         byte b[] = new byte[1024];
39         int len = inputStream.read(b);
40         return new String(b, 0, len);
41     }
42
43     public String get(final String key) throws IOException {
44
45         StringBuilder sb = new StringBuilder();
46
47         sb.append("*2").append("
");
48
49         sb.append("$3").append("
");
50
51         sb.append("GET").append("
");
52
53         sb.append("$").append(key.length()).append("
");
54
55         sb.append(key).append("
");
56
57         socket.getOutputStream().write(sb.toString().getBytes());
58
59         InputStream inputStream = socket.getInputStream();
60         byte b[] = new byte[1024];
61         int len = inputStream.read(b);
62         return new String(b, 0, len);
63     }
64
65     public static void main(String[] args) throws IOException {
66         SimpleJedis myJedis = new SimpleJedis();
67
68         System.out.println(myJedis.set("aa", "11"));
69         System.out.println("-----------------");
70         System.out.println(myJedis.get("aa"));
71         System.out.println("-----------------");
72     }
73 }
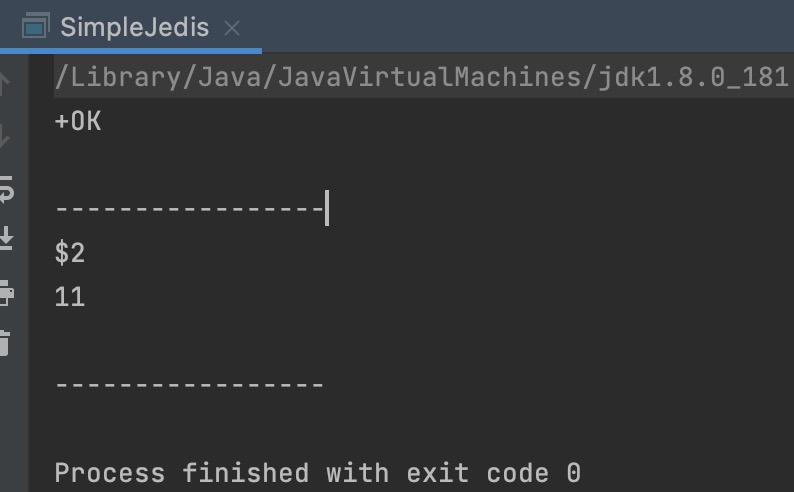
启动redis-server后,运行程序,验证结果
二、进化版Jedis
朝着架构师的目标,向前迈一步。一个可复用的客户端组件,应该怎样设计、实现呢!
建立连接后 传输数据,是redis规范约定的“协议”。
在使用Jedis客户端时,直接操作的是API;执行set、get操作,并没有让我们自己进行按“协议”拼装数据;
同时客户端传输数据到server端,对我们使用者来说,也是无感知的。
因此我们不妨也分层来实现。
要实现一个redis客户端,需要考虑
-
传输层 Connection
-
协议层 RedisProtocol
-
API层 RedisClient

1、传输层 Connection
 1 /**
 2  * 传输层
 3  * 负责连接的建立,数据发送与接收
 4  */
 5 public class Connection {
 6
 7
 8     private Socket socket;
 9     private String host;
10     private int port;
11     private OutputStream outputStream;
12     private InputStream inputStream;
13
14     public Connection(String host, int port) {
15         this.host = host;
16         this.port = port;
17     }
18
19     public Connection connection() {
20         try {
21             if (!isConnected()) {
22                 socket = new Socket(host, port);
23                 outputStream = socket.getOutputStream();
24                 inputStream = socket.getInputStream();
25             }
26         } catch (IOException e) {
27             e.printStackTrace();
28         }
29         return this;
30     }
31
32     // 判断是否连接
33     private boolean isConnected() {
34         return this.socket != null &&
35                 this.socket.isBound() &&
36                 !this.socket.isClosed() &&
37                 socket.isConnected();
38
39     }
40
41     public Connection sendCommand(RedisProtocol.Command command, byte[]... args) {
42         connection();
43         RedisProtocol.sendCommand(outputStream, command, args);
44         return this;
45     }
46
47     public String getStatusReply() {
48         try {
49             byte[] bytes = new byte[1024];
50             int len = inputStream.read(bytes);
51             return new String(bytes, 0, len);
52         } catch (IOException e) {
53             e.printStackTrace();
54         }
55         return null;
56     }
57 }
2、协议层 RedisProtocol
/**
 * redis客户端
 * 消息协议层
 */
public class RedisProtocol {

    public static final String DOLLAR_BYTE = "$";
    public static final String ASTERISK_BYTE = "*";
    public static final String BLANK_STRING = "
";

    /**
     * redis操作命令 枚举
     */
    public static enum Command {
        PING, SET, GET
    }

    /**
     * 发送命令
     *
     * @param os
     * @param command
     * @param args
     */
    public static void sendCommand(OutputStream os, Command command, byte[]... args) {
        StringBuffer sb = new StringBuffer();
        sb.append(ASTERISK_BYTE).append(args.length + 1).append(BLANK_STRING);
        sb.append(DOLLAR_BYTE).append(command.name().length()).append(BLANK_STRING);
        sb.append(command.name()).append(BLANK_STRING);

        for (byte[] arg : args) {
            sb.append(DOLLAR_BYTE).append(arg.length).append(BLANK_STRING);
            sb.append(new String(arg)).append(BLANK_STRING);
        }

        try {
            os.write(sb.toString().getBytes());
        } catch (IOException e) {
            e.printStackTrace();
        }
    }
}
3、API层 RedisClient
 1 public class RedisCilent {
 2
 3
 4     private Connection connection;
 5
 6     public RedisCilent(String host, int port) {
 7         connection = new Connection(host, port);
 8     }
 9
10
11     public String set(String key, String value) {
12         connection.sendCommand(RedisProtocol.Command.SET, key.getBytes(), value.getBytes());
13         return connection.getStatusReply();
14     }
15
16
17     public String get(String key) {
18         connection.sendCommand(RedisProtocol.Command.GET, key.getBytes());
19         return connection.getStatusReply();
20     }
21
22
23     public static void main(String[] args) {
24         RedisCilent redisCilent = new RedisCilent("127.0.0.1", 6379);
25         System.out.println(redisCilent.set("aa", "11"));
26         System.out.println("-----------------");
27         System.out.println(redisCilent.get("aa"));
28         System.out.println("-----------------");
29     }
30 }
4、验证,运行结果如下:

三、举一反三
我们经常使用Jedis,对Redis进行各种操作。一番探究下来,其实本质就是客户端程序和服务端建立连接,在指定的端口传输“指令数据”;只是“指令数据”,需要按照约定的格式。
Jedis客户端和redis-server之间就是普通的网络通信。特殊之处,就是Redis采用的序列化协议RESP是非二进制、人类可读的。
其实,其他组件的客户端,也是通过类似的模式;
1、MySQL客户端,和mysql-server进行交互,也是通过TCP,默认在3306端口;
2、Zookeeper客户端,和server端交互、传输指令,也是通过TCP连接,默认在2181端口;
3、……
这些客户端和对应server的交互,本身就是基于tcp的一个Request/Response模式。
是不是,可以列举很多呢。其实了解了底层原理,一通百通。
我们实现的mini版 Jedis,只是实现了最核心的set、get操作;然而对于操作Redis来说,虽然这是最基础、最核心的,但真正完备的Redis客户端,还应该支持 诸如连接断开重试、pipeline管道操作等。
但本文的最终目的并不是重复造一个轮子,而是通过对底层原理的研究,做到反推、和验证,进而举一反三。
(偷偷告诉你,进阶版Jedis更像Jedis的源码哦~)
参考:https://www.jianshu.com/p/0e9897c9e45c