本章介绍SpringBoot与安全Spring Security的集成
Spring Security介绍
Spring Security是针对Spring项目的安全框架,也是Spring Boot底层安全模块默认的技术选型。他可以实现强大的web安全控制。对于安全控制,我们仅需引入spring-boot-starter-security模块,进行少量的配置,即可实现强大的安全管理。
重点:
WebSecurityConfigurerAdapter:自定义Security策略
AuthenticationManagerBuilder:自定义认证策略
@EnableWebSecurity:开启WebSecurity模式
与Spring Security的集成
项目搭建
1、新建SpringBoot Web项目,且集成Thymeleaf,pom文件如下:


 1 <?xml version="1.0" encoding="UTF-8"?>
 2 <project xmlns="http://maven.apache.org/POM/4.0.0"
 3          xmlns:xsi="http://www.w3.org/2001/XMLSchema-instance"
 4          xsi:schemaLocation="http://maven.apache.org/POM/4.0.0 http://maven.apache.org/xsd/maven-4.0.0.xsd">
 5     <modelVersion>4.0.0</modelVersion>
 6
 7     <groupId>com.test</groupId>
 8     <artifactId>test-springboot-security</artifactId>
 9     <version>1.0-SNAPSHOT</version>
10
11     <parent>
12         <groupId>org.springframework.boot</groupId>
13         <artifactId>spring-boot-starter-parent</artifactId>
14         <version>2.1.8.RELEASE</version>
15     </parent>
16
17     <properties>
18
19         <project.build.sourceEncoding>UTF-8</project.build.sourceEncoding>
20         <project.reporting.outputEncoding>UTF-8</project.reporting.outputEncoding>
21         <java.version>1.8</java.version>
22     </properties>
23
24     <dependencies>
25
26         <dependency>
27             <groupId>org.springframework.boot</groupId>
28             <artifactId>spring-boot-starter-web</artifactId>
29         </dependency>
30
31         <dependency>
32             <groupId>org.springframework.boot</groupId>
33             <artifactId>spring-boot-starter-thymeleaf</artifactId>
34         </dependency>
35
36         <dependency>
37             <groupId>org.springframework.boot</groupId>
38             <artifactId>spring-boot-starter-test</artifactId>
39             <scope>test</scope>
40         </dependency>
41
42     </dependencies>
43
44
45     <!-- SpringBoot打包插件,可以将代码打包成一个可执行的jar包 -->
46     <build>
47         <plugins>
48             <plugin>
49                 <groupId>org.springframework.boot</groupId>
50                 <artifactId>spring-boot-maven-plugin</artifactId>
51             </plugin>
52         </plugins>
53     </build>
54
55
56 </project>
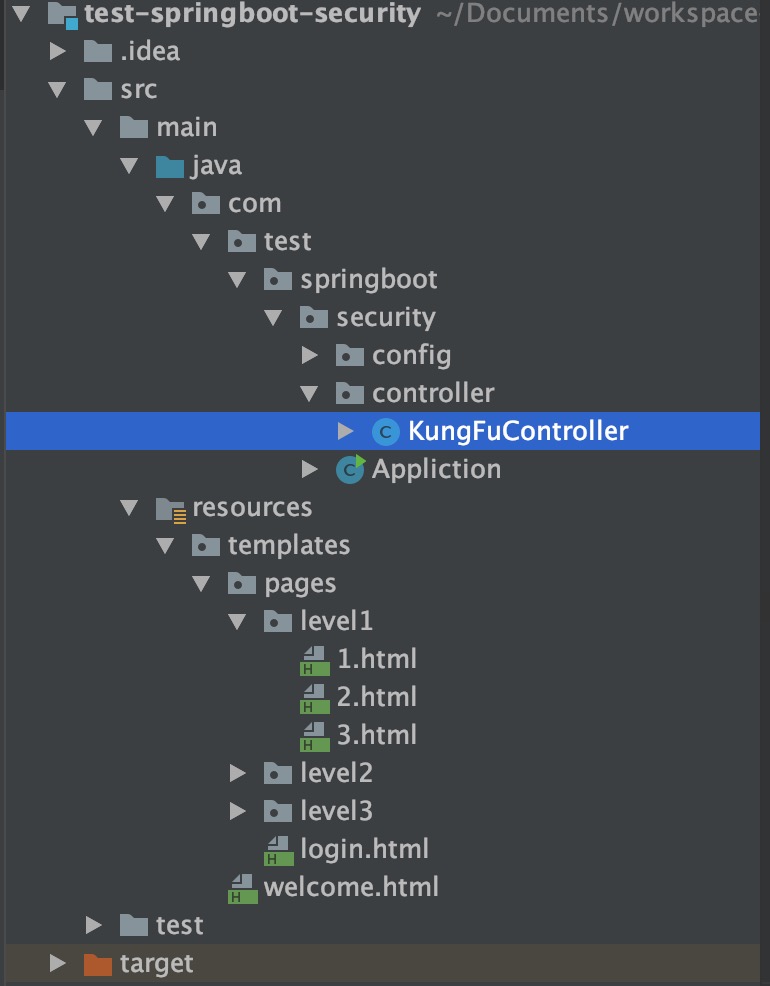
项目目录如下:
2、编辑KungFuController,内容如下,主要是访问一些界面
 1 package com.test.springboot.security.controller;
 2
 3 import org.springframework.stereotype.Controller;
 4 import org.springframework.web.bind.annotation.GetMapping;
 5 import org.springframework.web.bind.annotation.PathVariable;
 6
 7 @Controller
 8 public class KungFuController {
 9
10     private  final String PREFIX = "pages/";
11
12     /**
13      * 欢迎页
14      * @return
15      */
16     @GetMapping("/")
17     public String index(){
18         return "welcome";
19     }
20
21     /**
22      * 登录页
23      * @return
24      */
25     @GetMapping("/userlogin")
26     public String loginPage(){
27         return PREFIX + "login";
28     }
29
30     /**
31      * level1页面映射
32      * @param path
33      * @return
34      */
35     @GetMapping("/level1/{path}")
36     public String level1(@PathVariable("path") String path){
37         return PREFIX + "level1/" + path;
38     }
39
40
41     /**
42      * level2页面映射
43      * @param path
44      * @return
45      */
46     @GetMapping("/level2/{path}")
47     public String level2(@PathVariable("path") String path){
48         return PREFIX + "level2/" + path;
49     }
50
51     /**
52      * level3页面映射
53      * @param path
54      * @return
55      */
56     @GetMapping("/level3/{path}")
57     public String level3(@PathVariable("path") String path){
58         return PREFIX + "level3/" + path;
59     }
60
61 }
3、新建welcome页面
 1 <!DOCTYPE html>
 2 <html xmlns:th="http://www.thymeleaf.org">
 3 <head>
 4 <meta http-equiv="Content-Type" content="text/html; charset=UTF-8">
 5 <title>Insert title here</title>
 6 </head>
 7 <body>
 8 <h1 align="center">欢迎光临武林秘籍管理系统</h1>
 9
10 <hr>
11
12 <div >
13     <h3>普通武功秘籍</h3>
14     <ul>
15         <li><a th:href="@{/level1/1}">罗汉拳</a></li>
16         <li><a th:href="@{/level1/2}">武当长拳</a></li>
17         <li><a th:href="@{/level1/3}">全真剑法</a></li>
18     </ul>
19
20 </div>
21
22 <div >
23     <h3>高级武功秘籍</h3>
24     <ul>
25         <li><a th:href="@{/level2/1}">太极拳</a></li>
26         <li><a th:href="@{/level2/2}">七伤拳</a></li>
27         <li><a th:href="@{/level2/3}">梯云纵</a></li>
28     </ul>
29
30 </div>
31
32 <div >
33     <h3>绝世武功秘籍</h3>
34     <ul>
35         <li><a th:href="@{/level3/1}">葵花宝典</a></li>
36         <li><a th:href="@{/level3/2}">龟派气功</a></li>
37         <li><a th:href="@{/level3/3}">独孤九剑</a></li>
38     </ul>
39 </div>
40 </body>
41 </html>
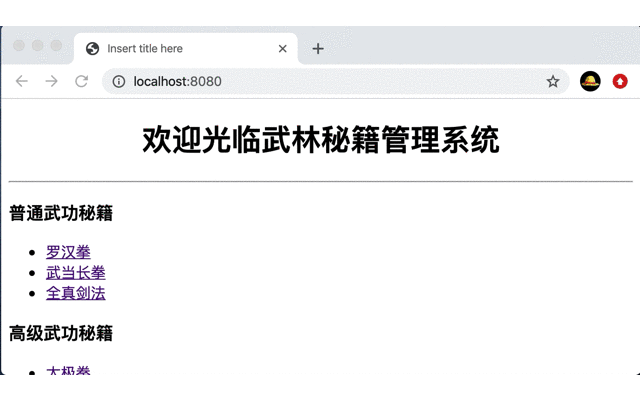
4、测试,启动项目访问地址:http://localhost:8080,效果如下:

引入Spring Security
1、在项目中添加spring-boot-starter-security依赖
1 <!-- 引入Spring Security -->
2 <dependency>
3     <groupId>org.springframework.boot</groupId>
4     <artifactId>spring-boot-starter-security</artifactId>
5 </dependency>
2、编辑一个类MySecurityConfig,继承WebSecurityConfigurerAdapter,用来配置Security内容
 1 package com.test.springboot.security.config;
 2
 3 import org.springframework.security.config.annotation.authentication.builders.AuthenticationManagerBuilder;
 4 import org.springframework.security.config.annotation.web.builders.HttpSecurity;
 5 import org.springframework.security.config.annotation.web.configuration.EnableWebSecurity;
 6 import org.springframework.security.config.annotation.web.configuration.WebSecurityConfigurerAdapter;
 7 import org.springframework.security.crypto.bcrypt.BCryptPasswordEncoder;
 8
 9 // 开启认证
10 @EnableWebSecurity
11 public class MySecurityConfig extends WebSecurityConfigurerAdapter {
12
13     // 定义请求规则
14     @Override
15     protected void configure(HttpSecurity http) throws Exception {
16 //        super.configure(http);
17         // 定制请求的授权规则
18         http.authorizeRequests().antMatchers("/").permitAll()
19                 .antMatchers("/level1/**").hasRole("VIP1")
20                 .antMatchers("/level2/**").hasRole("VIP2")
21                 .antMatchers("/level3/**").hasRole("VIP3");
22
23     }
24
25 }
可以看到,主要是配置类请求的规则,对"/"请求放行,对"/level1/**"请求必须要有"VIP1"角色等
3、重启项目,http://localhost:8080,效果如下:
测试结果:"/level1/**"请求,权限验证不通过,会报错 Access Denied (拒绝访问)
登录注销功能
1、编辑MySecurityConfig类
通过http.formLogin();开启登录功能
通过http.logout();开启注销功能
通过重写configure(AuthenticationManagerBuilder auth)方法,将认证信息存到内存中
 1 @EnableWebSecurity
 2 public class MySecurityConfig extends WebSecurityConfigurerAdapter {
 3
 4     // 定义请求规则
 5     @Override
 6     protected void configure(HttpSecurity http) throws Exception {
 7 //        super.configure(http);
 8         // 定制请求的授权规则
 9         http.authorizeRequests().antMatchers("/").permitAll()
10                 .antMatchers("/level1/**").hasRole("VIP1")
11                 .antMatchers("/level2/**").hasRole("VIP2")
12                 .antMatchers("/level3/**").hasRole("VIP3");
13
14         // 开启登录功能,效果:如果没有登录,没有权限就会来到登录页面
15         http.formLogin();
16         //        .loginPage("/userlogin")
17         //        .usernameParameter("user").passwordParameter("pwd");
18
19         // 1、/login来到登录页
20         // 2、重定向到/login?error表示登录失败
21         // 3、更多详情规定
22         // 4、默认post形式的login代表登录
23         // 5、一但定制loginPage,loginPage的post请求就是登录
24
25         // 开启自动配置的注销功能
26         // logoutSuccessUrl成功注销返回界面
27         http.logout().logoutSuccessUrl("/");
28         // 1、访问 /logout 表示用户注销,清空session
29         // 2、注销成功会返回 /login?logout
30
31         // 开启记住我功能
32         http.rememberMe();
33                 //.rememberMeParameter("remember");
34         // 1、登录成功以后,将cookie发送给浏览器保存,以后访问自动带上cookie,检查通过免登录
35         // 2、点击注销后会删除cookie
36
37     }
38
39     // 定义认证规则
40     @Override
41     protected void configure(AuthenticationManagerBuilder auth) throws Exception {
42 //        super.configure(auth);
43
44         BCryptPasswordEncoder passwordEncoder = new BCryptPasswordEncoder();
45
46         // 认证信息存储到内存中
47         auth.inMemoryAuthentication()
48                 .passwordEncoder(passwordEncoder)
49                 .withUser("zhangsan").password(passwordEncoder.encode("123456")).roles("VIP1", "VIP2")
50                 .and()
51                 .withUser("lisi").password(passwordEncoder.encode("123456")).roles("VIP2", "VIP3")
52                 .and()
53                 .withUser("wangwu").password(passwordEncoder.encode("123456")).roles("VIP1", "VIP3");
54     }
55 }
2、在welconme页面增加注销按钮,内容如下,注销的url地址是:"/logout"
1 <form th:action="@{/logout}" method="post">
2     <input type="submit" value="注销"/>
3 </form>
3、重新启动项目,测试,效果如下:

整合Thymeleaf 与 Spring Security
引入spring security之后,要想在thymeleaf中使用权限的相关内容,需要引入新的jar包。
功能:
1)判断用户是否有权限:sec:authorize="isAuthenticated()
2)获取用户名称:sec:authentication="name"
3)获取角色名称:sec:authentication="principal.authorities"
1、引入依赖thymeleaf-extras-springsecurity5,此依赖可以在spring-boot-dependencies pom中找到
1 <!-- 引入Thymeleaf与Security整合的模块,可以在spring-boot-dependencies pom中找到 -->
2 <dependency>
3     <groupId>org.thymeleaf.extras</groupId>
4     <artifactId>thymeleaf-extras-springsecurity5</artifactId>
5 </dependency>
2、编辑welcome界面
 1 <!DOCTYPE html>
 2 <html xmlns:th="http://www.thymeleaf.org"
 3       xmlns:sec="http://www.thymeleaf.org/thymeleaf-extras-springsecurity4">
 4 <head>
 5     <meta http-equiv="Content-Type" content="text/html; charset=UTF-8">
 6     <title>Insert title here</title>
 7 </head>
 8 <body>
 9 <h1 align="center">欢迎光临武林秘籍管理系统</h1>
10 <div sec:authorize="!isAuthenticated()">
11     <h2 align="center">游客您好,如果想查看武林秘籍 <a th:href="@{/userlogin}">请登录</a></h2>
12 </div>
13 <div align="center" sec:authorize="isAuthenticated()">
14     <h2><span sec:authentication="name"></span> - 您好,您的角色有:
15         <span sec:authentication="principal.authorities"></span></h2>
16     <form th:action="@{/logout}" method="post">
17         <input type="submit" value="注销"/>
18     </form>
19 </div>
20
21 <hr>
22
23 <div sec:authorize="hasRole('VIP1')">
24     <h3>普通武功秘籍</h3>
25     <ul>
26         <li><a th:href="@{/level1/1}">罗汉拳</a></li>
27         <li><a th:href="@{/level1/2}">武当长拳</a></li>
28         <li><a th:href="@{/level1/3}">全真剑法</a></li>
29     </ul>
30
31 </div>
32
33 <div sec:authorize="hasRole('VIP2')">
34     <h3>高级武功秘籍</h3>
35     <ul>
36         <li><a th:href="@{/level2/1}">太极拳</a></li>
37         <li><a th:href="@{/level2/2}">七伤拳</a></li>
38         <li><a th:href="@{/level2/3}">梯云纵</a></li>
39     </ul>
40
41 </div>
42
43 <div sec:authorize="hasRole('VIP3')">
44     <h3>绝世武功秘籍</h3>
45     <ul>
46         <li><a th:href="@{/level3/1}">葵花宝典</a></li>
47         <li><a th:href="@{/level3/2}">龟派气功</a></li>
48         <li><a th:href="@{/level3/3}">独孤九剑</a></li>
49     </ul>
50 </div>
51 </body>
52 </html>
3、重启项目,测试效果如下:

其他还有其他功能,如自定义登录界面等,参考官网:https://spring.io/projects/spring-security
本例完整代码如下:
MySecurityConfig.java
 1 package com.test.springboot.security.config;
 2
 3 import org.springframework.security.config.annotation.authentication.builders.AuthenticationManagerBuilder;
 4 import org.springframework.security.config.annotation.web.builders.HttpSecurity;
 5 import org.springframework.security.config.annotation.web.configuration.EnableWebSecurity;
 6 import org.springframework.security.config.annotation.web.configuration.WebSecurityConfigurerAdapter;
 7 import org.springframework.security.crypto.bcrypt.BCryptPasswordEncoder;
 8
 9 // 开启认证
10 @EnableWebSecurity
11 public class MySecurityConfig extends WebSecurityConfigurerAdapter {
12
13     // 定义请求规则
14     @Override
15     protected void configure(HttpSecurity http) throws Exception {
16 //        super.configure(http);
17         // 定制请求的授权规则
18         http.authorizeRequests().antMatchers("/").permitAll()
19                 .antMatchers("/level1/**").hasRole("VIP1")
20                 .antMatchers("/level2/**").hasRole("VIP2")
21                 .antMatchers("/level3/**").hasRole("VIP3");
22
23         // 开启登录功能,效果:如果没有登录,没有权限就会来到登录页面
24         http.formLogin()
25                 .loginPage("/userlogin")
26                 .usernameParameter("user").passwordParameter("pwd");
27
28         // 1、/login来到登录页
29         // 2、重定向到/login?error表示登录失败
30         // 3、更多详情规定
31         // 4、默认post形式的login代表登录
32         // 5、一但定制loginPage,loginPage的post请求就是登录
33
34         // 开启自动配置的注销功能
35         // logoutSuccessUrl成功注销返回界面
36         http.logout().logoutSuccessUrl("/");
37         // 1、访问 /logout 表示用户注销,清空session
38         // 2、注销成功会返回 /login?logout
39
40         // 开启记住我功能
41         http.rememberMe()
42                 .rememberMeParameter("remember");
43         // 1、登录成功以后,将cookie发送给浏览器保存,以后访问自动带上cookie,检查通过免登录
44         // 2、点击注销后会删除cookie
45
46     }
47
48     // 定义认证规则
49     @Override
50     protected void configure(AuthenticationManagerBuilder auth) throws Exception {
51 //        super.configure(auth);
52
53         BCryptPasswordEncoder passwordEncoder = new BCryptPasswordEncoder();
54
55         // 认证信息存储到内存中
56         auth.inMemoryAuthentication()
57                 .passwordEncoder(passwordEncoder)
58                 .withUser("zhangsan").password(passwordEncoder.encode("123456")).roles("VIP1", "VIP2")
59                 .and()
60                 .withUser("lisi").password(passwordEncoder.encode("123456")).roles("VIP2", "VIP3")
61                 .and()
62                 .withUser("wangwu").password(passwordEncoder.encode("123456")).roles("VIP1", "VIP3");
63     }
64 }
welcome.html
 1 <!DOCTYPE html>
 2 <html xmlns:th="http://www.thymeleaf.org"
 3       xmlns:sec="http://www.thymeleaf.org/thymeleaf-extras-springsecurity4">
 4 <head>
 5     <meta http-equiv="Content-Type" content="text/html; charset=UTF-8">
 6     <title>Insert title here</title>
 7 </head>
 8 <body>
 9 <h1 align="center">欢迎光临武林秘籍管理系统</h1>
10 <div sec:authorize="!isAuthenticated()">
11     <h2 align="center">游客您好,如果想查看武林秘籍 <a th:href="@{/userlogin}">请登录</a></h2>
12 </div>
13 <div align="center" sec:authorize="isAuthenticated()">
14     <h2><span sec:authentication="name"></span> - 您好,您的角色有:
15         <span sec:authentication="principal.authorities"></span></h2>
16     <form th:action="@{/logout}" method="post">
17         <input type="submit" value="注销"/>
18     </form>
19 </div>
20
21 <hr>
22
23 <div sec:authorize="hasRole('VIP1')">
24     <h3>普通武功秘籍</h3>
25     <ul>
26         <li><a th:href="@{/level1/1}">罗汉拳</a></li>
27         <li><a th:href="@{/level1/2}">武当长拳</a></li>
28         <li><a th:href="@{/level1/3}">全真剑法</a></li>
29     </ul>
30
31 </div>
32
33 <div sec:authorize="hasRole('VIP2')">
34     <h3>高级武功秘籍</h3>
35     <ul>
36         <li><a th:href="@{/level2/1}">太极拳</a></li>
37         <li><a th:href="@{/level2/2}">七伤拳</a></li>
38         <li><a th:href="@{/level2/3}">梯云纵</a></li>
39     </ul>
40
41 </div>
42
43 <div sec:authorize="hasRole('VIP3')">
44     <h3>绝世武功秘籍</h3>
45     <ul>
46         <li><a th:href="@{/level3/1}">葵花宝典</a></li>
47         <li><a th:href="@{/level3/2}">龟派气功</a></li>
48         <li><a th:href="@{/level3/3}">独孤九剑</a></li>
49     </ul>
50 </div>
51 </body>
52 </html>
login.html
 1 <!DOCTYPE html>
 2 <html xmlns:th="http://www.thymeleaf.org">
 3 <head>
 4 <meta charset="UTF-8">
 5 <title>Insert title here</title>
 6 </head>
 7 <body>
 8     <h1 align="center">欢迎登陆武林秘籍管理系统</h1>
 9     <hr>
10     <div align="center">
11         <form th:action="@{/userlogin}" method="post">
12             用户名:<input name="user"/><br>
13             密码:<input name="pwd"><br/>
14             <input type="checkbox" name="remember"> 记住我<br/>
15             <input type="submit" value="登陆">
16         </form>
17     </div>
18 </body>
19 </html>