本章揭晓SpringBoot与RabbitMQ的整合,不了解RabbitMQ的可以参考【RabbitMQ】 RabbitMQ 基本概念
RabbitMQ安装参考:【RabbitMQ】 RabbitMQ安装
RabbitMQ自动配置
1、搭建SpringBoot项目,引入RabbitMQ的相关依赖
1 <dependency>
2     <groupId>org.springframework.boot</groupId>
3     <artifactId>spring-boot-starter-amqp</artifactId>
4 </dependency>
完整pom.xml文件如下:


 1 <?xml version="1.0" encoding="UTF-8"?>
 2 <project xmlns="http://maven.apache.org/POM/4.0.0"
 3          xmlns:xsi="http://www.w3.org/2001/XMLSchema-instance"
 4          xsi:schemaLocation="http://maven.apache.org/POM/4.0.0 http://maven.apache.org/xsd/maven-4.0.0.xsd">
 5     <modelVersion>4.0.0</modelVersion>
 6
 7     <groupId>com.test</groupId>
 8     <artifactId>test-springboot-amqp</artifactId>
 9     <version>1.0-SNAPSHOT</version>
10
11     <parent>
12         <groupId>org.springframework.boot</groupId>
13         <artifactId>spring-boot-starter-parent</artifactId>
14         <version>2.1.8.RELEASE</version>
15     </parent>
16
17     <properties>
18
19         <project.build.sourceEncoding>UTF-8</project.build.sourceEncoding>
20         <project.reporting.outputEncoding>UTF-8</project.reporting.outputEncoding>
21         <java.version>1.8</java.version>
22     </properties>
23
24     <dependencies>
25
26         <dependency>
27             <groupId>org.springframework.boot</groupId>
28             <artifactId>spring-boot-starter-web</artifactId>
29         </dependency>
30
31         <dependency>
32             <groupId>org.springframework.boot</groupId>
33             <artifactId>spring-boot-starter-amqp</artifactId>
34         </dependency>
35
36         <dependency>
37             <groupId>org.springframework.boot</groupId>
38             <artifactId>spring-boot-starter-test</artifactId>
39             <scope>test</scope>
40         </dependency>
41
42     </dependencies>
43
44
45     <!-- SpringBoot打包插件,可以将代码打包成一个可执行的jar包 -->
46     <build>
47         <plugins>
48             <plugin>
49                 <groupId>org.springframework.boot</groupId>
50                 <artifactId>spring-boot-maven-plugin</artifactId>
51             </plugin>
52         </plugins>
53     </build>
54
55 </project>
2、查看RabbitAutoConfiguration自动配置类
 1 @Configuration
 2 @ConditionalOnClass({ RabbitTemplate.class, Channel.class })
 3 @EnableConfigurationProperties(RabbitProperties.class)
 4 @Import(RabbitAnnotationDrivenConfiguration.class)
 5 public class RabbitAutoConfiguration {
 6
 7     @Configuration
 8     @ConditionalOnMissingBean(ConnectionFactory.class)
 9     protected static class RabbitConnectionFactoryCreator {
10
11         // 连接工厂ConnectionFactory
12         @Bean
13         public CachingConnectionFactory rabbitConnectionFactory(RabbitProperties properties,
14                 ObjectProvider<ConnectionNameStrategy> connectionNameStrategy) throws Exception {
15             PropertyMapper map = PropertyMapper.get();
16             CachingConnectionFactory factory = new CachingConnectionFactory(
17                     getRabbitConnectionFactoryBean(properties).getObject());
18             ...
19             return factory;
20         }
21         ...
22     }
23
24     @Configuration
25     @Import(RabbitConnectionFactoryCreator.class)
26     protected static class RabbitTemplateConfiguration {
27
28         private final RabbitProperties properties;
29         private final ObjectProvider<MessageConverter> messageConverter;
30         private final ObjectProvider<RabbitRetryTemplateCustomizer> retryTemplateCustomizers;
31
32         public RabbitTemplateConfiguration(RabbitProperties properties,
33                 ObjectProvider<MessageConverter> messageConverter,
34                 ObjectProvider<RabbitRetryTemplateCustomizer> retryTemplateCustomizers) {
35             this.properties = properties;
36             this.messageConverter = messageConverter;
37             this.retryTemplateCustomizers = retryTemplateCustomizers;
38         }
39
40         // Rabbit模版:用来发送和接受消息
41         @Bean
42         @ConditionalOnSingleCandidate(ConnectionFactory.class)
43         @ConditionalOnMissingBean
44         public RabbitTemplate rabbitTemplate(ConnectionFactory connectionFactory) {
45             PropertyMapper map = PropertyMapper.get();
46             RabbitTemplate template = new RabbitTemplate(connectionFactory);
47             MessageConverter messageConverter = this.messageConverter.getIfUnique();
48             if (messageConverter != null) {
49                 template.setMessageConverter(messageConverter);
50             }
51             template.setMandatory(determineMandatoryFlag());
52             RabbitProperties.Template properties = this.properties.getTemplate();
53             if (properties.getRetry().isEnabled()) {
54                 template.setRetryTemplate(new RetryTemplateFactory(
55                         this.retryTemplateCustomizers.orderedStream().collect(Collectors.toList())).createRetryTemplate(
56                                 properties.getRetry(), RabbitRetryTemplateCustomizer.Target.SENDER));
57             }
58             map.from(properties::getReceiveTimeout).whenNonNull().as(Duration::toMillis)
59                     .to(template::setReceiveTimeout);
60             map.from(properties::getReplyTimeout).whenNonNull().as(Duration::toMillis).to(template::setReplyTimeout);
61             map.from(properties::getExchange).to(template::setExchange);
62             map.from(properties::getRoutingKey).to(template::setRoutingKey);
63             map.from(properties::getDefaultReceiveQueue).whenNonNull().to(template::setDefaultReceiveQueue);
64             return template;
65         }
66
67         ...
68
69         // AmqpAdmin: RabbitMQ系统管理功能组件
70         @Bean
71         @ConditionalOnSingleCandidate(ConnectionFactory.class)
72         @ConditionalOnProperty(prefix = "spring.rabbitmq", name = "dynamic", matchIfMissing = true)
73         @ConditionalOnMissingBean
74         public AmqpAdmin amqpAdmin(ConnectionFactory connectionFactory) {
75             return new RabbitAdmin(connectionFactory);
76         }
77     }
78
79     @Configuration
80     @ConditionalOnClass(RabbitMessagingTemplate.class)
81     @ConditionalOnMissingBean(RabbitMessagingTemplate.class)
82     @Import(RabbitTemplateConfiguration.class)
83     protected static class MessagingTemplateConfiguration {
84
85         // Rabbit消息模版:可以用来发送和接受消息
86         @Bean
87         @ConditionalOnSingleCandidate(RabbitTemplate.class)
88         public RabbitMessagingTemplate rabbitMessagingTemplate(RabbitTemplate rabbitTemplate) {
89             return new RabbitMessagingTemplate(rabbitTemplate);
90         }
91     }
92 }
可以看到自动配置了以下几点
1、自动配置连接工厂 rabbitConnectionFactory
2、RabbitProperties 封装了 RabbitMQ的配置
3、RabbitTemplate:给RabbitMQ发送和接受消息
4、AmqpAdmin: RabbitMQ系统管理功能组件
AmqpAdmin:创建和删除 Queue,Exchange,Binding
3、rabbitmq配置
1 spring:
2   rabbitmq:
3     # 主机
4     host: 192.168.0.1
5     # 端口默认 5672
6     port: 5672
7     username: guest
8     password: guest
RabbitMQ整合使用
AmqpAdmin使用
1、 使用AmqpAdmin:创建和删除 Queue,Exchange,Binding,新建一个测试类
 1 @RunWith(SpringRunner.class)
 2 @SpringBootTest
 3 public class TestApplication {
 4
 5
 6     @Autowired
 7     AmqpAdmin amqpAdmin;
 8
 9     @Test
10     public void createExchange(){
11         // 新建一个Exchange,查看Exchange接口的继承关系,可以找到实现类DirectExchange
12         Exchange exchange = new DirectExchange("exchange.direct");
13         // 在rabbitmq中,创建一个Exchange交换机
14         amqpAdmin.declareExchange(exchange);
15
16         // 在rabbitmq中,创建一个Queue队列
17         // new Queue(队列名称, 是否持久化)
18         amqpAdmin.declareQueue(new Queue("queue.news", true));
19
20         // 在rabbitmq中,创建一个Binding绑定关系
21         // new Binding(目的地, 目的类型, 交换机名称, 路由规则, 参数)
22         amqpAdmin.declareBinding(new Binding("queue.news", Binding.DestinationType.QUEUE,
23                 "exchange.direct", "queue.news", null));
24     }
25
26 }
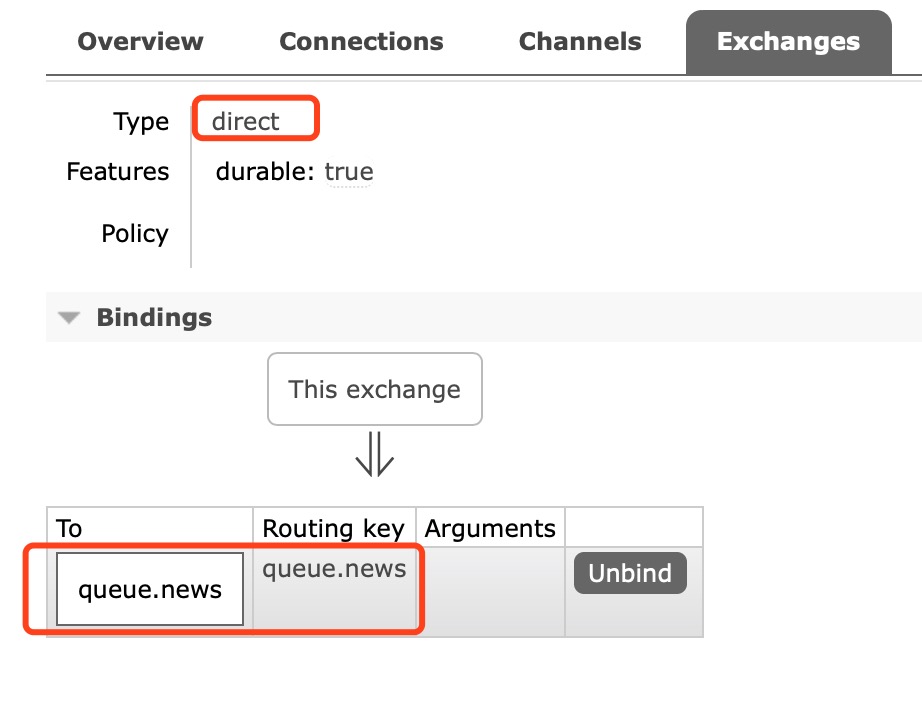
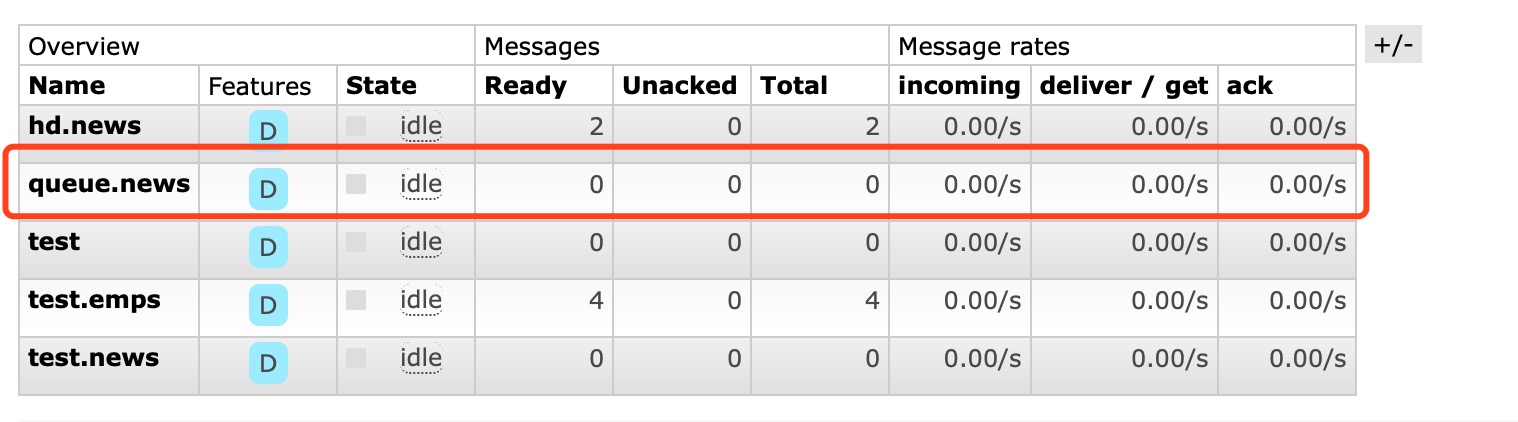
2、运行测试类方法,运行成功,在RabbitMQ的web管理界面查看,可以看到Queue,Exchange,Binding都创建成功
RabbitTemplate使用
3、在测试类中,添加发送消息方法,内容如下:
 1 // 点对点(单播)
 2 @Test
 3 public void publisher() {
 4
 5     // 方法一:Message需要自己构造一个;定义消息体内容和消息头
 6     // rabbitTemplate.send(exchange, routingKey, message);
 7
 8     // 方法二:object默认当成消息体,只需要传入发送的对象,自动序列化发送给rabbitmq
 9     // rabbitTemplate.convertAndSend(exchange, routingKey, object);
10
11     Map<String, Object> map = new HashMap<>();
12     map.put("msg", "hello world!");
13     map.put("data", Arrays.asList(1, 2, 3));
14     // 对象别默认序列化以后发送出去
15     rabbitTemplate.convertAndSend("exchange.direct", "queue.news", map);
16 }
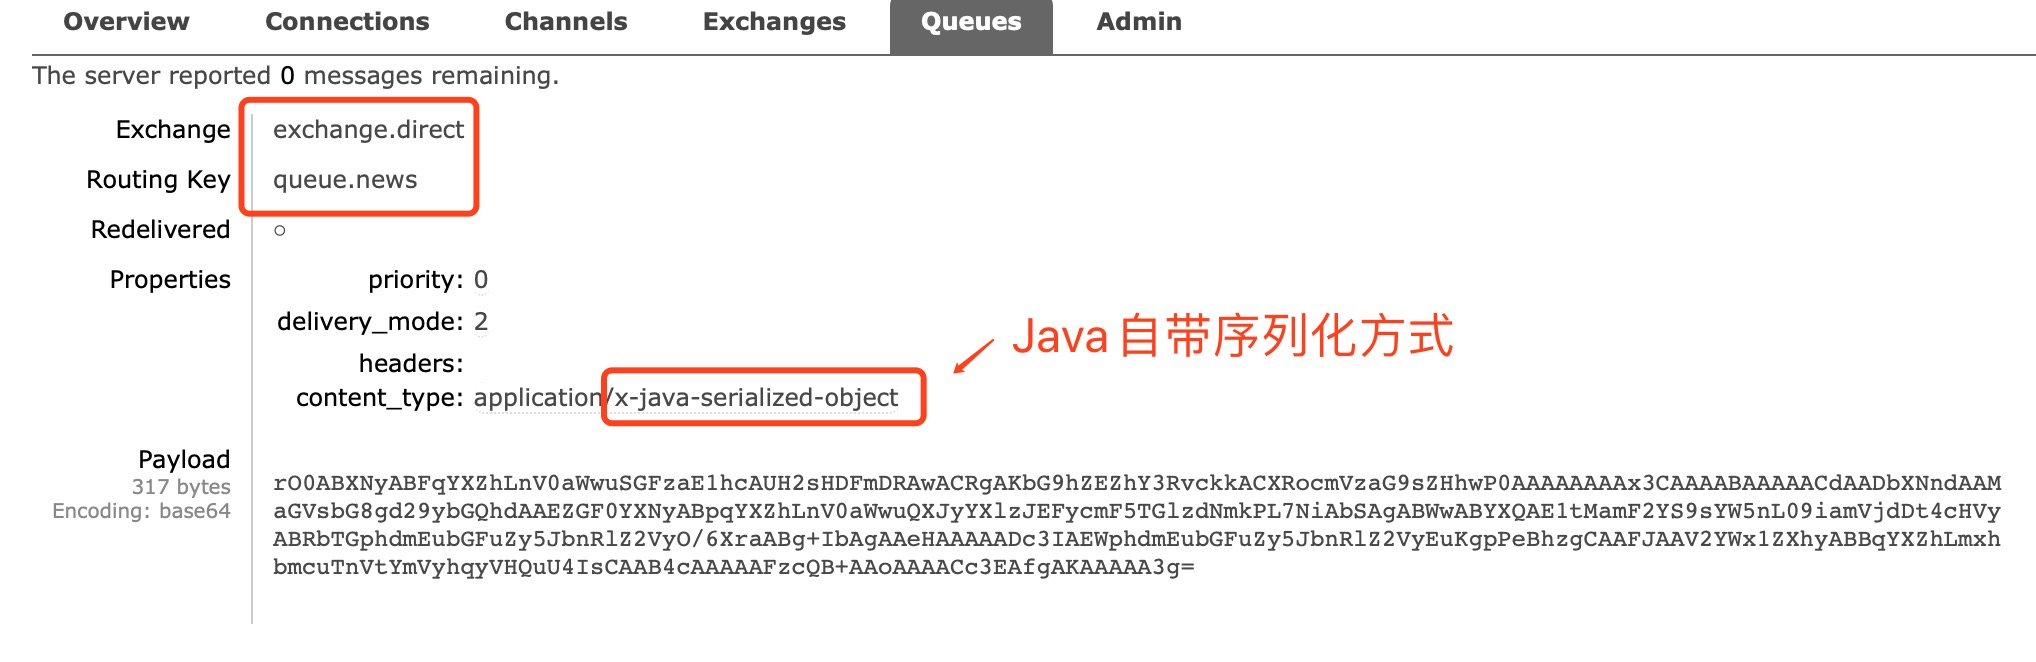
4、测试,调用publisher方法,在RabbitMQ的web管理界面查看队列queue.news
5、在测试类中,添加接受消息方法,内容如下:
1 // 接受消息
2 @Test
3 public void consumer() {
4     // 接受消息自动反序列化成对象
5     Object o = rabbitTemplate.receiveAndConvert("queue.news");
6     System.out.println(o.getClass());
7     System.out.println(o);
8 }
6、测试,调用consumer方法,在控制台查看打印内容

7、在测试publisher方法的时候,发现rabbitmq接受到的消息内容,是java自动序列化的内容。而RabbitTemplate将对象序列化使用的是SimpleMessageConverter(简单消息转换器)
可以跟踪RabbitTemplate的注入过程发现。查看RabbitTemplate类
 1 public class RabbitTemplate extends RabbitAccessor // NOSONAR type line count
 2         implements BeanFactoryAware, RabbitOperations, MessageListener,
 3             ListenerContainerAware, PublisherCallbackChannel.Listener, Lifecycle, BeanNameAware {
 4
 5     ...
 6
 7     // 消息转换器:默认是SimpleMessageConverter
 8     private MessageConverter messageConverter = new SimpleMessageConverter();
 9
10     ...
11 }
查看SimpleMessageConverter类,使用序列化工具序列化与反序列化对象的
 1 public class SimpleMessageConverter extends WhiteListDeserializingMessageConverter implements BeanClassLoaderAware {
 2
 3     ...
 4
 5     /**
 6      * 根据消息创建一个对象
 7      */
 8     @Override
 9     public Object fromMessage(Message message) throws MessageConversionException {
10         ....
11
12             // MessageProperties.CONTENT_TYPE_SERIALIZED_OBJECT = "application/x-java-serialized-object"
13             // 判断类型
14             else if (contentType != null &&
15                     contentType.equals(MessageProperties.CONTENT_TYPE_SERIALIZED_OBJECT)) {
16                 try {
17                     // 使用工具反序列化成对象
18                     content = SerializationUtils.deserialize(
19                             createObjectInputStream(new ByteArrayInputStream(message.getBody()), this.codebaseUrl));
20                 }
21                 catch (IOException | IllegalArgumentException | IllegalStateException e) {
22                     throw new MessageConversionException(
23                             "failed to convert serialized Message content", e);
24                 }
25             }
26         ...
27     }
28
29     /**
30      * 根据对象创建一个消息
31      */
32     @Override
33     protected Message createMessage(Object object, MessageProperties messageProperties) throws MessageConversionException {
34         ...
35
36         // 可序列化
37         else if (object instanceof Serializable) {
38             try {
39                 // 使用序列化工具,序列化对象
40                 bytes = SerializationUtils.serialize(object);
41             }
42             catch (IllegalArgumentException e) {
43                 throw new MessageConversionException(
44                         "failed to convert to serialized Message content", e);
45             }
46             // MessageProperties.CONTENT_TYPE_SERIALIZED_OBJECT = "application/x-java-serialized-object"
47             messageProperties.setContentType(MessageProperties.CONTENT_TYPE_SERIALIZED_OBJECT);
48         }
49         ...
50     }
51
52 }
如果想rabbitmq接受到的消息内容是json格式的,那么就需要需改RabbitMQ中的消息转换器,可以在容器中注册一个消息转换器(MessageConverter),内容如下:
@Configuration
public class MyAmqpConfig {

    // 注册一个json格式的消息转换器
    @Bean
    public MessageConverter messageConverter(){
        return new Jackson2JsonMessageConverter();
    }
}
SpringBoot在创建RabbitTemplate对象的时候,会自动把我们注入的MessageConverter赋值给RabbitTemplate。以后RabbitTemplate在发送和接受消息的时候就会使用我们注入的MessageConverter来进行对象与消息之间的转换
8、测试,调用publisher方法,在RabbitMQ的web管理界面查看队列queue.news

9、测试,调用consumer方法,在控制台查看打印内容,也能正常转换成对象。
SpringBoot监听RabbitMQ
在项目当中与RabbitMQ交互主要是发消息和收消息
发送消息:使用RabbitTemplate即可解决
接收消息:需要监听RabbitMQ是否有消息,然后进行消费。
SpringBoot提供了RabbitMQ消息监听机制,
1)@EnableRabbit:开启基于注解的RabbitMQ模式
2)@RabbitListener:监听RabbitMQ队列
1、在启动类上使用注解或者配置类上使用注解@EnableRabbit,开启基于注解的RabbitMQ模式
1 // 开启基于注解的RabbitMQ模式
2 @EnableRabbit
3 @SpringBootApplication
4 public class Application {
5
6     public static void main(String[] args) {
7         SpringApplication.run(Application.class, args);
8     }
9 }
2、编写service,使用@RabbitListener监听RabbitMQ队列,接收对象
 1 @Service
 2 public class ReceiveService {
 3
 4     // 监听rabbitmq队列 "queue.news"
 5     @RabbitListener(queues = "queue.news")
 6     // 接受到对象
 7     public void receive(Map map){
 8         System.out.println("收到消息:" + map);
 9     }
10 }
3、启动项目,测试,给队列发送消息,查看控制台输出是否收到消息

4、测试ReceiveService时,在方法中打断点,如下:
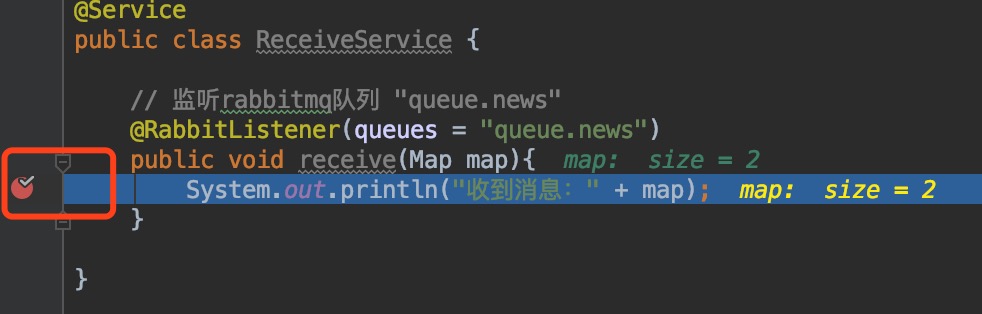
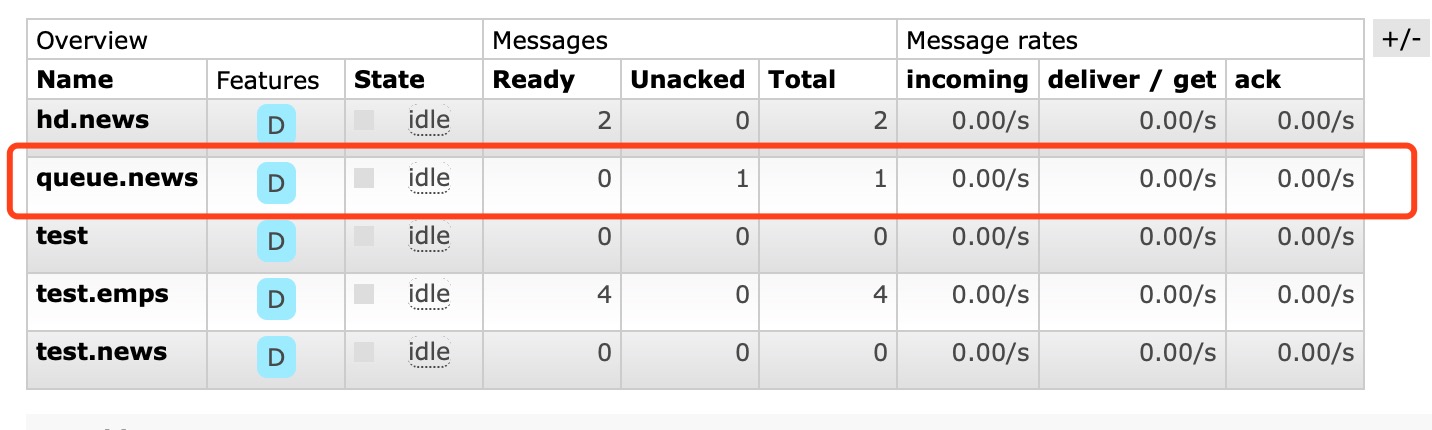
当程序运行到断点处是,rabbitmq中的此条消息处于未确认状态,如下:
当receive方法处理完毕时,队列中此条为确认消息才会删除。如下:
5、使用@RabbitListener监听RabbitMQ队列,接收Message
1 // 接收到Message
2 @RabbitListener(queues = "hd.news")
3 public void receive02(Message message){
4     System.out.println("收到消息:" + message);
5     System.out.println("message.getMessageProperties():" + message.getMessageProperties());
6     System.out.println("message.getBody():" + message.getBody());
7
8 }
6、测试,给队列(queues = "hd.news")发送消息,查看接收内容
