SpringMVC是什么?
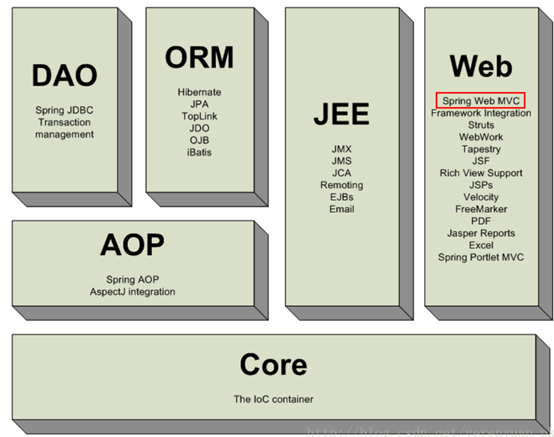
SpringMVC属于表现层的框架,它是Spring框架的一部分,我们可以从Spring的整体结构中看得出来:
SpringMVC处理流程
SpringMVC处理流程如下图所示:
SpringMVC入门程序
SpringMVC这个框架实现商品列表的展示。这是我对这个需求的分析:我这里假设请求的url为/itemList.action,由于我想要展示商品列表,所以是并不需要传递参数的,再次是这里仅仅是一个SpringMVC的一个入门小程序,并不会与MyBatis进行整合,也就不会从数据库表里面查询商品列表信息,故查询商品列表数据也仅仅只是一些静态数据。下面正式开始SpringMVC的入门小程序。
SpringMVC入门程序的开发步骤
【第一步】,创建一个javaweb工程,例如springmvc-first。
【第二步】,导入SpringMVC独立运行的jar包,如下:
【第三步】,创建一个jsp页面——itemList.jsp,内容如下:
<%@ page language="java" contentType="text/html; charset=UTF-8"

    pageEncoding="UTF-8"%>

<%@ taglib uri="http://java.sun.com/jsp/jstl/core" prefix="c" %>

<%@ taglib uri="http://java.sun.com/jsp/jstl/fmt"  prefix="fmt"%>

<!DOCTYPE html PUBLIC "-//W3C//DTD HTML 4.01 Transitional//EN" "http://www.w3.org/TR/html4/loose.dtd">

<html>

<head>

<meta http-equiv="Content-Type" content="text/html; charset=UTF-8">

<title>查询商品列表</title>

</head>

<body>

<form action="${pageContext.request.contextPath }/item/queryitem.action" method="post">

查询条件:

<table width="100%" border=1>

<tr>

<td><input type="submit" value="查询"/></td>

</tr>

</table>

商品列表:

<table width="100%" border=1>

<tr>

    <td>商品名称</td>

    <td>商品价格</td>

    <td>生产日期</td>

    <td>商品描述</td>

    <td>操作</td>

</tr>

<c:forEach items="${itemList }" var="item">

<tr>

    <td>${item.name }</td>

    <td>${item.price }</td>

    <td><fmt:formatDate value="${item.createtime}" pattern="yyyy-MM-dd HH:mm:ss"/></td>

    <td>${item.detail }</td>


    <td><a href="${pageContext.request.contextPath }/itemEdit.action?id=${item.id}">修改</a></td>


</tr>

</c:forEach>


</table>

</form>

</body>


</html>
并把该jsp页面复制到工程的/WEB-INF/jsp目录下。
【第四步】,创建一个Item类,用于描述商品信息,其内容如下:
public class Items {


    private int id;

    private String name;

    private double price;

    private Date createtime;

    private String detail;


    public Items(int id, String name, double price, Date createtime, String detail) {

        super();

        this.id = id;

        this.name = name;

        this.price = price;

        this.createtime = createtime;

        this.detail = detail;

    }


    public int getId() {

        return id;

    }

    public void setId(int id) {

        this.id = id;

    }

    public String getName() {

        return name;

    }

    public void setName(String name) {

        this.name = name;

    }

    public double getPrice() {

        return price;

    }

    public void setPrice(double price) {

        this.price = price;

    }

    public Date getCreatetime() {

        return createtime;

    }

    public void setCreatetime(Date createtime) {

        this.createtime = createtime;

    }

    public String getDetail() {

        return detail;

    }

    public void setDetail(String detail) {

        this.detail = detail;

    }


}
并将该类复制到工程src目录下的com.itheima.springmvc.pojo包中。
【第五步】,创建ItemController,ItemController是一个普通的java类,有点类似于Struts2中的Action,且不需要实现任何接口,只需要在类上添加@Controller注解即可。@RequestMapping注解指定请求的url,其中“.action”可以加也可以不加。在ModelAndView对象中,将视图设置为“/WEB-INF/jsp/itemList.jsp”。
@Controller

public class ItemController {

    // .action可以省略  (请求的url地址)

    @RequestMapping("/itemList.action")

    public ModelAndView itemList() {

        // 查询商品列表,使用静态数据生成一个商品列表

        List<Items> itemList = new ArrayList<Items>();

        itemList.add(new Items(1, "imac", 20000, new Date(), "苹果本很贵"));

        itemList.add(new Items(2, "imac1", 20000, new Date(), "苹果本很贵"));

        itemList.add(new Items(3, "imac2", 20000, new Date(), "苹果本很贵"));

        itemList.add(new Items(4, "imac3", 20000, new Date(), "苹果本很贵"));

        itemList.add(new Items(5, "imac4", 20000, new Date(), "卧槽,苹果本很贵啦!"));

        // 把商品列表传递给jsp

        ModelAndView modelAndView = new ModelAndView();

        modelAndView.addObject("itemList", itemList);

        // 设置展示数据的视图,即jsp

        modelAndView.setViewName("/WEB-INF/jsp/itemList.jsp");

        // 返回结果

        return modelAndView;

    }

}
最后将ItemController类复制到工程src目录下的com.itheima.springmvc.controller包中。
【第六步】,创建springmvc.xml,内容如下:
<?xml version="1.0" encoding="UTF-8"?>

<beans xmlns="http://www.springframework.org/schema/beans"

    xmlns:xsi="http://www.w3.org/2001/XMLSchema-instance"

    xmlns:p="http://www.springframework.org/schema/p"

    xmlns:context="http://www.springframework.org/schema/context"

    xmlns:mvc="http://www.springframework.org/schema/mvc"

    xsi:schemaLocation="

        http://www.springframework.org/schema/beans

        http://www.springframework.org/schema/beans/spring-beans-4.0.xsd

        http://www.springframework.org/schema/mvc

        http://www.springframework.org/schema/mvc/spring-mvc-4.0.xsd

        http://www.springframework.org/schema/context

        http://www.springframework.org/schema/context/spring-context-4.0.xsd">


    <context:component-scan base-package="com.itheima.springmvc.controller"/>

</beans>
上面配置了扫描包(Controller类所在的包),那么它就会扫描这个包下所有带@Controller注解的类,并创建对象放到springmvc容器中。
【第七步】,配置前端控制器。在web.xml中添加DispatcherServlet的配置,即在web.xml文件中添加如下配置:
<!-- 配置前端控制器 -->
<servlet>

    <servlet-name>springmvc</servlet-name>

    <servlet-class>org.springframework.web.servlet.DispatcherServlet</servlet-class>

    <init-param>

        <!-- 指定springmvc配置文件的路径。如果不指定,默认为:/WEB-INF/${servlet-name}-servlet.xml -->

        <param-name>contextConfigLocation</param-name>

        <param-value>classpath:springmvc.xml</param-value>

    </init-param>

</servlet>

<servlet-mapping>

    <servlet-name>springmvc</servlet-name>

    <url-pattern>*.action</url-pattern>

</servlet-mapping>
【第八步】,入门程序测试。