一、需求分析
1、练习开发一个向导用户界面
(1)、在同一个界面上展示不同的向导页面
(2)、通过“上一步”和“下一步”按钮进行切换
(3)、不同页面上的元素组件和元素排布都不相同
(4)、页面中的组件通过布局管理器进行排布
二、解决方案
1、通过布局嵌套进行界面设计

2、通过QStackedLayout管理不同的页面

3、通过子组件的方式生成不同的方式

4、注意事项
(1)、任意容器类的组件都可以指定布局管理器
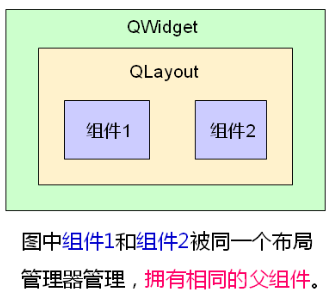
(2)、同一个布局管理器中的组件拥有相同的父组件
(3)、设置了布局管理的同时隐式地指定了父子关系


#ifndef WIDGET_H
#define WIDGET_H

#include <QtGui/QWidget>
#include <QLabel>
#include <QLineEdit>
#include <QPushButton>
#include <QStackedLayout>

class Widget : public QWidget
{
    Q_OBJECT
private:
    QLabel label1;
    QLabel label2;
    QLabel label3;
    QLabel label4;
    QLineEdit edit;
    QPushButton pageBtn1;
    QPushButton pageBtn2;

    QStackedLayout sLayout;//定义在这里是为了槽函数方便使用

    void initControl();
    QWidget* pageone();
    QWidget* pagetwo();
    QWidget* pagethree();

private slots:
    void onPreBtnClicked();
    void onNextBtnClicked();
public:
    Widget(QWidget *parent = 0);
    ~Widget();
};

#endif // WIDGET_H
#include "Widget.h"
#include <QHBoxLayout>
#include <QVBoxLayout>
#include <QPushButton>
#include <QFormLayout>
#include <QGridLayout>
#include <QDebug>

Widget::Widget(QWidget *parent)
    : QWidget(parent)
{
    initControl();
}
void Widget::initControl()
{
    QHBoxLayout* hLayout = new QHBoxLayout();//1.定义主界面的水平、垂直、栈式管理器
    QVBoxLayout* vLayout = new QVBoxLayout();


    QPushButton* preBtn = new QPushButton();
    QPushButton* nextBtn = new QPushButton();
    preBtn->setText("pre page");
    nextBtn->setText("next page");
    preBtn->setMinimumSize(100,30);
    nextBtn->setMinimumSize(100,30);

    hLayout->addWidget(preBtn);//3.定义按钮并添加到水平管理器
    hLayout->addWidget(nextBtn);

    sLayout.addWidget(pageone());//5.实现页面并且添加到栈式管理器
    sLayout.addWidget(pagetwo());
    sLayout.addWidget(pagethree());

    vLayout->addLayout(&sLayout);//2.添加水平和栈式管理器到垂直管理器
    vLayout->addLayout(hLayout);
    setLayout(vLayout);

    connect(preBtn, SIGNAL(clicked()), this, SLOT(onPreBtnClicked()));//6.连接信号与槽
    connect(nextBtn, SIGNAL(clicked()), this, SLOT(onNextBtnClicked()));


}

QWidget* Widget::pageone()
{
    QWidget* ret = new QWidget;
    QGridLayout* glayout = new QGridLayout();

    label1.setText("one");
    label2.setText("two");
    label3.setText("three");
    label4.setText("four");
    glayout->addWidget(&label1, 0, 0);
    glayout->addWidget(&label2, 0, 1);
    glayout->addWidget(&label3, 1, 0);
    glayout->addWidget(&label4, 1, 1);

    ret->setLayout(glayout);
/*说明相同的布局管理器中的组件有相同的父组件
    qDebug() << ret;
    qDebug() << label1.parent();
    qDebug() << label2.parent();
    qDebug() << label3.parent();
    qDebug() << label4.parent();
*/
    return ret;
}
QWidget* Widget::pagetwo()
{
    QWidget* ret = new QWidget;
    QFormLayout* flayout = new QFormLayout();

    flayout->addRow("name:", &edit);
    ret->setLayout(flayout);

    return ret;
}
QWidget* Widget::pagethree()
{
    QWidget* ret = new QWidget;

    pageBtn1.setText("this is");
    pageBtn2.setText("a page");

    QVBoxLayout* vlayout = new QVBoxLayout();
    vlayout->addWidget(&pageBtn1);
    vlayout->addWidget(&pageBtn2);

    ret->setLayout(vlayout);

    return ret;
}
void Widget::onPreBtnClicked()
{
    int index = ((sLayout.currentIndex() - 1) + sLayout.count()) % sLayout.count();
    sLayout.setCurrentIndex(index);
}
void Widget::onNextBtnClicked()
{
    int index = (sLayout.currentIndex() + 1) % 3;
    sLayout.setCurrentIndex(index);
}
Widget::~Widget()
{

}
#include <QtGui/QApplication>
#include "Widget.h"

int main(int argc, char *argv[])
{
    QApplication a(argc, argv);
    Widget w;
    w.show();

    return a.exec();
}
二、小结
(1)、布局管理器可以相互嵌套构成复杂的用户界面
(2)、任意容器组件均可设置布局管理器
(3)、同一个布局管理器中的组件拥有相同的父组件
(4)、组件间的父子关系是Qt中内存管理的重要方式