一安装Nginx
一、关闭selinux: $ vi /etc/selinux/config
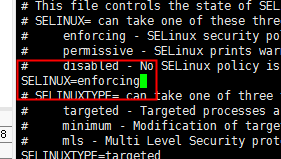
改为disabled.
然后重启服务器。
二、安装Nginx: $ yum -y install nginx
如果出现:No package nginx available
a、备份
执行$ mv /etc/yum.repos.d/CentOS-Base.repo /etc/yum.repos.d/CentOS-Base.repo.backup
b、下载新的CentOS-Base.repo 到/etc/yum.repos.d/
centos 5

wget -O /etc/yum.repos.d/CentOS-Base.repo http://mirrors.aliyun.com/repo/Centos-5.repo

或者

curl -o /etc/yum.repos.d/CentOS-Base.repo http://mirrors.aliyun.com/repo/Centos-5.repo

centos 6

wget -O /etc/yum.repos.d/CentOS-Base.repo http://mirrors.aliyun.com/repo/Centos-6.repo

或者

curl -o /etc/yum.repos.d/CentOS-Base.repo http://mirrors.aliyun.com/repo/Centos-6.repo

 centos 7

wget -O /etc/yum.repos.d/CentOS-Base.repo http://mirrors.aliyun.com/repo/Centos-7.repo

或者

curl -o /etc/yum.repos.d/CentOS-Base.repo http://mirrors.aliyun.com/repo/Centos-7.repo
c、执行$ yum makecache
4、执行$ yum install epel-release
5、执行$ yum install nginx
参考:https://www.cnblogs.com/maxwell-xu/p/8000458.html
使用:$ rpm -qa | grep nginx
查看nginx是否成功安装.
启动nginx:$ systemctl start nginx
使Nginx在系统引导时自动启动:$ systemctl enable nginx.
检测nginx的当前状态:$ systemctl status nginx
检测firewalld(CentOS7中防火墙从iptables变为firewalld)状态:$ systemctl status firewalld.
如果firewalld没有启用那么需要将其启用。
打开端口80:$ firewall-cmd --zone=public --add-port=80/tcp --permanent
重启防火墙:$ systemctl restart firewalld.
如果想想在Nginx上启用HTTPS,那么还需要代开443端口:
$:firewall-cmd --zone=public --add-port=443/tcp --permanent
使用:$ netstat -lntp 查看端口是否被分配给了Nginx.
使用:$curl 127.0.0.1:80看能否访问。
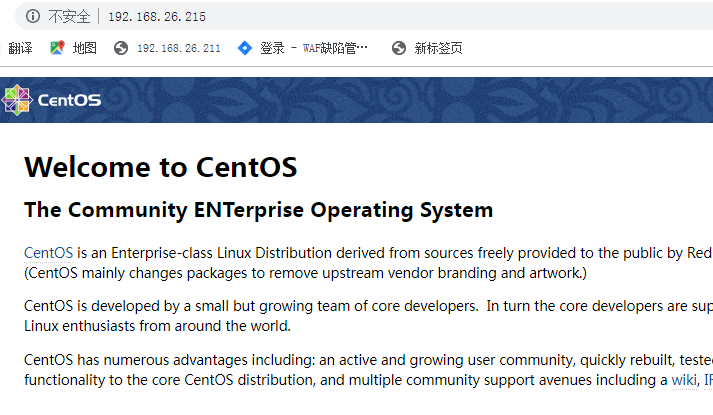
使用其它机器的浏览器访问:http:ip
nginx的配置文件:/etc/nginx/nginx.conf等等
nginx网站的默认根目录: /usr/share/nginx/html
改变网站根目录的所有者:
chown nginx:nginx /usr/share/nginx/html -R
注意:
如果 浏览器不能访问,可以通过:$ netstat -lntp检测当前端口状态:
$ ip ro show 坚持路由是否正常
$ Ss -lnpa | grep nginx
$ curl 127.0.0.1:80是否可与访问 $ curl 服务器ip:80是否可以访问。
如果访问/usr/share/nginx/html下的nginx-logo.png或者1.txt可以访问,而 1.php不能说明此时nginx不能继续php文件.
二、安装Mariadb:
$ yum install mariadb-server mariadb -y
检测是否安装成功:$ rpm -qa | grep mariadb
启动mariadb: $ systemctl start mariadb
在系统引导时启用自动启动:$ systemctl enable mariadb
检查mariadb的状态: $ systemctl status mariadb
看到MariaDB正在运行,需要运行安全脚本:
mysql_secure_installation
当它要求输入Mariadb root密码时,请按Enter键,因为尚未设置root密码,然后输入y 以设置MariaDB服务器的root密码:
设置后root密码后,连续按4次Y,完成mariadb的安装。
执行:$ mysql -r root -p 进入myqsl
执行:$ exit 退出mysql
Mariadb的数据库文件在以下目录:
find / -name mysql
数据文件是放在 /var/lib/mysql目录下。
三、安装PHP:
使用以下命令安装PHP和相关模块:
$ yum install php php-mysqlnd php-fpm php-opcache php-gd php-xml php-mbstring php-json -y
必须按php-json,否则下面安装wordpress会出错。
查看php扩展文件:$ php -a
检测php-fpm当前状态:$ systemctl status php-fpm.
启动php-fpm: $ systemctl start php-fpm.
在系统引导是启用自动启动:$ systemctl enable php-fpm
检测php-fpm状态: systemctl status php-fpm.
运行正常后,编辑PHP-FPM配置文件
vi /etc/php-fpm.d/www.conf
默认情况下PHP-FPM作为apache用户运行,由于我们使用的是Nginx Web服务器,我们需要进行更改,找到以下两行:
user = apache 与 group = apache
将它们更改为: user = nginx 与 group = apache
在此文件,可以找到以下行:listen =/run/php-fpm/www.sock
这表明PHP-FPM正在侦听Unix套接字而不是TCP套接字,保存文件,重新加载PHP-FPM以使更改生效:
$ systemct reload php-fpm
四、配置nginx.conf文件使其可以解析:php文件
进入nginx.conf:$ vi /etc/nginx/conf/nginx.conf
server {
        listen       80 default_server;
        listen       [::]:80 default_server;
        # 这里改动了,也可以写你的域名
        server_name  192.168.17.26;

        # 默认网站根目录(www目录)
        root         /var/www/;

        # Load configuration files for the default server block.
        include /etc/nginx/default.d/*.conf;

        location / {
            # 这里改动了 定义首页索引文件的名称
            #index index.php index.html index.htm;
        }

        error_page 404 /404.html;
            location = /40x.html {
        }

        error_page 500 502 503 504 /50x.html;
            location = /50x.html {
        }

        # 这里新加的
        # PHP 脚本请求全部转发到 FastCGI处理. 使用FastCGI协议默认配置.
        # Fastcgi服务器和程序(PHP,Python)沟通的协议.
        location ~ .php$ {
            # 设置监听端口
            fastcgi_pass   127.0.0.1:9000;
            # 设置nginx的默认首页文件(上面已经设置过了,可以删除)
            fastcgi_index  index.php;
            # 设置脚本文件请求的路径
            fastcgi_param  SCRIPT_FILENAME  $document_root$fastcgi_script_name;
            # 引入fastcgi的配置文件
            include        fastcgi_params;
        }
    }

在nginx的网站主目录建立如下内容的一个php文件测试php
$ cd /usr/share/nginx/html
$ echo "<?php phpinfo(); ?>" >>info.php
在浏览器地址揽中输入:http://服务器IP/info.php, 来测试php,如下图所示。

卸载安装的php: $ yum remove php php-mysqlnd php-fpm php-opcache php-gd php-xml php-mbstring php-json -y