1.CSS3 结构性伪类选择器—root
:root选择器就是匹配元素E所在文档的根元素。在HTML文档中,根元素始终是<html>。
“:root”选择器等同于<html>元素,简单点说:
:root{background:orange}
html {background:orange;}
示例演示:
通过“:root”选择器设置背景颜色
HTML代码:
<div>:root选择器的演示</div>
CSS代码:
:root {
  background:orange;
}
演示结果:
“:root”选择器等同于<html>元素,简单点说:
:root{background:orange}
html {background:orange;}
得到的效果等同。
建议使用:root方法。
:root 代码示例:
<!DOCTYPE html>
<html>
<head>
<meta charset="utf-8">
<title>结构性伪类选择器—root</title>
<style type="text/css">
:root{
background: skyblue;
color: blue;
}
</style>
</head>
<body>
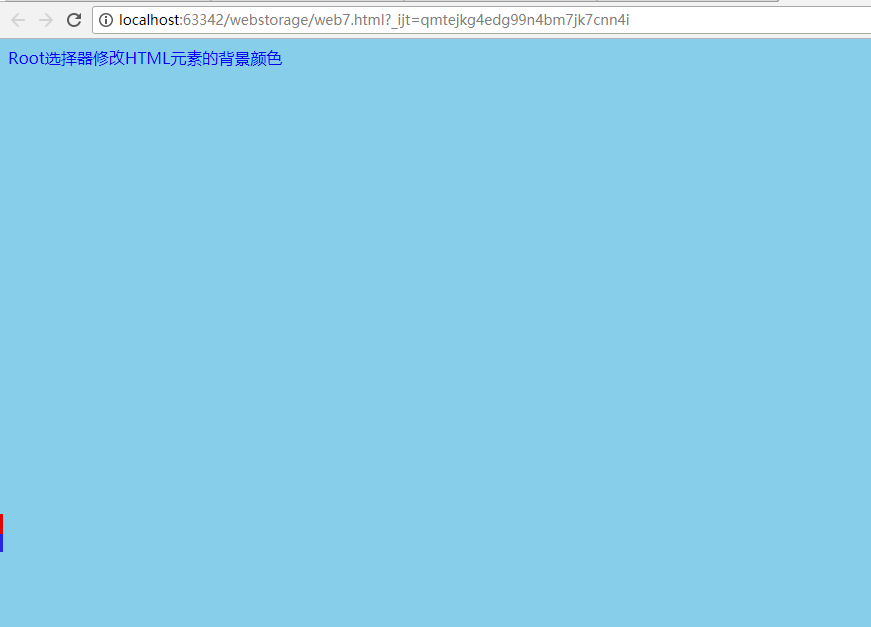
<div>Root选择器修改HTML元素的背景颜色</div>
</body>
</html>
效果:
html 代码示例:
<!DOCTYPE html>
<html>
<head>
    <meta charset="utf-8">
    <title>结构性伪类选择器—root</title>

    <style type="text/css">
        html{
            background: rebeccapurple;
           color: blue;
        }

    </style>
</head>
<body>
<div>Root选择器修改HTML元素的背景颜色</div>
</body>
</html>
效果:

2.:not选择器称为否定选择器
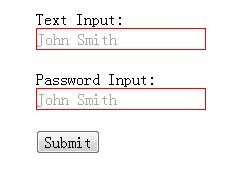
:not选择器称为否定选择器,和jQuery中的:not选择器一模一样,可以选择除某个元素之外的所有元素。就拿form元素来说,比如说你想给表单中除submit按钮之外的input元素添加红色边框,CSS代码可以写成:
form {
   200px;
  margin: 20px auto;
}
div {
  margin-bottom: 20px;
}
input:not([type="submit"]){
  border:1px solid red;
}
相关HTML代码:
<form action="#">
<div>
<label for="name">Text Input:</label>
<input type="text" name="name" id="name" placeholder="John Smith" />
</div>
<div>
<label for="name">Password Input:</label>
<input type="text" name="name" id="name" placeholder="John Smith" />
</div>
<div>
<input type="submit" value="Submit" />
</div>
</form>
演示结果:
代码示例:
<!DOCTYPE html>
<html>
<head>
    <meta charset="utf-8">
    <title>结构性伪类选择器—not</title>

    <style type="text/css">
        div{
            padding: 10px ;
            200px;

        }
        div:not([id="footer"]){
            background: orange;
        }
        li{
            background: skyblue;
            250px;
        }
        li:not([id="class2"] ){
            background: slateblue;
        }
    </style>

</head>
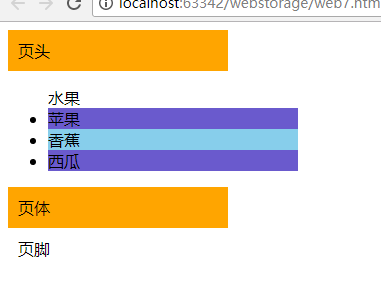
演示结果:
3.CSS3 结构性伪类选择器—empty
:empty选择器表示的就是空。用来选择没有任何内容的元素,这里没有内容指的是一点内容都没有,哪怕是一个空格。
示例显示:
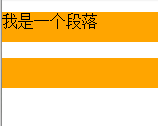
比如说,你的文档中有三个段落p元素,你想把没有任何内容的P元素隐藏起来。我们就可以使用“:empty”选择器来控制。
HTML代码:
<p>我是一个段落</p> <p> </p> <p></p>
CSS代码:
p{
background: orange;
min-height: 30px;
}
p:empty {
display: none;
}
演示结果:
代码示例:
<!DOCTYPE html>
<html>
<head>
<meta charset="utf-8">
<title>结构性伪类选择器—empty</title>
<style type="text/css">
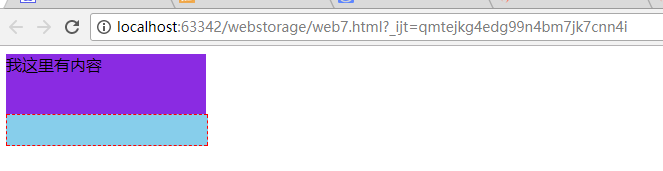
div {
background: blueviolet;
min-height: 30px;
200px;
}
div:empty {
border: 1px dashed red;
background: skyblue;
}
</style>
</head>
<body>
<div>我这里有内容</div>
<div> <!-- 我这里有一个空格 --></div>
<div></div><!-- 我这里任何内容都没有 -->
</body>
</html>
演示结果:
4.CSS3 结构性伪类选择器—target
:target选择器称为目标选择器,用来匹配文档(页面)的url的某个标志符的目标元素。我们先来上个例子,然后再做分析。
示例展示
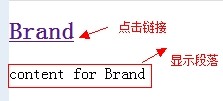
点击链接显示隐藏的段落。
HTML代码:
<h2><a href="#brand">Brand</a></h2>
<div class="menuSection" id="brand">
    content for Brand
</div>
CSS代码:
.menuSection{
  display: none;
}
:target{/*这里的:target就是指id="brand"的div对象*/
  display:block;
}
演示结果:
分析:
1、具体来说,触发元素的URL中的标志符通常会包含一个#号,后面带有一个标志符名称,上面代码中是:#brand
2、:target就是用来匹配id为“brand”的元素(id="brand"的元素),上面代码中是那个div元素。
多个url(多个target)处理:
就像上面的例子,#brand与后面的id="brand"是对应的,当同一个页面上有很多的url的时候你可以取不同的名字,只要#号后对的名称与id=""中的名称对应就可以了。
如下面例子:
html代码:
<h2><a href="#brand">Brand</a></h2>
<div class="menuSection" id="brand">
  content for Brand
</div>
<h2><a href="#jake">Brand</a></h2>
<div class="menuSection" id="jake">
 content for jake
</div>
<h2><a href="#aron">Brand</a></h2>
<div class="menuSection" id="aron">
    content for aron
</div>
css代码:
#brand:target {
  background: orange;
  color: #fff;
}
#jake:target {
  background: blue;
  color: #fff;
}
#aron:target {
  background: red;
  color: #fff;
}
上面的代码可以对不同的target对象分别设置不的样式。
代码示例:
<!DOCTYPE html>
<html>
<head>
<meta charset="UTF-8">
<title>target demo</title>
<style type="text/css">
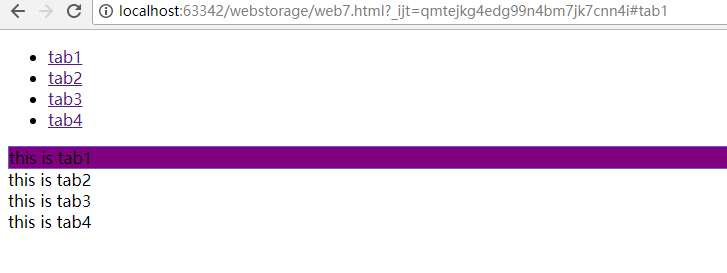
div:target{
background: purple;border: 1px solid black;
}
</style>
</head>
<body>
<ul>
<li><a href="#tab1">tab1</a></li>
<li><a href="#tab2">tab2</a></li>
<li><a href="#tab3">tab3</a></li>
<li><a href="#tab4">tab4</a></li>
</ul>
<div id="tab1">this is tab1</div>
<div id="tab2">this is tab2</div>
<div id="tab3">this is tab3</div>
<div id="tab4">this is tab4</div>
</body>
</html>
演示结果:
转载:http://www.imooc.com/code/736