一.nginx
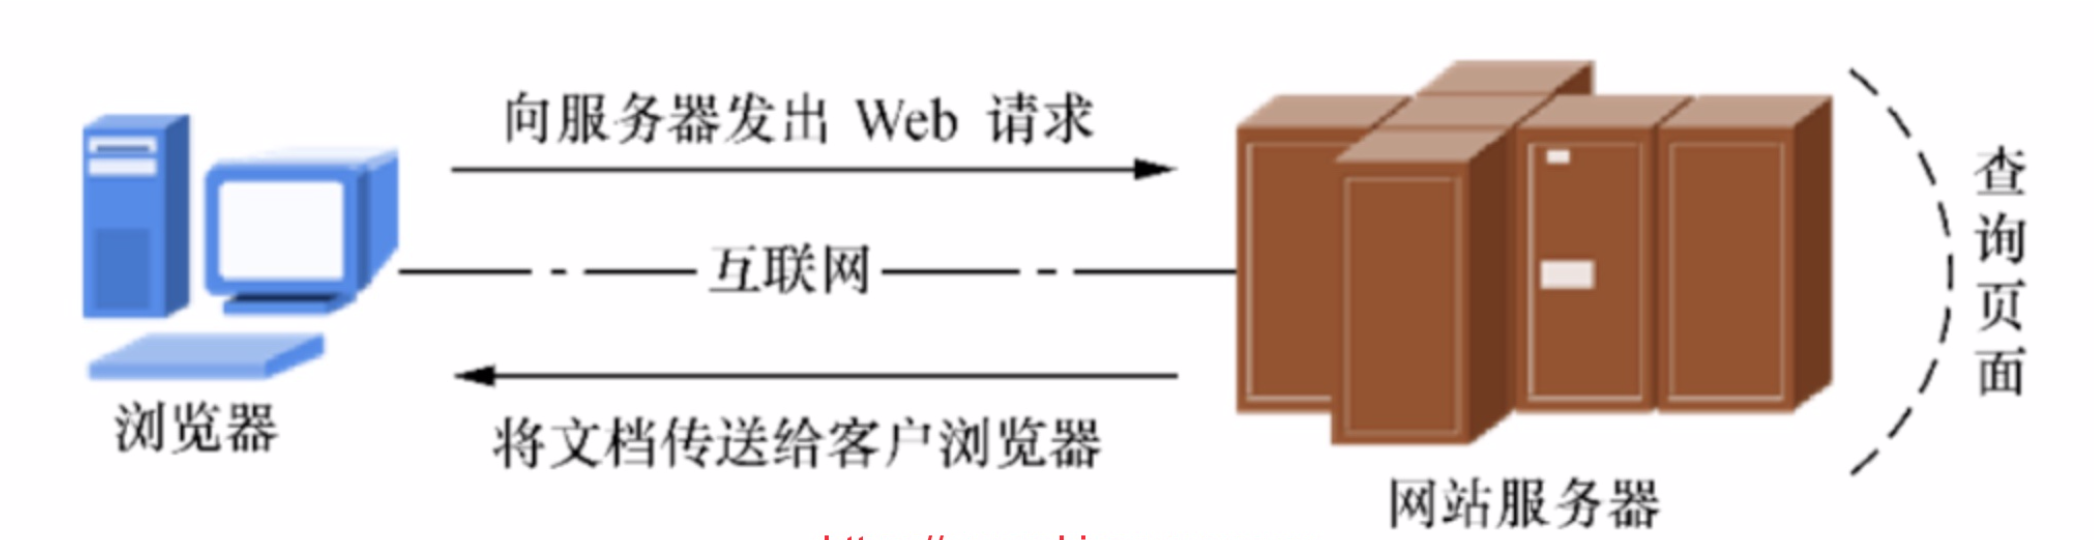
想必我们大多数人都是通过访问网站而开始接触互联网的吧。我们平时访问的网站服务 就是 Web 网络服务,一般是指允许用户通过浏览器访问到互联网中各种资源的服务。
Web 网络服务是一种被动访问的服务程序,即只有接收到互联网中其他主机发出的 请求后才会响应,最终用于提供服务程序的 Web 服务器会通过 HTTP(超文本传输协议)或 HTTPS(安全超文本传输协议)把请求的内容传送给用户。
目前能够提供 Web 网络服务的程序有 IIS、Nginx 和 Apache 等。其中,IIS(Internet Information Services,互联网信息服务)是 Windows 系统中默认的 Web 服务程序
2004 年 10 月 4 日,为俄罗斯知名门户站点而开发的 Web 服务程序 Nginx 横空出世。 Nginx 程序作为一款轻量级的网站服务软件,因其稳定性和丰富的功能而快速占领服务器市 场,但 Nginx 最被认可的还当是系统资源消耗低且并发能力强,因此得到了国内诸如新浪、 网易、腾讯等门户站的青睐。
web服务器(nginx):接收HTTP请求(例如www.pythonav.cn/xiaocang.jpg)并返回数据
web框架(django,flask):开发web应用程序,处理接收到的数据。
二.nginx 介绍
1)nginx是一个开源的,支持高性能,高并发的www服务和代理服务软件。它是一个俄罗斯人lgor sysoev开发的,作者将源代码开源出来供全球使用。
2)nginx比它大哥apache性能改进许多,nginx占用的系统资源更少,支持更高的并发连接,有更高的访问效率。
3)nginx不但是一个优秀的web服务软件,还可以作为反向代理,负载均衡,以及缓存服务使用。
4)安装更为简单,方便,灵活。
5)支持高并发,能支持几万并发连接
6)资源消耗少,在3万并发连接下开启10个nginx线程消耗的内存不到200M
7)可以做http反向代理和负载均衡
8)支持异步网络i/o事件模型epoll
第三方产品Tengine
Tengine是由淘宝网发起的Web服务器项目。它在Nginx的基础上,针对大访问量网站的需求,添加了很多高级功能和特性。Tengine的性能和稳定性已经在大型的网站如淘宝网,天猫商城等得到了很好的检验。它的最终目标是打造一个高效、稳定、安全、易用的Web平台。
三.nginx配置安装
同样,nginx也有很多的安装方式:
1)源码安装(运维偏向:规范,便于配置管理)
2)yum,rpm安装(为了效率可以选用)
nginx官网:http://nginx.org/
#安装依赖包
[root@elkstack01 ~]# yum install gcc gcc-c++ pcre-devel patch libffi-devel python-devel  zlib-devel bzip2-devel openssl-devel ncurses-devel sqlite-devel readline-devel tk-devel gdbm-devel db4-devel libpcap-devel xz-devel openssl-devel -y

#依赖简单介绍
一. gcc 安装
安装 nginx 需要先将官网下载的源码进行编译,编译依赖 gcc 环境,如果没有 gcc 环境,则需要安装:
yum install gcc-c++

二. PCRE pcre-devel 安装
PCRE(Perl Compatible Regular Expressions) 是一个Perl库,包括 perl 兼容的正则表达式库。nginx 的 http 模块使用 pcre 来解析正则表达式,所以需要在 linux 上安装 pcre 库,pcre-devel 是使用 pcre 开发的一个二次开发库。nginx也需要此库。命令:
yum install -y pcre-devel

三. zlib 安装
zlib 库提供了很多种压缩和解压缩的方式, nginx 使用 zlib 对 http 包的内容进行 gzip ,所以需要在 Centos 上安装 zlib 库。
yum install -y zlib-devel

四. OpenSSL 安装
OpenSSL 是一个强大的安全套接字层密码库,囊括主要的密码算法、常用的密钥和证书封装管理功能及 SSL 协议,并提供丰富的应用程序供测试或其它目的使用。
nginx 不仅支持 http 协议,还支持 https(即在ssl协议上传输http),所以需要在 Centos 安装 OpenSSL 库。
yum install -y openssl-devel

#下载nginx源码包
[root@elkstack01 ~]# wget -c https://nginx.org/download/nginx-1.10.3.tar.gz
#创建nginx用户
[root@elkstack01 ~]# useradd nginx -s /sbin/nologin -M
#解压
[root@elkstack01 ~]# tar xf nginx-1.10.3.tar.gz
#进入nginx安装目录
[root@elkstack01 ~]# cd nginx-1.10.3/
#生成编译文件,开启状态监测模块,开启ssl,开启4层代理模块
[root@elkstack01 nginx-1.10.3]# ./configure  --user=nginx --group=nginx --prefix=/usr/local/nginx-1.10.3/ --with-http_stub_status_module  --with-http_ssl_module --with-stream
#编译
[root@elkstack01 nginx-1.10.3]# make
#安装
[root@elkstack01 nginx-1.10.3]# make install
#执行成功后我们可以看一下,/usr/local目录下是否有nginx
[root@elkstack01 nginx-1.10.3]# ll /usr/local/
总用量 0
drwxr-xr-x.  2 root  root    6 2018-04-11 12:59 bin
drwxr-xr-x.  2 root  root    6 2018-04-11 12:59 etc
drwxr-xr-x.  2 root  root    6 2018-04-11 12:59 games
drwxr-xr-x.  2 root  root    6 2018-04-11 12:59 include
drwxr-xr-x.  2 root  root    6 2018-04-11 12:59 lib
drwxr-xr-x.  2 root  root    6 2018-04-11 12:59 lib64
drwxr-xr-x.  2 root  root    6 2018-04-11 12:59 libexec
lrwxrwxrwx   1 mysql mysql  23 2019-04-16 20:48 mysql -> /usr/local/mysql-5.6.40
drwxr-xr-x  13 mysql mysql 205 2019-04-16 21:01 mysql-5.6.40
drwxr-xr-x   6 root  root   51 2019-04-18 10:35 mysql-proxy
drwxr-xr-x  11 root  root  151 2019-04-18 12:17 nginx-1.10.3
drwxr-xr-x   6 root  root   56 2019-04-18 18:46 python3.6.4
lrwxrwxrwx   1 root  root   23 2019-04-18 17:52 redis -> /usr/local/redis-3.2.12
drwxrwxr-x   6 root  root  309 2019-04-18 17:58 redis-3.2.12
drwxr-xr-x.  2 root  root    6 2018-04-11 12:59 sbin
drwxr-xr-x.  5 root  root   49 2019-04-08 19:14 share
drwxr-xr-x.  2 root  root    6 2018-04-11 12:59 src
#做软链接
[root@elkstack01 nginx-1.10.3]# ln -s /usr/local/nginx-1.10.3 /usr/local/nginx
#进入nginx程序目录
[root@elkstack01 nginx-1.10.3]# cd /usr/local/nginx-1.10.3/
#查看nginx的目录结构
[root@elkstack01 nginx-1.10.3]# ll
总用量 16
#存放nginx所有配置文件的目录,主要nginx.conf
drwxr-xr-x 2 root root 4096 4月  12 23:06 conf
#存放nginx默认站点的目录,如index.html、error.html等
drwxr-xr-x 2 root root 4096 4月  12 23:06 html
#存放nginx默认日志的目录,如error.log access.log
drwxr-xr-x 2 root root 4096 4月  12 23:06 logs
#存放nginx程序命令的目录
drwxr-xr-x 2 root root 4096 4月  12 23:06 sbin
nginx配置文件介绍
Nginx主配置文件/etc/nginx/nginx.conf是一个纯文本类型的文件,整个配置文件是以区块的形式组织的。一般,每个区块以一对大括号{}来表示开始与结束,每一行使用;表示结束。
#CoreModule核心模块
user nginx;                       #Nginx进程所使用的用户
worker_processes 1;             #Nginx运行的work进程数量(建议与CPU数量一致或auto)
error_log /log/nginx/error.log  #Nginx错误日志存放路径
pid /var/run/nginx.pid          #Nginx服务运行后产生的pid进程号

#events事件模块
events {
    worker_connections  #每个worker进程支持的最大连接数
    use epool;          #事件驱动模型, epoll默认
}


#http内核模块
#公共的配置定义在http{}
http {  //http层开始
...
#使用Server配置网站, 每个Server{}代表一个网站(简称虚拟主机)
    'server' {
        listen       80;        //监听端口, 默认80
        server_name  localhost; //提供服务的域名或主机名
        access_log host.access.log  //访问日志
        //控制网站访问路径
        'location' / {
            root   /usr/share/nginx/html;   //存放网站代码路径
            index  index.html index.htm;    //服务器返回的默认页面文件
        }
        //指定错误代码, 统一定义错误页面, 错误代码重定向到新的Locaiton
        error_page   500 502 503 504  /50x.html;
    }
    ...
    //第二个虚拟主机配置
    'server' {
    ...
    }
    include /etc/nginx/conf.d/*.conf;  //包含/etc/nginx/conf.d/目录下所有以.conf结尾的文件
}   //http层结束
部署一个简单的nginx站点
#简化nginx配置文件
[root@elkstack01 conf]# grep -Ev "#|^$" /usr/local/nginx/conf/nginx.conf.default > /usr/local/nginx/conf/nginx.conf
#编辑nginx页面
[root@elkstack01 conf]# echo 'hello world' > /usr/local/nginx/html/index.html
#检测nginx语法
[root@elkstack01 conf]# /usr/local/nginx/sbin/nginx -t
nginx: the configuration file /usr/local/nginx-1.10.3//conf/nginx.conf syntax is ok
nginx: configuration file /usr/local/nginx-1.10.3//conf/nginx.conf test is successful
#启动nginx
[root@elkstack01 conf]# /usr/local/nginx/sbin/nginx
#检测端口
[root@elkstack01 conf]# netstat -lntup|grep 80
tcp        0      0 0.0.0.0:80                  0.0.0.0:*                   LISTEN      39105/nginx
#检测进程
[root@elkstack01 conf]# ps -ef|grep nginx
root      39105      1  0 23:19 ?        00:00:00 nginx: master process /usr/local/nginx/sbin/nginx
nginx     39106  39105  0 23:19 ?        00:00:00 nginx: worker proce
nginx 多个虚拟主机
如果每台linux服务器只运行了一个小网站,那么人气低,流量小的草根站长需要承担高额的服务器租赁费,也造成了硬件资源浪费。
虚拟主机就是将一台服务器分割成多个“虚拟服务器”,每个站点使用各自的硬盘空间,由于省资源,省钱,众多网站都使用虚拟主机来部署网站。
1)虚拟主机的概念就是在web服务里的一个独立的网站站点,这个站点对应独立的域名(IP),具有独立的程序和资源目录,可以独立的对外提供服务。
2)这个独立的站点配置是在nginx.conf中使用server{}代码块标签来表示一个虚拟主机。
3)Nginx支持多个server{}标签,即支持多个虚拟主机站点。
虚拟主机类型
基于域名的虚拟主机
通过不同的域名区分不同的虚拟主机,是企业应用最广的虚拟主机。
基于端口的虚拟主机
通过不同的端口来区分不同的虚拟主机,一般用作企业内部网站,不对外直接提供服务的后台,例如blog.driverzeng.com:8888
基于IP的虚拟主机
通过不同的IP区分不同的虚拟主机,此类比较少见,一般业务需要多IP的常见都会在负载均衡中绑定VIP
nginx可以自动识别用户请求的域名,根据不同的域名请求服务器传输不同的内容,只需要保证服务器上有一个可用的ip地址,配置好dns解析服务。
/etc/hosts是linux系统中本地dns解析的配置文件,同样可以达到域名访问效果
配置虚拟主机
#编辑nginx配置文件
[root@elkstack01 conf]# vim /usr/local/nginx/conf/nginx.conf
worker_processes  1;
events {
    worker_connections  1024;
}
http {
    include       mime.types;
    default_type  application/octet-stream;
    sendfile        on;
    keepalive_timeout  65;
    server {
        listen       80;
        server_name  localhost;
        location / {
            root   html;
            index  index.html index.htm;
        }
        error_page   500 502 503 504  /50x.html;
        location = /50x.html {
            root   html;
        }
    }
    server {
        listen       80;
        server_name  blog.charles.com;
        location / {
            root   /code/drz;
            index  index.html index.htm;
        }
        error_page   500 502 503 504  /50x.html;
        location = /50x.html {
            root   html;
        }
    }
}
#创建站点目录
[root@elkstack01 conf]# mkdir -p /code/drz
#编辑blog页面
[root@elkstack01 conf]# echo '<font color="red">zls blog page</font>' > /code/drz/index.html
#检测nginx语法
[root@elkstack01 conf]# /usr/local/nginx/sbin/nginx -t
nginx: the configuration file /usr/local/nginx-1.10.3//conf/nginx.conf syntax is ok
nginx: configuration file /usr/local/nginx-1.10.3//conf/nginx.conf test is successful
#重新加载nginx(不间断业务)
[root@elkstack01 conf]# /usr/local/nginx/sbin/nginx -s reload
#绑定hosts(MAC)
MacBook-Pro:~ driverzeng$ sudo vim /etc/hosts
10.0.0.51 blog.charles.com
#绑定hosts(Windows)
windows+r 打开运行 输入:drivers,进入etc目录里面有一个hosts文件,在文件最后一行添加
10.0.0.51 blog.charles.com
代理多个服务器(负载均衡)
nginx配置文件
web01:

 server {
        listen       9988;
        server_name  www.oldboy.com;
        access_log logs/www.oldboy.com_access.log main;
        location / {
            root   html/book/ccpt_5_bbh/html;
            index  index.html index.htm;
        }
}


web02:

 server {
        listen       8899;
        server_name  www.oldboy.com;
        access_log  /var/log/nginx/www.oldboy.com_access.log main;
        location / {
            root   /usr/local/nginx/html/book/ccpt_5_bbh/html;
            index  index.html index.htm;

        }
}
代理nginx
worker_processes  1;
events {
    worker_connections  1024;
}
http {
    include       mime.types;
    default_type  application/octet-stream;
    sendfile        on;
    keepalive_timeout  65;

    upstream www_oldboy_com {
    server 10.0.0.51:9988  weight=1;
    server 10.0.0.52:8899  weight=1;
}
    server {
        listen       80;
        server_name  www.oldboy.com;
        location / {
            index  index.html index.htm;
            proxy_pass http://www_oldboy_com;
            proxy_set_header Host  $host;
            proxy_set_header X-Forwarded-For $remote_addr;
            proxy_connect_timeout 60;
            proxy_send_timeout 60;
            proxy_read_timeout 60;
            proxy_buffer_size 4k;
            proxy_buffers 4 32k;
            proxy_busy_buffers_size 64k;
            proxy_temp_file_write_size 64k;
        }
    }
}