上一篇我们重点介绍了组件的创建、注册和使用,熟练这几个步骤将有助于深入组件的开发。另外,在子组件中定义props,可以让父组件的数据传递下来,这就好比子组件告诉父组件:“嘿,老哥,我开通了一个驿站,你把东西放到驿站我就可以拿到了。”
今天我们将着重介绍slot和父子组件之间的访问和通信。slot是一个非常有用的东西,它相当于一个内容插槽,它是我们重用组件的基础。Vue的事件系统独立于原生的DOM事件,它用于组件之间的通信。
注意:组件模板都定义在<template>标签中,然而IE不支持<template>标签,这使得在IE中<template>标签中的内容会显示出来。
解决办法——隐藏<template>标签
template{
    display: none;
}
一、编译作用域
尽管使用组件就像使用一般的HTML元素一样,但它毕竟不是标准的HTML元素,为了让浏览器能够识别它,组件会被解析为标准的HTML片段,然后将组件的标签替换为该HTML片段。
<div id="app">
    <my-component>
    </my-component>
</div>

<template id="myComponent">
    <div>
        <h2>{{ msg }}</h2>
        <button v-on:click="showMsg">Show Message</button>
    </div>
</template>
<script src="js/vue.js"></script>
<script>
    new Vue({
        el: '#app',
        components: {
            'my-component': {
                template: '#myComponent',
                data: function() {
                    return {
                        msg: 'This is a component!'
                    }
                },
                methods: {
                    showMsg: function() {
                        alert(this.msg)
                    }
                }
            }
        }
    })
这段代码定义了一个my-component组件,<my-component><my-component>不是标准的HTML元素,浏览器是不理解这个元素的。那么Vue是如何让浏览器理解<my-component><my-component>标签的呢?

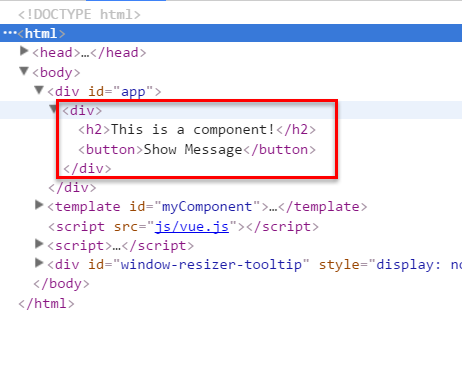
在创建一个Vue实例时,除了将它挂载到某个HTML元素下,还要编译组件,将组件转换为HTML片段。除此之外,Vue实例还会识别其所挂载的元素下的<my-component>标签,然后将<my-component>标签替换为HTML片段。实际上浏览器仍然是不理解<my-component>标签的,我们可以通过查看源码了解到这一点。
组件在使用前,经过编译已经被转换为HTML片段了,组件是有一个作用域的,那么组件的作用域是什么呢?你可以将它理解为组件模板包含的HTML片段,组件模板内容之外就不是组件的作用域了。例如,my-component组件的作用域只是下面这个小片段。
组件的模板是在其作用域内编译的,那么组件选项对象中的数据也应该是在组件模板中使用的。考虑下面的代码,在Vue实例和组件的data选项中分别追加一个display属性:
new Vue({
    el: '#app',
    data: {
        display: true
    },
    components: {
        'my-component': {
            template: '#myComponent',
            data: function() {
                return {
                    msg: 'This is a component!',
                    display: false
                }
            },
            methods: {
                showMsg: function() {
                    alert(this.msg)
                }
            }
        }
    }
})
然后在my-component标签上使用指令v-show="display",这个display数据是来源于Vue实例,还是my-component组件呢?
<div id="app">
    <my-component v-show="display">
    </my-component>
</div>
答案是Vue实例。
至此,我们应该认识到组件的作用域是独立的:父组件模板的内容在父组件作用域内编译;子组件模板的内容在子组件作用域内编译
通俗地讲,在子组件中定义的数据,只能用在子组件的模板。在父组件中定义的数据,只能用在父组件的模板。如果父组件的数据要在子组件中使用,则需要子组件定义props。
二、使用Slot
为了让组件可以组合,我们需要一种方式来混合父组件的内容与子组件自己的模板。这个处理称为内容分发,Vue.js 实现了一个内容分发 API,使用特殊的 <slot> 元素作为原始内容的插槽。如果不理解这段话,可以先跳过,你只要知道<slot>元素是一个内容插槽。
1、单个Slot
下面的代码在定义my-component组件的模板时,指定了一个<slot></slot>元素。
<div id="app">
    <my-component v-show="display">
        <h1>Hello Vue.js!</h1>
    </my-component>
    <my-component>
    </my-component>
</div>
<template id="myComponent">
    <div>
        <h2>{{msg}}</h2>
        <slot>如果没有分发内容,则显示slot中的内容</slot>
        <button @click="showMsg">show Msg</button>
    </div>
</template>
</body>
<script>
    var vm=new Vue({
        el:"#app",
        data:{
            display:true
        },
        components:{
            "my-component":{
                template:"#myComponent",
                data:function(){
                    return {
                        msg:"myComponent",
                        display:false
                    }
                },
                methods:{
                    "showMsg":function(msg){
                        alert(this.msg);
                    }
                }
            }
        }
    })
</script>

第一个<my-component>标签有一段分发内容<h1>Hello Vue.js!</h1>,渲染组件时显示了这段内容。
第二个<my-component>标签则没有,渲染组件时则显示了slot标签中的内容。
简而言之,slot就是一个占位符,当template里面有内容时就把位置给它显示;当没有内容时,就默认显示slot里的内容。
2、指定名称的slot
上面示例是一个匿名slot,它只能表示一个插槽。如果需要多个内容插槽,则可以为slot元素指定name属性。
多个slot一起使用时,会非常有用。例如,对话框是HTML常用的一种交互方式。在不同的运用场景下,对话框的头部、主体内容、底部可能是不一样的。
//使用时,用name
<slot name="header"></slot>

//定义时
<header class="dialog-header" slot="header">
    <h1 class="dialog-title">提示信息</h1>
</header>
三、父子组件之间的访问
有时候我们需要父组件访问子组件,子组件访问父组件,或者是子组件访问根组件。针对这几种情况,Vue.js都提供了相应的API:
1、父组件访问子组件:使用$children或$refs
在父组件中,通过this.$children可以访问子组件。this.$children是一个数组,它包含所有子组件的实例。
组件个数较多时,我们难以记住各个组件的顺序和位置,通过序号访问子组件不是很方便。在子组件上使用v-ref指令,可以给子组件指定一个索引ID:
<template id="parent-component">
    <child-component1 v-ref:cc1></child-component1>
    <child-component2 v-ref:cc2></child-component2>
    <button v-on:click="showChildComponentData">显示子组件的数据</button>
</template>
在父组件中,则通过 "$refs.索引ID" 访问子组件的实例:
showChildComponentData: function() {
    alert(this.$refs.cc1.msg);
    alert(this.$refs.cc2.msg);
}
2、子组件访问父组件:使用$parent
在子组件中,通过this.$parent可以访问到父组件的实例。
3、子组件访问根组件实例:使用$root
注意:尽管可以访问父链上任意的实例,不过子组件应当避免直接依赖父组件的数据,尽量显式地使用 props 传递数据。
另外,在子组件中修改父组件的状态是非常糟糕的做法,因为: (1)这让父组件与子组件紧密地耦合; (2)只看父组件,很难理解父组件的状态。因为它可能被任意子组件修改!理想情况下,只有组件自己能修改它的状态。
四、自定义事件
有时候我们希望触发父组件的某个事件时,可以通知到子组件;触发子组件的某个事件时,可以通知到父组件。
Vue 实例实现了一个自定义事件接口,用于在组件树中通信。这个事件系统独立于原生 DOM 事件,用法也不同。
每个 Vue 实例都是一个事件触发器:
(1)使用 $on() 监听事件;
(2)使用 $emit() 在它上面触发事件;
(3)使用 $dispatch() 派发事件,事件沿着父链冒泡;
(4)使用 $broadcast() 广播事件,事件向下传导给所有的后代。
1、派发事件
下面这段代码是一个简单的事件派发处理
<div id="app">
    <p>Messages: {{ messages | json }}</p>
    <child-component></child-component>
</div>
<template id="child-component">
    <input v-model="msg" />
    <button v-on:click="notify">Dispatch Event</button>
</template>
<script src="vue.js"></script>
<script>
    // 注册子组件
    Vue.component('child-component', {
        template: '#child-component',
        data: function() {
            return {
                msg: ''
            }
        },
        methods: {
            notify: function() {
                if (this.msg.trim()) {
                    this.$dispatch('child-msg', this.msg);
                    this.msg = ''
                }
            }
        }
    })

    // 初始化父组件
    new Vue({
        el: '#app',
        data: {
            messages: []
        },
        events: {
            'child-msg': function(msg) {
                this.messages.push(msg)
            }
        }
    })
</script>
我们将这个示例分为几个步骤解读:
子组件的button元素绑定了click事件,该事件指向notify方法
子组件的notify方法在处理时,调用了$dispatch,将事件派发到父组件的child-msg事件,并给该该事件提供了一个msg参数
父组件的events选项中定义了child-msg事件,父组件接收到子组件的派发后,调用child-msg事件。

结果: 
2、广播事件
下面这段代码是一个简单的事件广播处理
<div id="app">
    <input v-model="msg" />
    <button v-on:click="notify">Broadcast Event</button>
    <child-component></child-component>
</div>
<template id="child-component">
    <ul>
        <li v-for="item in messages">
            父组件录入了信息:{{ item }}
        </li>
    </ul>
</template>
<script src="vue.js"></script>
<script>
    // 注册子组件
    Vue.component('child-component', {
        template: '#child-component',
        data: function() {
            return {
                messages: []
            }
        },
        events: {
            'parent-msg': function(msg) {
                this.messages.push(msg)
            }
        }
    })
    // 初始化父组件
    new Vue({
        el: '#app',
        data: {
            msg: ''
        },
        methods: {
            notify: function() {
                if (this.msg.trim()) {
                    this.$broadcast('parent-msg', this.msg);
                    this.msg = '';
                }
            }
        }
    })
</script>
我们将这个示例分为几个步骤解读:
父组件的button元素绑定了click事件,该事件指向notify方法
父组件的notify方法在处理时,调用了$broadcast,将事件派发到子组件的parent-msg事件,并给该该事件提供了一个msg参数
子组件的events选项中定义了parent-msg事件,子组件接收到父组件的广播后,调用parent-msg事件

结果:
3、$on监听事件,$emit触发事件
现在$dispatch、$broadcast需要配合events使用,在vue2.0上已经被删除了,现在更多的是使用$on监听事件、$emit触发事件。主要分为以下四步:
(1)子组件绑定send事件
<template id="bbb">
    <h3>子组件-</h3>
    <input type="button" value="send" @click="send">
</template>
(2)子组件通过$emit主动触发事件,发送数据到父组件
methods:{
    send(){//2、子组件通过$.emit主动发送数据a到父级
        this.$emit('child-msg',this.a);
    }
}
(3)父组件通过v-on监听子组件触发的事件
<template id="aaa">
    <span>我是父级 -> {{msg}}</span>
    //3、父组件绑定接收事件,接收的一边是子组件里的事件名,一边是父组件里面需要定义的事件名
    <bbb @child-msg="get"></bbb>
</template>
(4)父组件接受子组件发送的数据
methods:{
    //4、父组件接收子组件发送的数据,作为参数,改变自己里面数据
    get(msg){
        this.msg=msg;
    }
}