用TestNG测试后,自动会生成html的测试报告,不过相信大家都有感觉,自动生成的测试报告太难看了,所以我们又用了ReportNG来美化它。在 这里给大家再介绍一下比reportNG还要稍稍美观一点的reporting tool: testNG-xslt.
官方网址:http://code.google.com/p/testng-xslt/
用 户讨论区:http://groups.google.com/group/testng-xslt-users/topics
其 实testNG-xslt就是把testNG自动生成的测试报告testng-results.xml进行了一个转换,把它的html输出报告变得更漂亮 而已。因此用法也很简单:
1. 在官方网站上下载testNG-xslt ,http://testng-xslt.googlecode.com/files/testng-xslt-1.1.zip
2. 解压后把saxon-8.7.jar放到project的lib目录下(在bulid路径里也把这个lib加上)
3. 然后再把/src/main/resources/testng-results.xsl放到你的 test-output 目录下
4. 在测试项目的根目录下创建一个简单的build.xml, 如下:
<?xml version="1.0" encoding="UTF-8"?>
<project name= "testTng" basedir= "." default="transform">
<property name= "lib.dir" value= "lib" />
<path id= "test.classpath" >
<!-- adding the saxon jar to your classpath -->
<fileset dir= "${lib.dir}" includes= "*.jar" />
</path>
<target name= "transform" >
<xslt in= "G:/eclipse3.7/workspace/testTng/test-output/testng-results.xml" style= "G:/eclipse3.7/workspace/testTng/test-output/testng-results.xsl"
out= "G:eclipse3.7workspace estTng est-outputindex1.html " >
<!-- you need to specify the directory here again -->
<param name= "testNgXslt.outputDir" expression= "G:eclipse3.7workspace estTng est-output" />
<classpath refid= "test.classpath" />
</xslt>
</target>
</project>
5.最后用 ant 运行这个 xml 就会在test-output 目录下生成 index1.html,打开它就是测试报告了。
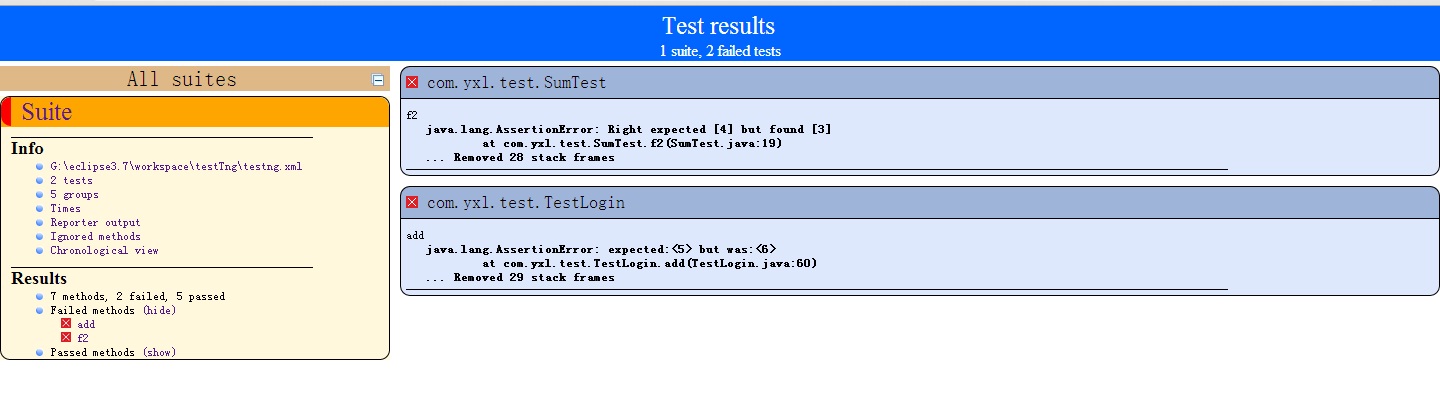
转换前的测试报告:
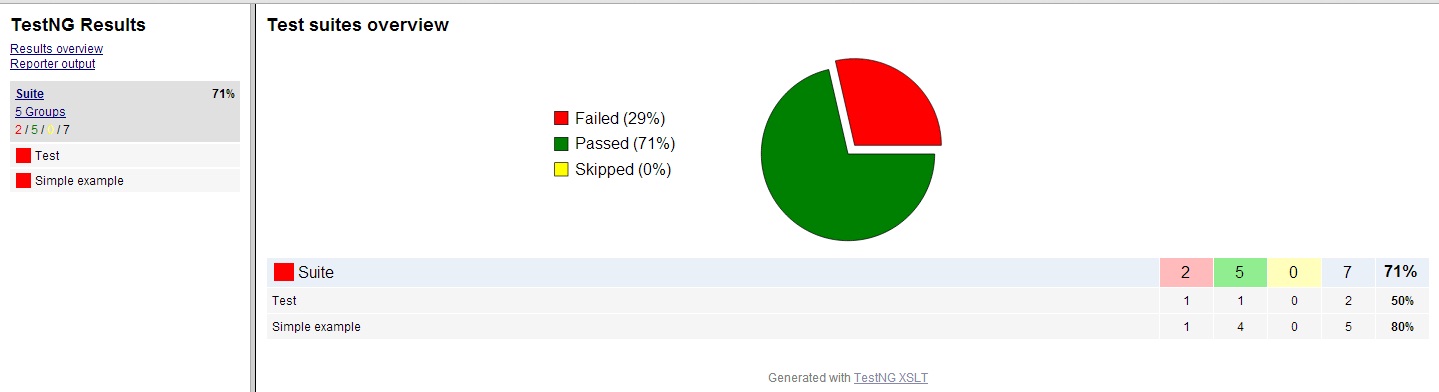
转换后的测试报告(是不是美观很多呢):
参考:http://www.cnblogs.com/zhangfei/archive/2011/04/20/2022213.html