老生常谈,做一个简单的记录。浏览器自带的checkbox和radio样式可能不符合项目要求,通常要做一些自定义样式设置,目前基本的解决思路都是将input[type=checkbox/radio]隐藏,用label去与input做联动处理,具体实现方法有以下两种:
 1 <!DOCTYPE html>
 2 <html lang="en">
 3
 4 <head>
 5     <meta charset="UTF-8">
 6     <meta name="viewport" content="width=device-width, initial-scale=1.0">
 7     <meta http-equiv="X-UA-Compatible" content="ie=edge">
 8     <style>
 9         /* 方法1 */
10
11         label {
12             display: inline-block;
13              15px;
14             height: 15px;
15             background: url('../../../assets/img/unchecked.svg') no-repeat 100% 100%;
16         }
17
18         input[type="checkbox"]:checked+label {
19             background: url('../../../assets/img/checked.svg') no-repeat 100% 100%;
20         }
21         /* 方法2 */
22
23         #test+span {
24             display: inline-block;
25              15px;
26             height: 15px;
27             background: url('../../../assets/img/unchecked.svg') no-repeat 100% 100%;
28         }
29
30         #test:checked+span {
31             background: url('../../../assets/img/checked.svg') no-repeat 100% 100%;
32         }
33     </style>
34     <title>checkboxAndRadio</title>
35 </head>
36
37 <body ng-app="app">
38     <div>方法1</div>
39     <input type="checkbox" id="checkbox" style="display: none;">
40     <label for="checkbox"></label><br>
41     <div>方法2</div>
42     <input type="checkbox" id="test" style="display: none;">
43     <span></span>
44     <script>
45         document.getElementsByTagName('span')[0].addEventListener('click', function(e) {
46             this.previousElementSibling.checked = !this.previousElementSibling.checked;
47         })
48     </script>
49 </body>
50
51 </html>
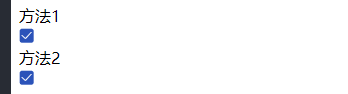
第一种方式必须要设置元素id,如果表单过多将导致命名很纠结;第二种可以简单的写一个事件监听,去动态改变checkbox的选中状态,以此来达到动态切换的目的。在利用框架进行开发应用时,只需要进行简单的封装即可使用,radio实现同上,效果图如下: