| 版权声明:本文为博主原创文章,未经博主允许不得转载。
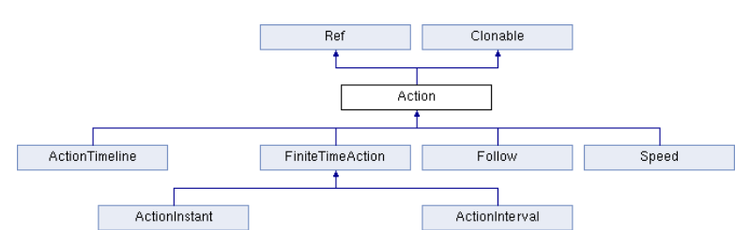
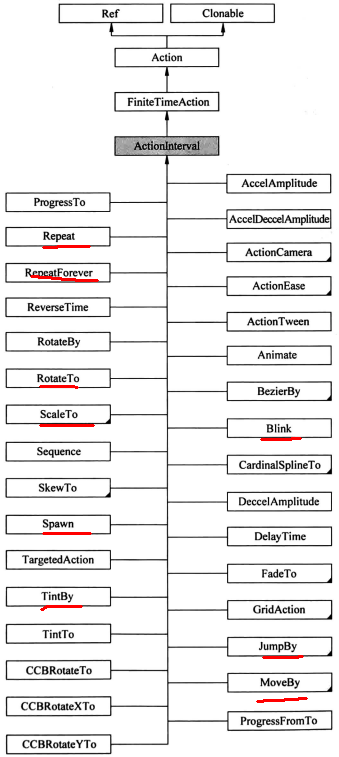
在Cocos2d-x中的Node对象可以有动作,特效和动画等动态特性。因此在Node类中定义了这些动态特性,因此精灵,标签,菜单,地图和粒子系统等都具有这些动态特性。在cocos2d-x中为了让游戏画面动起来,有两种方法,例如:位置、大小,旋转等等。另外:一种就是使用动作; cocos2d-x中提供了丰富的动作类,这些动作类分为动作包括:属性变化动作(如:缩放,旋转等),瞬时动作,持续性动作,变速运动,控制动作,视觉特效动作,复合动作等等。Action是动作的基类,所有的动作多派生自这个类,它创建的一个对象代表了一个动作,动作作用于Node,因此,任何一个动作都需要由Node对象来执行。在Node类中有关的动作的函数如下:
(1)、Action* runAction(Action* action);
运行指定动作,返回值仍然是一个动作对象。
(2)、void stopAction(Action* action);
停止指定动作。
(3)、void stopActionByTag(int tag);
通过指定标签停止动作。
(4)、void stopAllActions();
停止所有动作。
实例:
.h files
#ifndef _ACTIONTEST_SCENE_H_
#define _ACTIONTEST_SCENE_H_
#include "cocos2d.h"
class actionTest : public cocos2d::Layer
{
private:
cocos2d::Vec2 origin;
cocos2d::Size visible;
cocos2d::Sprite* mole;
public:
static cocos2d::Scene* createScene();
virtual bool init();
//点击屏幕时执行特定的动作,这就要首先创建一个单点触屏事件
virtual bool onTouchBegan(cocos2d::Touch *touch, cocos2d::Event *unused_event);
void createSprite();
CREATE_FUNC(actionTest);
};
#endif // _ACTIONTEST_SCENE_H_
.cpp files
#include "ActionTest.h"
USING_NS_CC;
Scene* actionTest::createScene()
{
auto scene = Scene::create();
auto layer = actionTest::create();
scene->addChild(layer);
return scene;
}
bool actionTest::init()
{
if (!Layer::init())
{
return false;
}
visible = Director::getInstance()->getVisibleSize();
origin = Director::getInstance()->getVisibleOrigin();
//因为有触屏事件,则要先设置并创建监听器
auto listener = EventListenerTouchOneByOne::create();
//设置监听的对象
listener->onTouchBegan = CC_CALLBACK_2(actionTest::onTouchBegan, this);
//注册监听器
_eventDispatcher->addEventListenerWithSceneGraphPriority(listener, this);
createSprite();
return true;
}
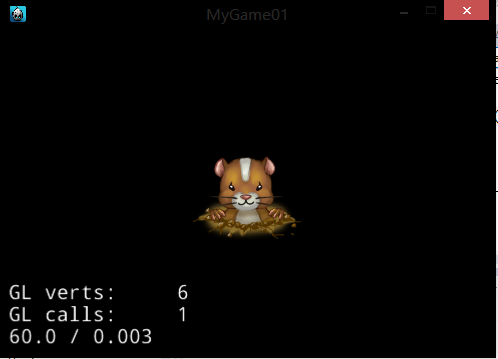
void actionTest::createSprite()
{
mole = Sprite::create("Rats_4.png");
mole->setPosition(Vec2(origin.x + visible.width / 2,
origin.y + visible.height / 2));
this->addChild(mole);
}
bool actionTest::onTouchBegan(cocos2d::Touch *touch, cocos2d::Event *unused_event)
{
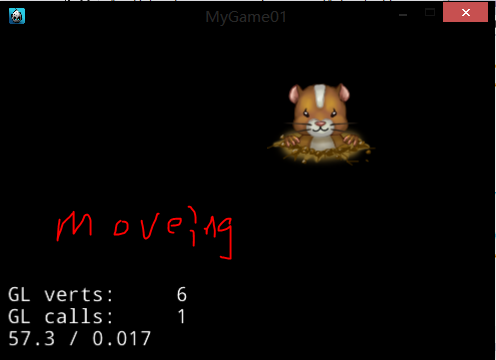
auto move = MoveTo::create(3, Vec2(100, 100));
//使mole移动到某个特定的地方
mole->runAction(move);
return false;
}

属性变化动作
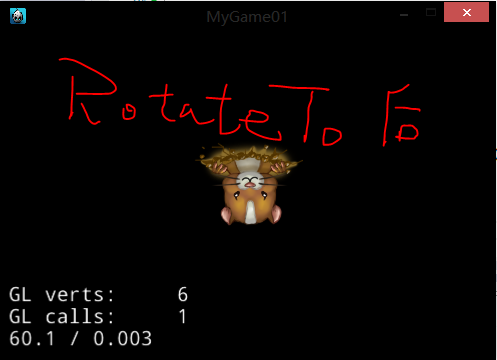
1. ScaleTo 和 ScaleBy //缩放
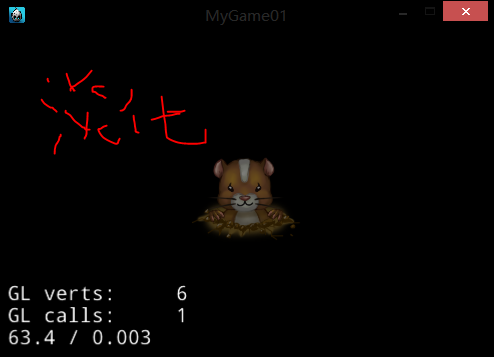
2. RotateTo 和 RotateBy //旋转
3. FadeIn 和 FadeOut
//淡入淡出
4. TintTo 和 TintBy
//色调变化
By是在点击屏幕可以无限次的变化,To只能点击一次,在点击则不会在改变
实例:
.h files

#ifndef _ATTRIBUTECHANGEACTIONTEST_SCENE_H_
#define _ATTRIBUTECHANGEACTIONTEST_SCENE_H_
#include "cocos2d.h"
class attributeChangeAction : public cocos2d::Layer
{
private:
	cocos2d::Vec2 origin;
	cocos2d::Size visible;
	cocos2d::Sprite* mole;
public:
	static cocos2d::Scene* createScene();
	virtual bool init();
	virtual bool onTouchBegan(cocos2d::Touch *touch, cocos2d::Event *unused_event);
	void createSprite();
	void testScaleTo();
	void testScaleBy();
	void testRotateTo();
	void testRotateBy();
	void testFadeInOut();
	void testTintTo();
	void testTintBy();
	CREATE_FUNC(attributeChangeAction);
};
#endif // _ATTRIBUTECHANGEACTIONTEST_SCENE_H_


.cpp files

#include "AttributeChangeActionTest.h"
USING_NS_CC;
int count = 0;
Scene* attributeChangeAction::createScene()
{
	auto scene = Scene::create();
	auto layer = attributeChangeAction::create();
	scene->addChild(layer);
	return scene;
}
bool attributeChangeAction::init()
{
	if (!Layer::init())
	{
		return false;
	}
	visible = Director::getInstance()->getVisibleSize();
	origin = Director::getInstance()->getVisibleOrigin();
	//设置监听器
	auto listener = EventListenerTouchOneByOne::create();
	listener->onTouchBegan = CC_CALLBACK_2(attributeChangeAction::onTouchBegan, this);
	_eventDispatcher->addEventListenerWithSceneGraphPriority(listener, this);
	createSprite();
	return true;
}
void attributeChangeAction::createSprite()
{
	mole = Sprite::create("Rats_4.png");
	mole->setPosition(Vec2(origin.x + visible.width / 2,
		origin.y + visible.height / 2));
	this->addChild(mole);
}
//缩放动作
void attributeChangeAction::testScaleTo()
{
	auto s1 = ScaleTo::create(5, 2);
	auto s2 = ScaleTo::create(5, 0.5);

	if (count++ % 2 == 0)
		mole->runAction(s1);
	else
		mole->runAction(s2);
}
void attributeChangeAction::testScaleBy()
{
	auto s1 = ScaleBy::create(5, 2);
	mole->runAction(s1);
}
//旋转
void attributeChangeAction::testRotateTo()
{
	auto r1 = RotateTo::create(5, 180);
	mole->runAction(r1);
}
void attributeChangeAction::testRotateBy()
{
	auto r1 = RotateBy::create(5, 180);
	mole->runAction(r1);
}
//淡入淡出
void attributeChangeAction::testFadeInOut()
{
	auto f2 = FadeIn::create(10);
	auto f1 = FadeOut::create(10);
	auto seq = Sequence::create(f1, f2, NULL);
	mole->runAction(seq);
}
//色调的调节
void attributeChangeAction::testTintTo()
{
	auto t1 = TintTo::create(5, 100, 100, 100);
	mole->runAction(t1);
}
void attributeChangeAction::testTintBy()
{
	auto t2 = TintBy::create(2, 102, 140, 130);
	mole->runAction(t2);
}
bool attributeChangeAction::onTouchBegan(cocos2d::Touch *touch, cocos2d::Event *unused_event)
{
	//testScaleTo();
	//testScaleBy();
	//testRotateTo();
	//testRotateBy();
	//testFadeInOut();
	//testTintTo();
	testTintBy();
	return false;
}

瞬时动作简介
瞬时动作是指能立刻完成的动作,是FiniteTimeAction中的动作持续时间为0的特征。更准确的说,这类动作是在下一帧会立刻执行并完成的动作,如设定位置,设定缩放等。这些动作原本可以通过简单的对Node赋值完成,但是把它们包装为动作之后,可以方便的与其他动作类组合为复杂动作。
瞬时动作中的一些重要的方法
1. Place
该动作是将节点放置在指定的位置上,该动作和修改节点的position属性有相同的效果
auto placeAction = Place::create(Vec2(200,200));
mole->runAction(placeAction);
2. FilpX和FilepY
这两个动作分别用于将精灵沿X和Y轴反向显示,其作用与设置精灵的FilpX和FilpY属性相同。
//auto fileXAction = FilpX::create(true);
auto fileYAction = FilpY::create(true);
mole->runAction(fileYAction);
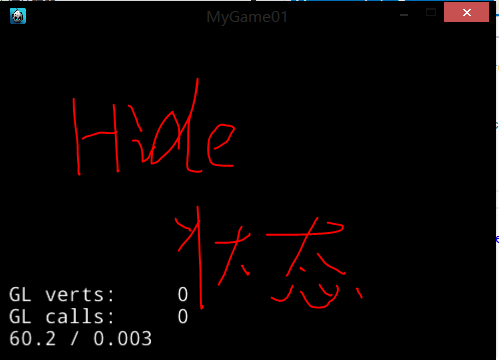
3. Show和Hide
这两个动作分别用于显示和隐藏节点,其作用与设置节点的Visible属性的作用一样.
auto showAction = Show::create();
auto hideAction = Hide::create();
if(count++%2 == 0)
{
mole->runAction(hideAction);
}
else
{
mole->runAction(showAction);
}
4. CallFunc系列
>>.v2.0版本:
CallFunc系列动作包括CallFunc, CallFuncN, CallFuncND, 以及Call-FuncO四个动作,用来在动作中进行方法的调用(之所以不是函数调用,是因为他们只能调用某个类中的实例方法,而不能调用普通的c函数)。当某个对象执行CallFunc系列动作时,就会调用一个先前被设置好的方法,以完成某些特别的功能。
在CallFunc系列动作中的4个类中,CallFunc调用的方法不包含参数,CallFuncN调用的方法包含一个Node*类型的参数,表示执行动作的对象,CallFuncND调用的方法包含两个参数,不仅有一个节点参数,还有一个自定义的参数(Node*与void*),CallFuncO调用的方法则只包含一个Object*类型的参数。实际上,CallFunc系列动作的后缀“N”表示Node参数,指的是执行动作的对象,“D”表示的是Data参数,指的是用户自定义的数据,“O”表示对象,指的是一个用户自定义的Object参数,在不同的情况下,我们可以根据不同的需求来选择不同的CallFunc动作。
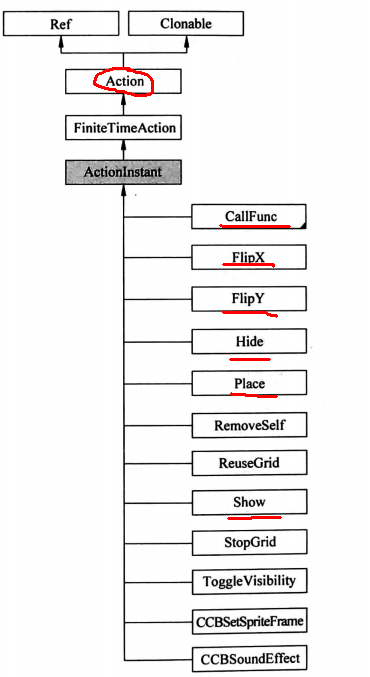
>>.3.0的版本:
这些全部都简化了,只有一个CallFunc。从上类图中可以看出。
实例:
.h files
#ifndef _MOMENTARYACTIONTEST_SCENE_H_
#define _MOMENTARYACTIONTEST_SCENE_H_
//MomentaryActionTest
#include "cocos2d.h"
class momentaryAction : public cocos2d::Layer
{
private:
cocos2d::Vec2 origin;
cocos2d::Sprite* mole;
cocos2d::Size visible;
public:
static cocos2d::Scene* createScene();
virtual bool init();
virtual bool onTouchBegan(cocos2d::Touch *touch, cocos2d::Event *unused_event);
void Test1();
void Test2();
void Test3();
void Test4();
void callback1();
void callback2(cocos2d::Node* sendef);
void callback3(cocos2d::Node* sendef, long date);
void createSprite();
CREATE_FUNC(momentaryAction);
};
#endif // _MOMENTARYACTIONTEST_SCENE_H_
.cpp files
#include "MomentaryActionTest.h"
USING_NS_CC;
int number = 1;
Scene* momentaryAction::createScene()
{
auto scene = Scene::create();
auto layer = momentaryAction::create();
scene->addChild(layer);
return scene;
}
bool momentaryAction::init()
{
if (!Layer::init())
{
return false;
}
visible = Director::getInstance()->getVisibleSize();
origin = Director::getInstance()->getVisibleOrigin();
//注册点击触屏事件
auto listener = EventListenerTouchOneByOne::create();
listener->onTouchBegan = CC_CALLBACK_2(momentaryAction::onTouchBegan, this);
_eventDispatcher->addEventListenerWithSceneGraphPriority(listener, this);
createSprite();
return true;
}
void momentaryAction::createSprite()
{
mole = Sprite::create("Rat4.png");
mole->setPosition(Vec2(origin.x + visible.width / 2,
origin.y + visible.height / 2));
mole->setTag(1000);
this->addChild(mole);
}
//瞬时跳转到Place设置的坐标点
void momentaryAction::Test1()
{
auto place = Place::create(Vec2(100, 100));
mole->runAction(place);
}
//沿X轴或者Y轴折叠
void momentaryAction::Test2()
{
auto filpX = FlipX::create(true);
mole->runAction(filpX);
}
//show和hide动作,显示和隐藏动作
void momentaryAction::Test3()
{
auto showMole = Show::create();
auto hideMole = Hide::create();
if (number++ % 2 == 0)
mole->runAction(hideMole);
else
mole->runAction(showMole);
}
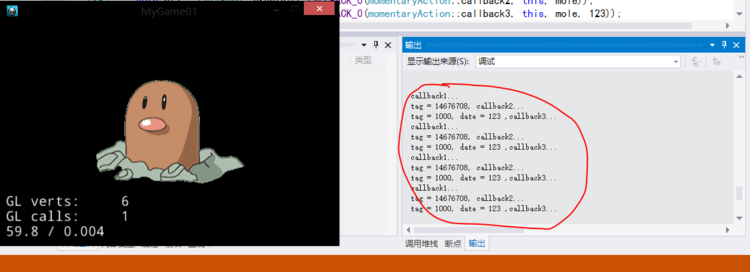
//CallFunc
void momentaryAction::Test4()
{
auto cf1 = CallFunc::create(CC_CALLBACK_0(momentaryAction::callback1, this));
auto cf2 = CallFunc::create(CC_CALLBACK_0(momentaryAction::callback2, this, mole));
auto cf3 = CallFunc::create(CC_CALLBACK_0(momentaryAction::callback3, this, mole, 123));
}
void momentaryAction::callback1()
{
CCLOG("callback1...");
}
void momentaryAction::callback2(cocos2d::Node* sendef)
{
Sprite* sprite = (Sprite*)sendef;
int tag = sprite->getTag();
CCLOG("tag = %d, callback2...");
}
void momentaryAction::callback3(cocos2d::Node* sendef, long date)
{
Sprite* sprite = (Sprite*)sendef;
int tag = sprite->getTag();
CCLOG("tag = %d, date = %ld ,callback3...", tag, date);
}
bool momentaryAction::onTouchBegan(cocos2d::Touch *touch, cocos2d::Event *unused_event)
{
//Test1();
//Test2();
//Test3();
Test4();
return false;
}
持续性动作简介
持续性动作实在持续的一段时间里逐渐完成的动作,如精灵从一个点连续的移动到另一个点。与瞬时动作相比,持续性动作的种类丰富。由于这些动作将持续一段时间,所以大多数的持续性动作都会带有一个用于控制动作执行时间的实型参数duration。它有To和By变种运动:每一种持续性动作通常 都存在两个不同的变种动作,分别具有To和By后缀,后缀为To的动作描述了节点属性值的绝对变化,例如:MoveTo将对象移动到一个特定的位置;而后缀为By的动作,则描述了属性值相对的变化,如MoveBy将对象移动一段相对位移。根据作用效果不同,可以将持续性动作划分为以下4大类:
(1)、位置变化动作
位置变化的重要函数:
1. MoveTo 和 MoveBy
用于使节点做直线运动,设置了动作时间和终点位置后,节点就会在规定的时间内,从当前的位置直线移动到设置的终点位置。它们的初始化方法分别为:
MoveTo::create(ccTime durtion, Point& pos);和MoveBy::create(ccTime durtion, Point& pos);其中,duration参数表示动作持续的时间,pos参数表示移动的终点或者距离。对于MoveTo,节点会被移动到pos对应的位置,对于MoveBy,节点会相对之前的位置移动到pos的距离。
//1. test moveto
void HelloWorld::testMoveTo()
{
auto moveto = MoveTo::create(5, Point(100,
100));
mole->runAction(moveTo);
}
//2. test moveby
void HelloWorld::testMoveBy()
{
auto moveby = MoveBy::create(5, Point(100,
100));
mole->runAction(moveby);
}
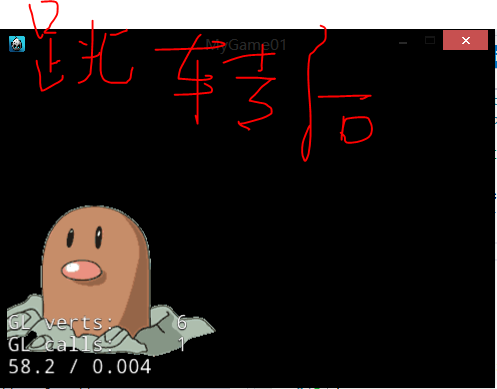
2. JumpTo 和 JumpBy
使节点以一定的轨迹跳跃到指定的位置,他们的初始化方法如下:其中pos表示跳跃的终点和距离,height表示最大的高度,jumps表示跳跃的次数:
JumpTo::create(ccTime durtion, Point pos, float
height, int jumps);
JumpBy::create(ccTime durtion, Point pos, float height, int jumps);
//3. test jumpto
void HelloWorld::testJumpTo
{
auto jumpto = JumpTo::create(1, Point(100,100),
20, 5);
mole->runAction(jumpto);
}
//4. test JumpBy
void HelloWorld::testJumpTo
{
auto jumpby = JumpTo::create(1, Point(100,100),
20, 5);
mole->runAction(jumpby);
}
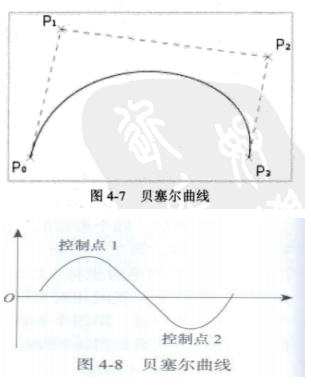
3. BezierTo和BezierBy
使用节点进行曲线运动,运动的轨迹由贝塞尔曲线描述,贝塞尔曲线是描述任意曲线的有力工具 ,在许多软件(如:Adoble PhotoShop)中,钢笔工具就是贝塞尔曲线的运用,每一条贝塞尔曲线都包含一个起点和一个终点。在一条曲线中,起点和终点都各自包含一个控制点,而控制点到端点的连线称作控制线,控制线决定了从端点发出的曲
线形状,包含角度和长度两个参数,角度决定了它所控制的曲线方向,及这段曲线在这一控制点的切线方向,长度控制曲线的曲率。控制线越长,它所控制的曲线离 控制线越近,使用时我们要先创建BezierConfig结构体,设置好终点endPosition以及两个控制点controlPoint_1和controlPoint_2后,再把结构体传入BezierTo和BezierBy的初始化方法中:
//5. test bezier
void HelloWorld::testBezier()
{
BezierConfig bezier;
bezier.controlPoint_1 = Point(20,150);
bezier.controlPoint_2 = Point(200,30);
bezier.endPosition = Point(160,30);
auto bezierAction = BezierTo::create(2,bezier);
mole->runAction(bezierAction);
}
实例:
.h files

#ifndef _CONTINUEACTIONTEST_SCENE_H_
#define _CONTINUEACTIONTEST_SCENE_H_
#include "cocos2d.h"
class continueAction : public cocos2d::Layer
{
private:
	cocos2d::Sprite* mole;
	cocos2d::Vec2 origin;
	cocos2d::Size visible;
public:
	static cocos2d::Scene* createScene();
	virtual bool init();
	virtual bool onTouchBegan(cocos2d::Touch *touch, cocos2d::Event *unused_event);
	void testMoveTo();
	void testMoveBy();
	void testJumpTo();
	void testJumpBy();
	void testBezierTo();
	void testBezierBy();
	void createSprite();
	CREATE_FUNC(continueAction);
};
#endif // _CONTINUEACTIONTEST_SCENE_H_


.cpp files

#include "ContinueActionTest.h"
USING_NS_CC;
Scene* continueAction::createScene()
{
	auto scene = Scene::create();
	auto layer = continueAction::create();
	scene->addChild(layer);
	return scene;
}
bool continueAction::init()
{
	if (!Layer::init())
	{
		return false;
	}
	visible = Director::getInstance()->getVisibleSize();
	origin = Director::getInstance()->getVisibleOrigin();
	//设置监听器
	auto listener = EventListenerTouchOneByOne::create();
	listener->onTouchBegan = CC_CALLBACK_2(continueAction::onTouchBegan, this);
	_eventDispatcher->addEventListenerWithSceneGraphPriority(listener, this);
	createSprite();
	return true;
}
void continueAction::createSprite()
{
	mole = Sprite::create("Rats_4.png");
	mole->setPosition(Vec2(origin.x + visible.width - mole->getContentSize().width,
		origin.y + visible.height - mole->getContentSize().height));
	this->addChild(mole);
}
//MoveTo函数指定一个特定的时间和坐标,在这个时间段内,指定的精灵会在规定的时间内到达指定的地方
void continueAction::testMoveTo()
{
	//Vec2(100, 100);两个100,分别表示GL坐标
	auto move = MoveTo::create(5, Vec2(100, 100));
	mole->runAction(move);
}
//MoveBy函数指定一个特定的时间和特定的距离(x,y轴的距离),这样精灵就会在特定的时间内,移动规定的距离长度
void continueAction::testMoveBy()
{
	//Vec2(100, 100),两个100分别表示在x轴和y轴移动100的距离
	auto move = MoveBy::create(5, Vec2(100, 100));
	mole->runAction(move);
}
//JumpTo函数:
void continueAction::testJumpTo()
{
	//下面这条语句表示,在5s的时间内,从原始的位置跳到100,100的坐标处,且一共跳到5次,每次跳的高度为15
	auto jumpto = JumpTo::create(5, Vec2(100, 100), 15, 5);
	mole->runAction(jumpto);
}
//JumpBy函数:
void continueAction::testJumpBy()
{
	//下面这条语句表示,在5s的时间内,从原始的位置向x和y轴分别跳到50的距离,且一共跳到5次,每次跳的高度为15
	auto jumpby = JumpBy::create(5, Vec2(50, 50), 15, 5);
	mole->runAction(jumpby);
}
void continueAction::testBezierTo()
{
	//首先要定义一个结构体
	ccBezierConfig config;
	//通过结构体中的变量来设置控制点和结束点
	config.controlPoint_1 = Vec2(20, 150);
	config.controlPoint_2 = Vec2(200, 30);
	config.endPosition = Vec2(160, 30);
	//设置Bezier曲线
	auto bezierto = BezierTo::create(5, config);
	//让精灵执行这个动作
	mole->runAction(bezierto);
}
void continueAction::testBezierBy()
{
	ccBezierConfig config;
	config.controlPoint_1 = Vec2(20, 150);
	config.controlPoint_2 = Vec2(200, 30);
	config.endPosition = Vec2(160, 30);
	auto bezierby = BezierBy::create(5, config);
	mole->runAction(bezierby);
}
bool continueAction::onTouchBegan(cocos2d::Touch *touch, cocos2d::Event *unused_event)
{
	//testMoveTo();
	//testMoveBy();
	//testJumpTo();
	//testJumpBy();
	//testBezierTo();
	testBezierBy();
	return false;
}

(2)、属性变化动作: 见上
(3)、视觉效果动作
这一类动作用于实现一些特殊的视觉效果
1. 闪烁: 使目标节点闪烁,其初始化方法为: 见实例代码;
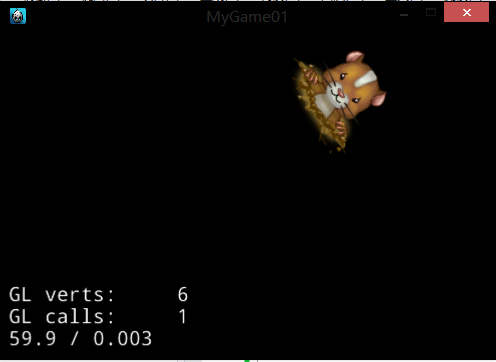
2. 动画效果:
实例:
.h files

#ifndef _VISUALEFFECTSACTIONTEST_SCENE_H_
#define _VISUALEFFECTSACTIONTEST_SCENE_H_
//视觉特效动画
#include "cocos2d.h"
class visualEffectsAction : public cocos2d::Layer
{
private:
	cocos2d::Vec2 origin;
	cocos2d::Size visible;
	cocos2d::Sprite* mole;
public:
	static cocos2d::Scene* createScene();
	virtual bool init();
	virtual bool onTouchBegan(cocos2d::Touch *touch, cocos2d::Event *unused_event);
	void testBlinkAction();
	void createMole();
	void testAnimation();
	CREATE_FUNC(visualEffectsAction);
};
#endif // _VISUALEFFECTSACTIONTEST_SCENE_H_


.cpp files

#include "VisualEffectsActionTest.h"
USING_NS_CC;
Scene* visualEffectsAction::createScene()
{
	auto scene = Scene::create();
	auto layer = visualEffectsAction::create();
	scene->addChild(layer);
	return scene;
}
bool visualEffectsAction::init()
{
	if (!Layer::init())
	{
		return false;
	}
	visible = Director::getInstance()->getVisibleSize();
	origin = Director::getInstance()->getVisibleOrigin();
	//注册监听器
	auto listener = EventListenerTouchOneByOne::create();
	listener->onTouchBegan = CC_CALLBACK_2(visualEffectsAction::onTouchBegan, this);
	_eventDispatcher->addEventListenerWithSceneGraphPriority(listener, this);
	createMole();
	return true;
}
void visualEffectsAction::createMole()
{
	mole = Sprite::create("Rat4.png");
	mole->setPosition(Vec2(origin.x + visible.width / 2,
		origin.y + visible.height / 2));
	this->addChild(mole);
}
void visualEffectsAction::testBlinkAction()
{
	auto blink = Blink::create(1, 10);
	mole->runAction(blink);
}
void visualEffectsAction::testAnimation()
{
	//首先要获取到这个动画的对象,通过文件文件名和plist配置文件来创建
	SpriteFrameCache::getInstance()->addSpriteFramesWithFile("Mouse_2.plist");
	//在创建一个容器来保存这些取到的对象文件
	Vector<SpriteFrame*> frames;
	//在来一个循环包plist文件中的内容取出,存到Vector中
	for (int i = 5; i >= 1; i--)
	{
		String* frameName = String::createWithFormat("Rat%d.png", i);
		SpriteFrame* frame = SpriteFrameCache::getInstance()->getSpriteFrameByName(frameName->getCString());
		frames.pushBack(frame);
	}
	Animation* anim = Animation::createWithSpriteFrames(frames, 1.0f / 5.0f);
	mole->runAction(Animate::create(anim));
}
bool visualEffectsAction::onTouchBegan(cocos2d::Touch *touch, cocos2d::Event *unused_event)
{
	//testBlinkAction();
	testAnimation();
	return false;
}
(4)、控制动作
控制动作是一类特殊的动作,用于对一些动作进行精细的控制。利用这一类可以实现一些实用的功能,因此他们是十分常用的。这类动作包括DelayTime、Repeat、RepeatForever等。DelayTime可以将动作延时一定的时间,Repeat可以把现有的动作重复执行一定的次数,这个次数由参数决定,RepeateForever可以使一个动作不断的重复下去。
实例:
.h files

#ifndef _CONTROLACTIONTEST_SCENE_H_
#define _CONTROLACTIONTEST_SCENE_H_
#include "cocos2d.h"
USING_NS_CC;
class controlAction : public cocos2d::Layer
{
private:
	cocos2d::Vec2 origin;
	cocos2d::Size visible;
	cocos2d::Sprite* hammer;
public:
	static cocos2d::Scene* createScene();
	virtual bool init();
	void createSprite();
	void repeatTest();
	void DelayTimeTest();
	CREATE_FUNC(controlAction);
};
#endif // _CONTROLACTIONTEST_SCENE_H_


.cpp files

#include "ControlActionTest.h"
Scene* controlAction::createScene()
{
	auto scene = Scene::create();
	auto layer = controlAction::create();
	scene->addChild(layer);
	return scene;
}
bool controlAction::init()
{
	if (!Layer::init())
	{
		return false;
	}
	visible = Director::getInstance()->getVisibleSize();
	origin = Director::getInstance()->getVisibleOrigin();
	DelayTimeTest();
	//repeatTest();
	return true;
}
void controlAction::createSprite()
{
	hammer = Sprite::create("Rats_4.png");
	hammer->setPosition(Vec2(origin.x + visible.width / 2 - hammer->getContentSize().width / 2,
		origin.y + visible.height / 2));
	this->addChild(hammer);
}
//Repeat重复动作
void controlAction::repeatTest()
{
	createSprite();
	auto blink = Blink::create(2, 5);
	auto repeat = RepeatForever::create(blink);
	hammer->runAction(repeat);
}
//延迟动作DelayTime
void controlAction::DelayTimeTest()
{
	createSprite();
	auto move = MoveBy::create(2, Vec2(100, 100));
	//下面这个函数是恢复函数,就是回到原始的状态,让哪一个动作复原
	auto r = move->reverse();
	//在设置一个延迟的时间
	auto dt = DelayTime::create(2);
	//创建一个sequence将动作全部放进去,就能将动作一个一个的按照顺序来执行
	Sequence* seq = Sequence::create(move, dt, r, NULL);
	Repeat* re = Repeat::create(seq, 5);
	hammer->runAction(re);
}


复合动作简介
cocos2d-x为我们提供了一套的动作复合机制,允许我们组合各种基本动作,产生更为复杂和生动的动作效果。复合动作是一类特殊的动作,因此也需要使用Node的runAction方法执行。而它的特殊之处在于,作为动作容器,复合动作可以把许多动作组合成一个复杂的动作,因此我们通常会使用一个或多个动作来创建复合动作,再把动作交给节点执行。如:sequence 就是一个符合动作,它可以顺序的执行一系列的动作
(1)、重复(Repeat/RepeatForever): 重复的执行一个动作
(2)、并列(Spawn): 指的是使一批动作同时的执行
(3)、序列(Sequence): 除了让动作同时并列执行,我们更常遇到的情况是顺序执行一系列的动作。Sequence提供了一个动作队列,它会顺序执行一系列动作
实例:
 .h files

#ifndef _COMPOUNDACTIONTEST_SCENE_H_
#define _COMPOUNDACTIONTEST_SCENE_H_
#include "cocos2d.h"
USING_NS_CC;
class compoundAction : cocos2d::Layer
{
private:
	cocos2d::Vec2 origin;
	cocos2d::Size visible;
	cocos2d::Sprite* mole;
public:
	static cocos2d::Scene* createScene();
	virtual bool init();
	void createMole();
	void repeateTest();
	void sequenceTest();
	void spawnTest();
	CREATE_FUNC(compoundAction);
};
#endif // _COMPOUNDACTIONTEST_SCENE_H_


.cpp files

#include "CompoundActionTest.h"
Scene* compoundAction::createScene()
{
	auto scene = Scene::create();
	auto layer = compoundAction::create();
	scene->addChild(layer);
	return scene;
}
bool compoundAction::init()
{
	if (!Layer::init())
	{
		return false;
	}
	visible = Director::getInstance()->getVisibleSize();
	origin = Director::getInstance()->getVisibleOrigin();
	createMole();
	//repeateTest();
	//sequenceTest();
	spawnTest();
	return true;
}
void compoundAction::createMole()
{
	mole = Sprite::create("Rats_4.png");
	mole->setPosition(Vec2(origin.x + visible.width / 2,
		origin.y + visible.height / 2));
	mole->setAnchorPoint(Vec2(0.5, 0.5));
	this->addChild(mole);
}
void compoundAction::repeateTest()
{
	MoveBy* move = MoveBy::create(3, Vec2(100, 100));
	ActionInterval* re = move->reverse();
	Sequence* seq = Sequence::create(move, re, NULL);
	RepeatForever* rep = RepeatForever::create(seq);
	mole->runAction(rep);
}
void compoundAction::sequenceTest()
{
	MoveTo* move = MoveTo::create(3, Vec2(100, 100));
	Blink* blink = Blink::create(3, 5);
	RotateBy* rotate = RotateBy::create(2, 360);
	Sequence* seq = Sequence::create(move, blink, rotate, NULL);
	mole->runAction(seq);
}
void compoundAction::spawnTest()
{
	MoveBy* move = MoveBy::create(5, Vec2(100, 100));
	RotateBy* rot = RotateBy::create(5, 360);
	Blink* blink = Blink::create(2, 10);
	Sequence* seq = Sequence::create(move, rot, blink, NULL);
	Repeat* rep = Repeat::create(seq, 10);
	mole->runAction(rep);
}

变速动作简介
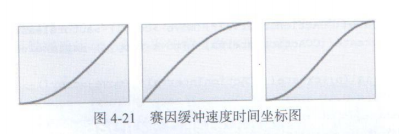
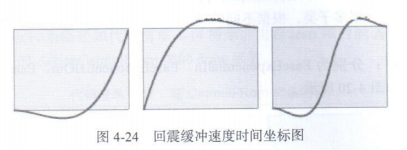
用作线性地改变的动作的速度,因此可以实现成倍地快速地快放或慢放功能,为了改变一个动作的速度,首先需要将目标的动作包装到Speed动作中。ActionEase:虽然使用Speed能够改变 的动作的速度,然而它只能按比例改变目标动作的速度。如果我们要实现动作由快到慢,速度随时间改变的变速动作,需要不停的修改它的Speed属性才能实现,显然这是一个很繁琐的方法,下面将要介绍的ActionEase系列动作通过使用内置的多种自动速度变化来解决这一问题;ActionEase系列包含15个动作,它们可以被概括为5类动作:Sine缓冲,弹性缓冲,跳跃缓冲和回震缓冲。每一类动作都有3个不同时期的变换:In、Out和InOut。下面使用时间变化图像表示每组ActionEase动作的作用效果,其中横坐标表示实际动画时间,纵坐标表示变换后的动画时间。因此线性动作的图像应该是一条自左下角到右上角的直线
指数缓冲
EaseExponentiaiIn,EaseExponentialOut,EaseExponentialInOut
图:

Sine缓冲
EaseSineIn,EaseSineOut,EaseSineInOut
图:
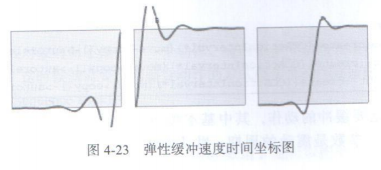
弹性缓冲
EaseElasticIn,EaseElasticOut,EaseElasticInOut
图:
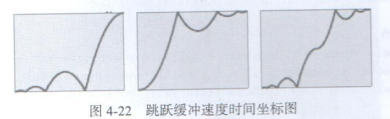
跳跃缓冲
EaseBounceIn,EaseBounceOut,EaseBounceInOut
回震缓冲
EaseBackIn,EaseBackOut,EaseBackInOut
实例:
.h files

#ifndef _VARIABLESPEEDACTIONTEST_SCENE_H_
#define _VARIABLESPEEDACTIONTEST_SCENE_H_
#include "cocos2d.h"
USING_NS_CC;
class variableSpeedTest : public cocos2d::Layer
{
private:
	cocos2d::Vec2 origin;
	cocos2d::Size visible;
	cocos2d::Sprite* mole;
public:
	static cocos2d::Scene* createScene();
	virtual bool init();
	void createMole();
	void speedTest();
	void exponentTest();
	void sineTest();
	void elasticTest();
	void bounceTest();
	void backTest();
	CREATE_FUNC(variableSpeedTest);
};
#endif // _VARIABLESPEEDACTIONTEST_SCENE_H_


.cpp files

#include "VariableSpeedActionTest.h"
Scene* variableSpeedTest::createScene()
{
	auto scene = Scene::create();
	auto layer = variableSpeedTest::create();
	scene->addChild(layer);
	return scene;
}
bool variableSpeedTest::init()
{
	if (!Layer::init())
	{
		return false;
	}
	visible = Director::getInstance()->getVisibleSize();
	origin = Director::getInstance()->getVisibleOrigin();
	createMole();
	//speedTest();
	//exponentTest();
	//sineTest();
	//elasticTest();
	//bounceTest();
	backTest();
	return true;
}
void variableSpeedTest::createMole()
{
	mole = Sprite::create("Rats_4.png");
	mole->setPosition(Vec2(origin.x + visible.width / 2,
		origin.y + visible.height / 2));
	this->addChild(mole);
}
//Speed函数速度的变化,Speed函数的速度是一个加速度恒定的匀加速运动,他的速度只会成倍的增加
void variableSpeedTest::speedTest()
{
	//首先我们创建一个精灵移动的运动
	MoveBy* move = MoveBy::create(10, Vec2(100, 100));
	//在创建一个速度变化的Speed函数
	//下面这条语句的意思是,让move这个动作的速度成2倍的增加
	Action* speed = Speed::create(move, 5);
	//最后让精灵执行这个动作
	mole->runAction(speed);
}
//指数缓冲函数,让动作成指数形式的变化,有三个指数变化的函数
//EaseExponentiaiIn,EaseExponentialOut,EaseExponentialInOut
void variableSpeedTest::exponentTest()
{
	//同样这里我们也要新创建一个动作
	MoveTo* move = MoveTo::create(10, Vec2(100, 100));
	//在创建指数缓冲的速度变化函数
	auto easein = EaseIn::create(move,2);
	//EaseOut* easeout = EaseOut::create(move, 3);
	//Action* easeinout = EaseInOut::create(move, 4);
	//在创建一个复合动作,将这些动作全部顺序的执行出来
	//Sequence* seq = Sequence::create(easein, easeout, easeinout, NULL);
	mole->runAction(easein);
}
//sine缓冲
void variableSpeedTest::sineTest()
{
	MoveTo* move = MoveTo::create(10, Vec2(100, 100));
	EaseSineIn* sinein = EaseSineIn::create(move);
	//EaseSineOut* sineout = EaseSineOut::create(move);
	//EaseSineInOut* sineinout = EaseSineInOut::create(move);
	//Sequence* seq = Sequence::create(sinein, sineout, sineinout, NULL);
	mole->runAction(sinein);
}
//弹性缓冲
void variableSpeedTest::elasticTest()
{
	MoveTo* move = MoveTo::create(10, Vec2(100, 100));
	//EaseElasticIn* elasticin = EaseElasticIn::create(move);
	EaseElasticOut* elasticout = EaseElasticOut::create(move);
	//EaseElasticInOut* elasticinout = EaseElasticInOut::create(move);
	//auto seq = Sequence::create(elasticin, elasticout, elasticinout, NULL);
	mole->runAction(elasticout);
}
//跳跃缓冲
void variableSpeedTest::bounceTest()
{
	MoveTo* move = MoveTo::create(10, Vec2(100, 100));
	//EaseBounceIn* bouncein = EaseBounceIn::create(move);
	//EaseBounceOut* bounceout = EaseBounceOut::create(move);
	EaseBounceInOut* bounceinout = EaseBounceInOut::create(move);
	//Sequence* seq = Sequence::create(bouncein, bounceinout, bounceout, NULL);
	mole->runAction(bounceinout);
}
//回震缓冲
void variableSpeedTest::backTest()
{
	MoveTo* move = MoveTo::create(10, Vec2(100, 100));
	//EaseBackIn* backin = EaseBackIn::create(move);
	//EaseBackInOut* backinout = EaseBackInOut::create(move);
	EaseBackOut* backout = EaseBackOut::create(move);
	//Sequence* seq = Sequence::create(backin, backout, backinout, NULL);
	mole->runAction(backout);
}