下载heapster1.3地址: https://github.com/kubernetes/heapster/releases?after=v1.4.3
参考文献:https://jimmysong.io/posts/kubernetes-heapster-installation/ 这个实验也是用heapster1.3来做的,1.3的要是不行那就建议用1.5的哦,只不过镜像的话还是需要参考下面的镜像,因为下面的镜像不会被墙。 用1.3的也可以只不过需要参考这一片文章
4194端口可以查看到),但是很不方便,因此我们选择安装heapster。
安装
下载heapster的代码
直接现在Github上的最新代码。
git pull https://github.com/kubernetes/heapster.git
目前的最高版本是1.3.0。
在heapster/deploy/kube-config/influxdb目录下有几个yaml文件:
grafana-deployment.yaml
grafana-service.yaml
heapster-deployment.yaml
heapster-service.yaml
influxdb-deployment.yaml
influxdb-service.yaml
我们再看下用了哪些镜像:
grafana-deployment.yaml:16:        image: gcr.io/google_containers/heapster-grafana-amd64:v4.0.2
heapster-deployment.yaml:16:        image: gcr.io/google_containers/heapster-amd64:v1.3.0-beta.1
influxdb-deployment.yaml:16:        image: gcr.io/google_containers/heapster-influxdb-amd64:v1.1.1
下载镜像
我们下载好了这些images后,存储到私有镜像仓库里:
sz-pg-oam-docker-hub-001.tendcloud.com/library/heapster-amd64:v1.3.0-beta.1
sz-pg-oam-docker-hub-001.tendcloud.com/library/heapster-grafana-amd64:v4.0.2
sz-pg-oam-docker-hub-001.tendcloud.com/library/heapster-influxdb-amd64:v1.1.1
我已经将官方镜像克隆到了时速云上,镜像地址:
index.tenxcloud.com/jimmy/heapster-amd64:v1.3.0-beta.1
index.tenxcloud.com/jimmy/heapster-influxdb-amd64:v1.1.1
index.tenxcloud.com/jimmy/heapster-grafana-amd64:v4.0.2
需要的可以去下载,下载前需要用时速云账户登陆,然后再执行pull操作。
docker login index.tendcloud.com
配置
参考Run Heapster in a Kubernetes cluster with an InfluxDB backend and a Grafana UI和Configuring Source,需要修改yaml文件中的几个配置。
-
首先修改三个deployment.yaml文件,将其中的镜像文件地址改成我们自己的私有镜像仓库的
-
修改heapster-deployment.yaml文件中的
--source参数为
—source=kubernetes:http://sz-pg-oam-docker-test-001.tendcloud.com:8080?inClusterConfig=false&useServiceAccount=false
修改完配置的heapster-deployment.yaml文件
apiVersion: extensions/v1beta1
kind: Deployment
metadata:
  name: heapster
  namespace: kube-system
spec:
  replicas: 1
  template:
    metadata:
      labels:
        task: monitoring
        k8s-app: heapster
    spec:
      containers:
      - name: heapster
        image: sz-pg-oam-docker-hub-001.tendcloud.com/library/heapster-amd64:v1.3.0-beta.1
        imagePullPolicy: IfNotPresent
        command:
        - /heapster
        - --source=kubernetes:http://sz-pg-oam-docker-test-001.tendcloud.com:8080?inClusterConfig=false&useServiceAccount=false
        - --sink=influxdb:http://monitoring-influxdb:8086
启动
在准备好镜像和修改完配置文件后就可以一键启动了,这不就是使用kbuernetes的方便之处吗?
启动heaspter
kubectl create -f deploy/kube-config/influxdb
查看状态
kubectl get -f deploy/kube-config/influxdb/
NAME                        DESIRED   CURRENT   UP-TO-DATE   AVAILABLE   AGE
deploy/monitoring-grafana   1         1         1            1           1h

NAME                     CLUSTER-IP      EXTERNAL-IP   PORT(S)   AGE
svc/monitoring-grafana   10.254.250.27   <none>        80/TCP    1h

NAME              DESIRED   CURRENT   UP-TO-DATE   AVAILABLE   AGE
deploy/heapster   1         1         1            1           1h

NAME           CLUSTER-IP       EXTERNAL-IP   PORT(S)   AGE
svc/heapster   10.254.244.187   <none>        80/TCP    1h

NAME                         DESIRED   CURRENT   UP-TO-DATE   AVAILABLE   AGE
deploy/monitoring-influxdb   1         1         1            1           1h

NAME                      CLUSTER-IP       EXTERNAL-IP   PORT(S)    AGE
svc/monitoring-influxdb   10.254.151.157   <none>        8086/TCP   1h
查看页面
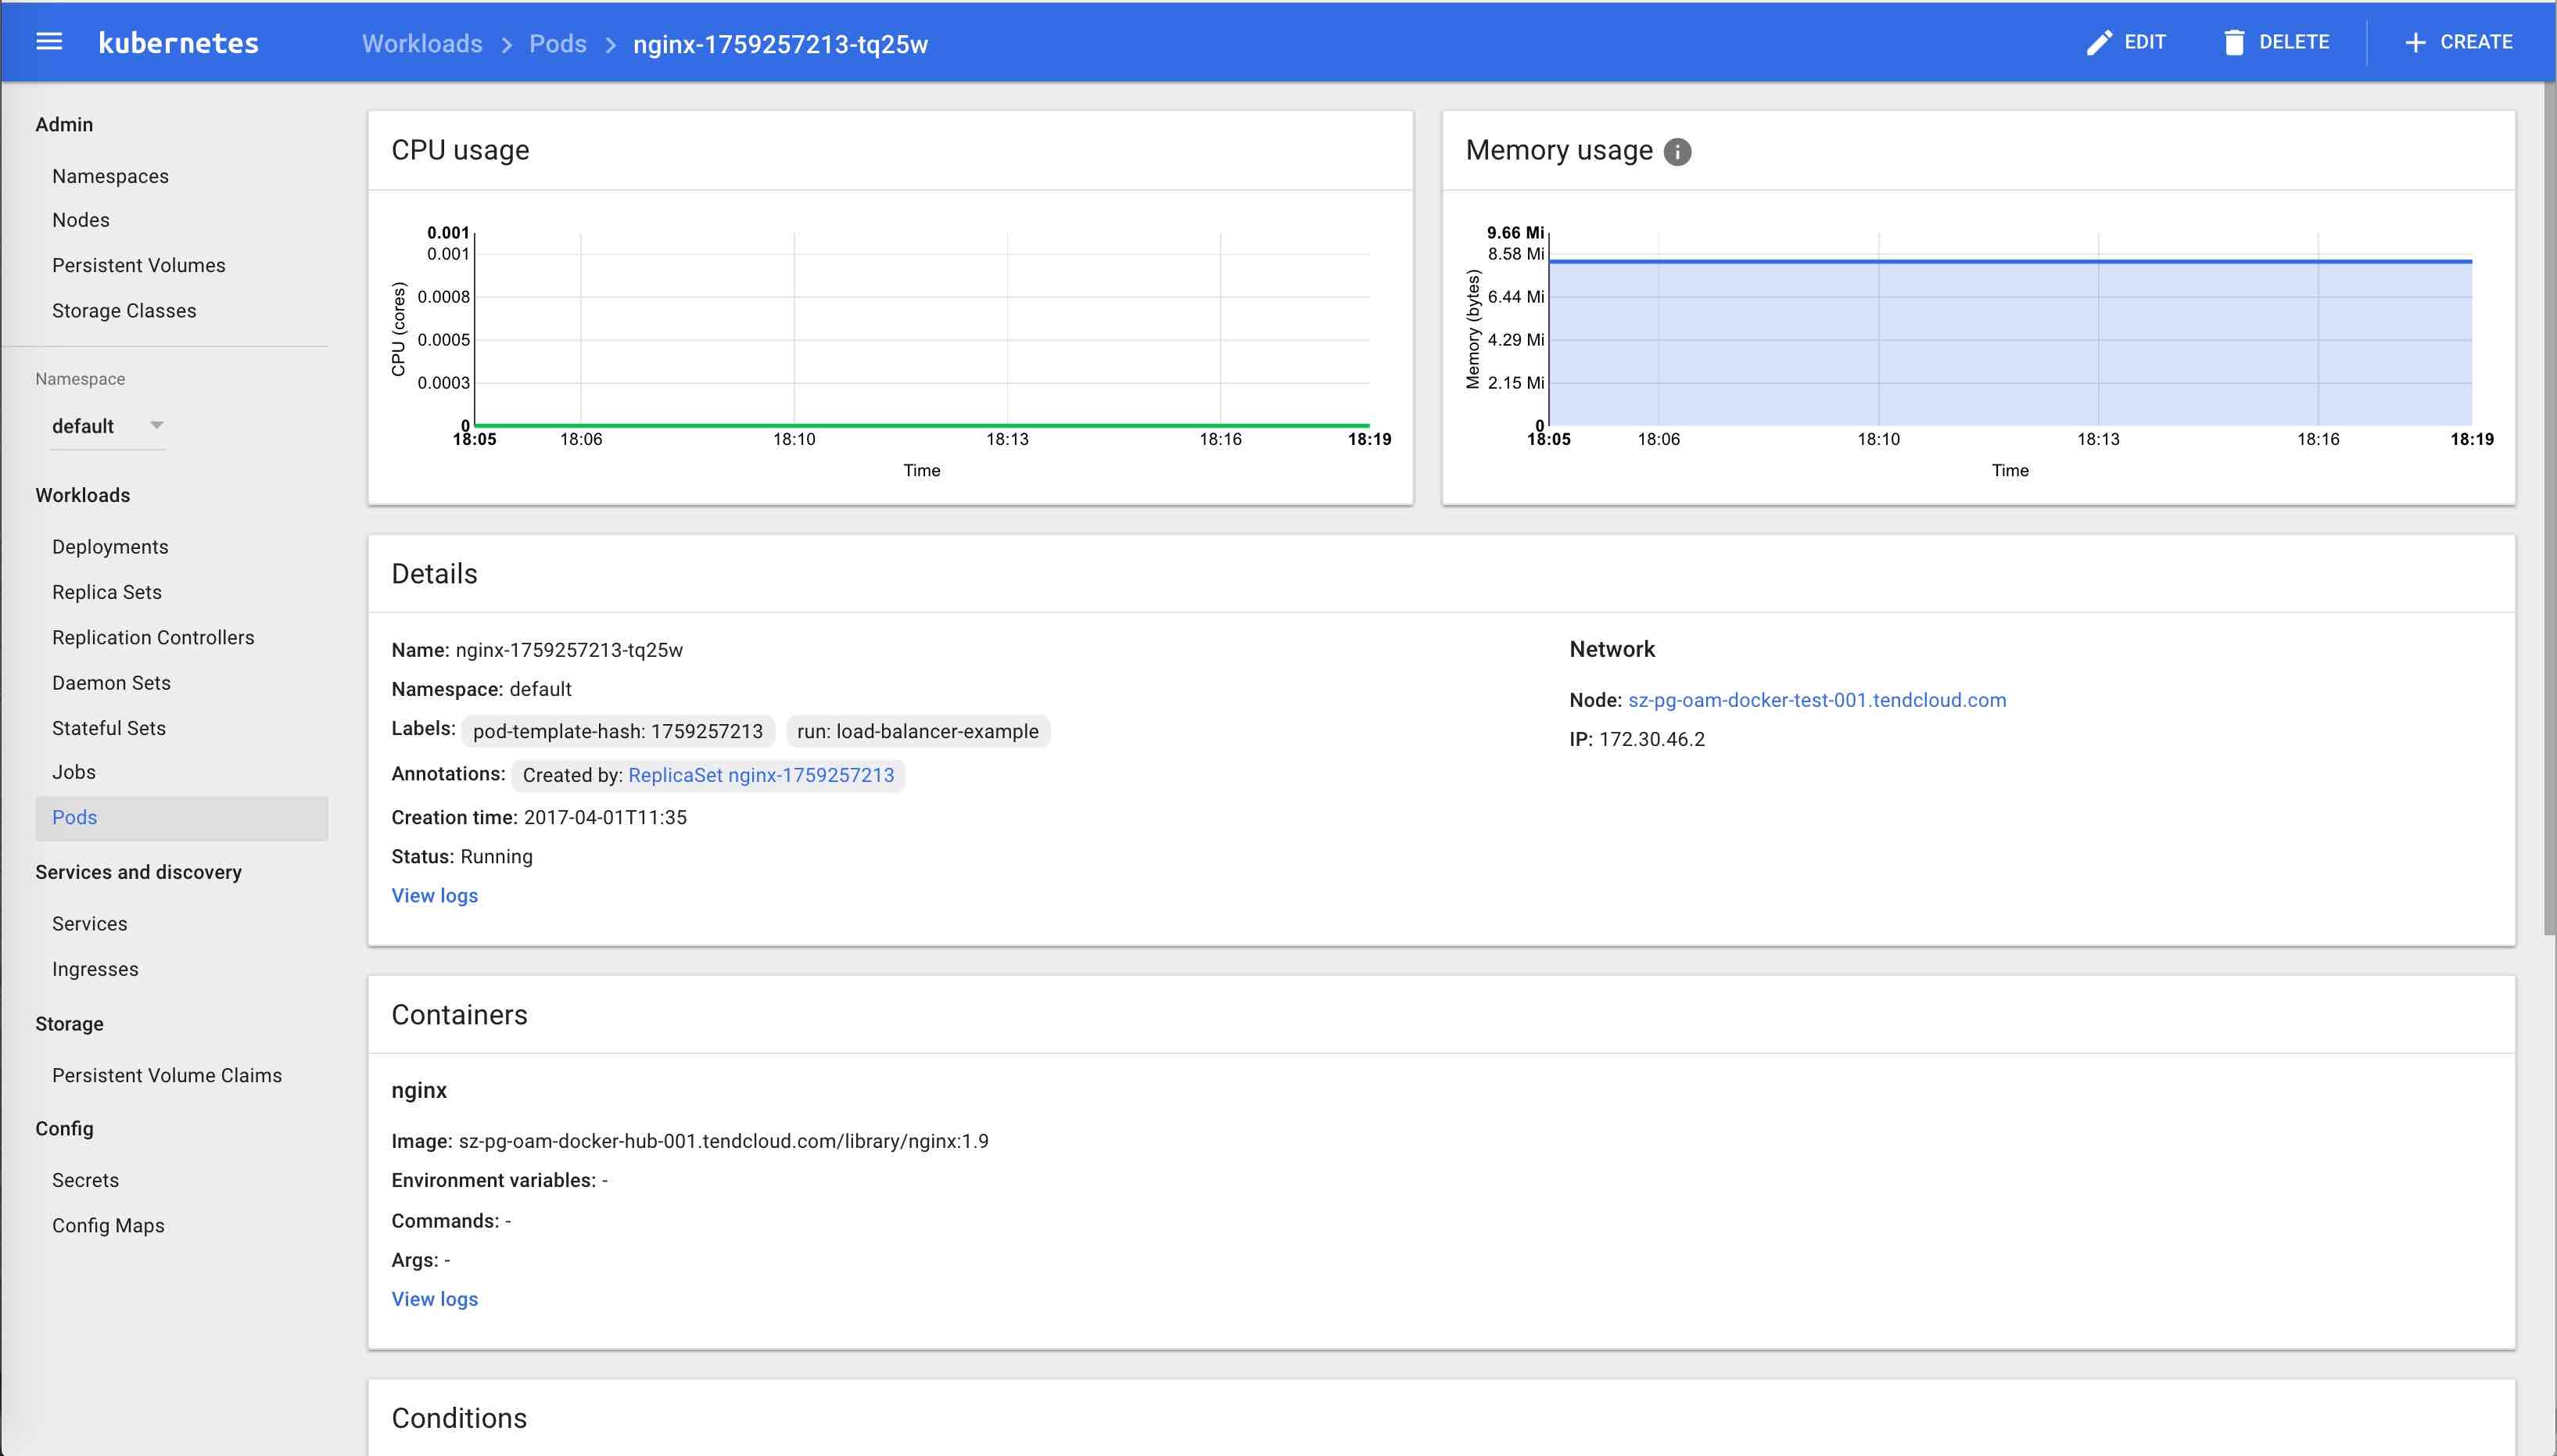
现在再打开Dashboard页面就可以看到CPU和Memory的监控信息了。
后记
虽然在安装了heapster插件后可以在dashboard中看到CPU和Memory的监控信息,但是这仅仅是近实时的监控,收集的metrics被保存到了InfluxDB中,还可以通过Kibana或者Grafana来展示更详细的信息和历史数据,还是有很多事情可以做的。