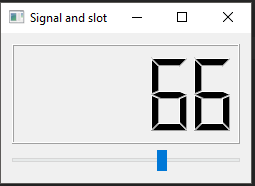
信号和槽
示例效果如下:
示例代码:
 1 #!/usr/bin/python3
 2 # -*- coding: utf-8 -*-
 3
 4 """
 5 ZetCode PyQt5 tutorial
 6
 7 In this example, we connect a signal
 8 of a QSlider to a slot of a QLCDNumber.
 9
10 Author: Jan Bodnar
11 Website: zetcode.com
12 Last edited: January 2017
13 """
14
15 import sys
16 from PyQt5.QtCore import Qt
17 from PyQt5.QtWidgets import (QWidget, QLCDNumber, QSlider,
18     QVBoxLayout, QApplication)
19
20
21 class Example(QWidget):
22
23     def __init__(self):
24         super().__init__()
25
26         self.initUI()
27
28     def initUI(self):
29
30         lcd = QLCDNumber(self)
31         sld = QSlider(Qt.Horizontal, self)
32
33         vbox = QVBoxLayout()
34         vbox.addWidget(lcd)
35         vbox.addWidget(sld)
36
37         self.setLayout(vbox)
       # 将滚动条的valueChanged信号连接到lcd的display插槽
38         sld.valueChanged.connect(lcd.display)
39
40         self.setGeometry(300, 300, 250, 150)
41         self.setWindowTitle('Signal and slot')
42         self.show()
43
44
45 if __name__ == '__main__':
46
47     app = QApplication(sys.argv)
48     ex = Example()
49     sys.exit(app.exec_())
这个例子中展示了一个QtGui.QLCDNumber和QtGui.QSlider。lcd的值会随着滑块的拖动而改变
sender是发出信号的对象。receiver是接收信号的对象。slot(插槽)是对信号做出反应的方法
重新实现事件处理器
 1 #!/usr/bin/python3
 2 # -*- coding: utf-8 -*-
 3
 4 """
 5 ZetCode PyQt5 tutorial
 6
 7 In this example, we reimplement an
 8 event handler.
 9
10 Author: Jan Bodnar
11 Website: zetcode.com
12 Last edited: August 2017
13 """
14
15 import sys
16 from PyQt5.QtCore import Qt
17 from PyQt5.QtWidgets import QWidget, QApplication
18
19
20 class Example(QWidget):
21
22     def __init__(self):
23         super().__init__()
24
25         self.initUI()
26
27     def initUI(self):
28
29         self.setGeometry(300, 300, 250, 150)
30         self.setWindowTitle('Event handler')
31         self.show()
32
33     def keyPressEvent(self, e):
34         # 按下Escape键会使程序退出
35         if e.key() == Qt.Key_Escape:
36             self.close()
37
38
39 if __name__ == '__main__':
40
41     app = QApplication(sys.argv)
42     ex = Example()
43     sys.exit(app.exec_())
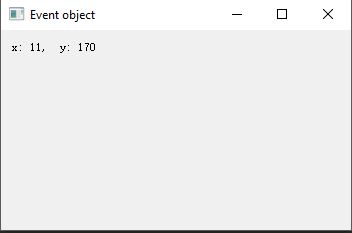
事件对象
事件对象是一个包含许多描述事件的属性的Python对象。每一个事件对象特定于生成的事件类型。
在示例中,我们在标签部件中显示鼠标指针的x和y坐标。
效果如下:
 1 #!/usr/bin/python3
 2 # -*- coding: utf-8 -*-
 3
 4 """
 5 ZetCode PyQt5 tutorial
 6
 7 In this example, we display the x and y
 8 coordinates of a mouse pointer in a label widget.
 9
10 Author: Jan Bodnar
11 Website: zetcode.com
12 Last edited: August 2017
13 """
14
15 import sys
16 from PyQt5.QtCore import Qt
17 from PyQt5.QtWidgets import QWidget, QApplication, QGridLayout, QLabel
18
19
20 class Example(QWidget):
21
22     def __init__(self):
23         super().__init__()
24
25         self.initUI()
26
27     def initUI(self):
28
29         grid = QGridLayout()
30
31         x = 0
32         y = 0
33
34         self.text = "x: {0},  y: {1}".format(x, y)
35
36         self.label = QLabel(self.text, self)
37         grid.addWidget(self.label, 0, 0, Qt.AlignTop)
38
39         self.setMouseTracking(True)
40
41         self.setLayout(grid)
42
43         self.setGeometry(300, 300, 350, 200)
44         self.setWindowTitle('Event object')
45         self.show()
46
47     def mouseMoveEvent(self, e):
48         # The e is the event(a mouse move ) object
49         x = e.x()
50         y = e.y()
51
52         text = "x: {0},  y: {1}".format(x, y)
53         self.label.setText(text)
54
55
56 if __name__ == '__main__':
57
58     app = QApplication(sys.argv)
59     ex = Example()
60     sys.exit(app.exec_())
事件发送者

 1 #!/usr/bin/python3
 2 # -*- coding: utf-8 -*-
 3
 4 """
 5 ZetCode PyQt5 tutorial
 6
 7 In this example, we determine the event sender
 8 object.
 9
10 Author: Jan Bodnar
11 Website: zetcode.com
12 Last edited: August 2017
13 """
14
15 import sys
16 from PyQt5.QtWidgets import QMainWindow, QPushButton, QApplication
17
18
19 class Example(QMainWindow):
20
21     def __init__(self):
22         super().__init__()
23
24         self.initUI()
25
26     def initUI(self):
27
28         btn1 = QPushButton("Button 1", self)
29         btn1.move(30, 50)
30
31         btn2 = QPushButton("Button 2", self)
32         btn2.move(150, 50)
33
34         # Both buttons are connected to the same slot.
35         btn1.clicked.connect(self.buttonClicked)
36         btn2.clicked.connect(self.buttonClicked)
37
38         self.statusBar()
39
40         self.setGeometry(300, 300, 290, 150)
41         self.setWindowTitle('Event sender')
42         self.show()
43
44     def buttonClicked(self):
45
46         #  determine which button we have clicked by calling the sender() method
47         sender = self.sender()
48         self.statusBar().showMessage(sender.text() + ' was pressed')
49
50
51 if __name__ == '__main__':
52
53     app = QApplication(sys.argv)
54     ex = Example()
55     sys.exit(app.exec_())
发送信号
下面的示例演示如何发出自定义信号,当我们用鼠标点击窗口任意处,closeApp信号发出,应用程序终止。
 1 #!/usr/bin/python3
 2 # -*- coding: utf-8 -*-
 3
 4 """
 5 ZetCode PyQt5 tutorial
 6
 7 In this example, we show how to
 8 emit a custom signal.
 9
10 Author: Jan Bodnar
11 Website: zetcode.com
12 Last edited: August 2017
13 """
14
15 import sys
16 from PyQt5.QtCore import pyqtSignal, QObject
17 from PyQt5.QtWidgets import QMainWindow, QApplication
18
19
20 class Communicate(QObject):
21
22     closeApp = pyqtSignal()
23
24
25 class Example(QMainWindow):
26
27     def __init__(self):
28         super().__init__()
29
30         self.initUI()
31
32     def initUI(self):
33
34         self.c = Communicate()
35         self.c.closeApp.connect(self.close)
36
37         self.setGeometry(300, 300, 290, 150)
38         self.setWindowTitle('Emit signal')
39         self.show()
40
41     def mousePressEvent(self, event):
42
43         self.c.closeApp.emit()
44
45
46 if __name__ == '__main__':
47
48     app = QApplication(sys.argv)
49     ex = Example()
50     sys.exit(app.exec_())