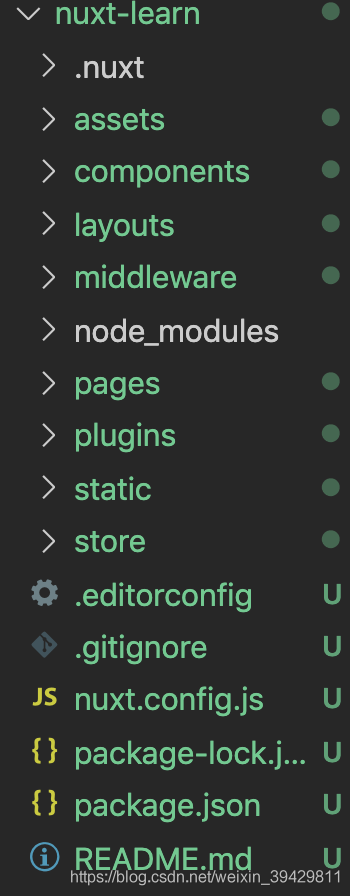
nuxt项目的文件夹目录
1.nuxt-link组件和router-link组件一样
2.pages文件夹中文件名就是路由路径名(无需配置路由路径),是页面组件。
laouts文件夹,是公共的模板的内容组件,公共的组件<Nuxt />,必须要加
不过在 Nuxt.js 框架中,我们有了新的变化,layouts对应目录中的layouts文件夹,默认pages下的页面走的都是 layouts/default.vue 布局方式,
但是如果自己定义的话,也可以新增新的布局页。其中<nuxt/>可以类似vue中slot插槽的概念,(如果对 slot 插槽不是很明白,
可以看之前的文章 《二十║Vue基础终篇:组件详解+项目说明》的第四节),pages/**.vue中的内容会插在<nuxt/>内。
3.components是普通组件
4.自定义模板组件
在layouts-->新建search.vue, 自定义版本内容
<template>
  <div class="layout-search">
    <h1>layout search</h1>
    <nuxt />
    <footer>layout footer</footer>
  </div>
</template>

<script>
export default {
  data() {
    return {}
  },
}
</script>

<style scoped lang="css">
.layout-search {
  color: red;
}
</style>
在页面组件pages-->新建search.vue(文件名和路由路劲匹配),用layout属性引入模板组件search.vue
<template>
  <div></div>
</template>

<script>
export default {
  layout: 'search',
  data() {
    return {}
  },
}
</script>

<style scoped lang="css"></style>
在浏览器输入路径。http://localhost:3333/search

5.关于css全局样式的引入,在nuxt. config.js配置
在nuxt.config.js配置, 配置项官网详情,
CONFIGURATION: https://www.nuxtjs.cn/api/configuration-build
module.exports={

  dev: process.env.NODE_ENV !== 'production',

  // Global page headers: https://go.nuxtjs.dev/config-head
  head: {
    title: 'mt-app',
    htmlAttrs: {
      lang: 'en',
    },
    meta: [
      { charset: 'utf-8' },
      { name: 'viewport', content: 'width=device-width, initial-scale=1' },
      { hid: 'description', name: 'description', content: '' },
    ],
    link: [{ rel: 'icon', type: 'image/x-icon', href: '/favicon.ico' }],
  },

  // Global CSS: https://go.nuxtjs.dev/config-css
  css: ['element-ui/lib/theme-chalk/index.css','~assets/css/main.css'],

  // Plugins to run before rendering page: https://go.nuxtjs.dev/config-plugins
  plugins: ['@/plugins/element-ui'],
配置 scss
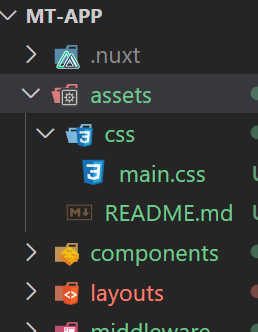
1. 在assets 目录中新建css目录,在css目录中新建 main.scss 文件 main.scss
body: { background: red; }
2. 命令行安装loader yarn add node-sass sass-loader scss-loader -D
3. 在 nuxt.config.js 文件中引入scss文件
css: [ 'element-ui/lib/theme-chalk/index.css', { src: '@/assets/css/main.scss', lang: 'scss' } ],
6. 服务端配置接口异步渲染
新建server-->interface->city.js, 配置路由接口,在index.js引入, 安装npm i koa koa-router
import Router from 'koa-router'

const router = new Router({
  prefix: '/city',
})

router.get('/list', async (ctx) => {
  ctx.body = {
    list: ['beigjin', '天津'],
  }
})

export default router
新建server-->index.js, 用babel转化成了es6语法了
import Koa from 'koa'
import { Nuxt, Builder } from 'nuxt'
import cityInterface from './interface/city'

async function start() {
  const app = new Koa()
  const host = process.env.HOST || '127.0.0.1'
  const port = process.env.PORT || 3000

  // Import and Set Nuxt.js options
  const config = require('../nuxt.config.js')
  config.dev = !(app.env === 'production')

  // Instantiate nuxt.js
  const nuxt = new Nuxt(config)

  // Build in development
  if (config.dev) {
    const builder = new Builder(nuxt)
    await builder.build()
  }
 //固定写法
  app.use(cityInterface.routes()).use(cityInterface.allowedMethods())
  app.use(ctx => {
    ctx.status = 200
    ctx.respond = false // Mark request as handled for Koa
    ctx.req.ctx = ctx // This might be useful later on, e.g. in nuxtServerInit or with nuxt-stash
    nuxt.render(ctx.req, ctx.res)
  })

  app.listen(port, host)
  console.log('Server listening on ' + host + ':' + port) // eslint-disable-line no-console
}

start()
在packjson.json的script中修改服务端的路劲,运行npm run dev
 "scripts": {
    "dev": "nodemon server/index.js --exec babel-node",
在浏览器中测试接口,输入:http://localhost:3000/city/list

在pages-->search.vue组件中,发送异步请求
注
1.在mouted发送异步请求,浏览器中有动态数据渲染,页面会展示数据,但是源码没有数据,因为在服务端渲染不执行mouted函数

2.在asyncData发送异步请求,会在服务端渲染数据,但是里头没有this(组件实例的),默认是80端口,数据出来没有闪烁(浏览器渲染会闪烁),因为在服务器短渲染的,源码是有数据的
用return 来保存数据, 服务器端把编译好的内容和数据下发给浏览器端
3.fetch和asyncData的效果一样的,都是服务端渲染的,不过它是commit vuex的状态的,而asyncData是在组件中发送数据请求的
<template>
  <div>
    Page is search
    <ul>
      <li v-for="(item, index) in list" :key="index">{{ item }}</li>
    </ul>
  </div>
</template>

<script>
import axios from 'axios'
export default {
  layout: 'search',
  data() {
    return {
      list: [],
    }
  },

  // async  mounted(){
  //   const {status, data:{list}} = await axios.get("/city/list")
  //   if(status ===200){
  //     this.list = list
  //   }

  // },

  async asyncData() {
    const { status,data: { list },} = await axios.get('http://localhost:3000/city/list')
    if (status === 200) {
      return {
        list
      }
    }
  },

  //  async fetch() {
  //   const { status,data: { list },} = await axios.get('http://localhost:3000/city/list')
  //   if (status === 200) {
  //     return {
  //       list
  //     }
  //   }
  // },
}
</script>

<style scoped lang="css"></style>

7.nuxt.js项目中vuex的使用,具体用法;https://i.cnblogs.com/posts/edit-done;postId=14416502
store--》index.js
export const state = () => ({
  inis: ['a', 'b']
})

export  const mutations = {
  INCREASE(state, text) {
    state.inis.push(text)
  }
}

export const actions = {
  increase({commit}, text){
    commit('INCREASE', text)
  }
}
store-->city.js
export const state = () => ({
  list: ['a', 'b']
})

export  const mutations = {
  ADD(state, text) {
    state.list.push(text)
  }
}

export const actions = {
  add({commit}, text){
    commit('ADD', text)
  }
}
在组件中使用,并获取数据
<template>
  <div>
    Page is search
    <ul>
      <li v-for="(item, index) in list" :key="index">{{ item }}</li>
    </ul>
  </div>
</template>

<script>
 import { mapState, mapMutations, mapActions } from 'vuex';
// import axios from 'axios'
export default {
  layout: 'search',
  data() {
    return {

    }
  },
  computed:{
      //  ...mapState(['list'])
      ...mapState({
        list:(state)=> state.city.list
      })
  },

  methods:{
    // ...mapMutations('city',['ADD'])
    ...mapActions('city',['add']),

  }