一,首页页面情况

1.底部四个切换栏路由组件路由配置
import Vue from 'vue'
import VueRouter from 'vue-router'

Vue.use(VueRouter)
// 引入路由组件
import Msite from '@/views/Msite'
import Order from '@/views/Order'
import Profile from '@/views/Profile'
import Search from '@/views/Search'

const routes = [
  {
    path: '/msite',
    component: Msite
  },
  {
    path: '/order',
    component: Order
  },
  {
    path: '/profile',
    component: Profile
  },
  {
    path: '/search',
    component: Search
  },
  {
    path: '/',
    redirect: '/msite'
  }
]

const router = new VueRouter({
  routes
})

export default router
在app.vue入口组件引入路由
<template>
  <div>
    <h3>app</h3>
    <router-view></router-view>
    <FooterGuide></FooterGuide>
  </div>
</template>
二,在footerGuider组件中
2.1,在底部的切换栏标签中有个on类名,渲染颜色,我们需要点击底部的四个切换栏(导航式路由),然后颜色也会跟着变化(根据路由的路径来判断)
    <footer class="footer_guide border-1px">
    <a href="javascript:;" class="guide_item " :class="{on:$route.path ==='/msite'}" @click="goTo('/msite')">
      <span class="item_icon">
        <i class="iconfont icon-waimai"></i>
      </span>
      <span>外卖</span>
    </a>
    <a href="javascript:;" class="guide_item" :class="{on:$route.path ==='/search'}" @click="goTo('/search')">
      <span class="item_icon">
        <i class="iconfont icon-search"></i>
      </span>
      <span>搜索</span>
    </a>
    <a href="javascript:;" class="guide_item"  :class="{on:$route.path ==='/order'}"   @click="goTo('/order')">
      <span class="item_icon">
        <i class="iconfont icon-dingdan"></i>
      </span>
      <span>订单</span>
    </a>
    <a href="javascript:;" class="guide_item"  :class="{on:$route.path ==='/profile'}"   @click="goTo('/profile')">
      <span class="item_icon">
        <i class="iconfont icon-geren"></i>
      </span>
      <span>我的</span>
    </a>
  </footer>
  .guide_item
      display flex
      flex 1
      text-align center
      flex-direction column
      align-items center
      margin 5px
      color #999999
      &.on
        color blue
 // 点击底部切换栏,跳转到对应的路由组件
    goTo(path){
      this.$router.replace(path)
    }
三,定义公共headerTop组件
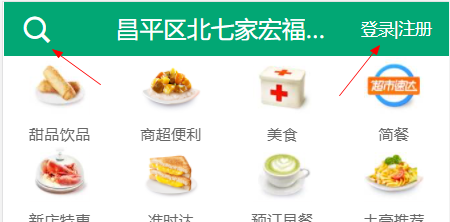
首页,搜索,订单,我的这四个路由组件页面顶部是一样的,我们需要将header抽离出来定义公共组件,但是我们发现首页组件顶部左边多了一个搜索图标,右边多个登录|注册
此时我们需要用到作用域插槽,子组件headerTop利用slot组件占位,父组件传入结构
首页组件(miste)顶部样式
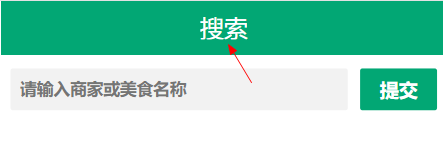
搜索组件(search)顶部样式
订单(order)顶部样式

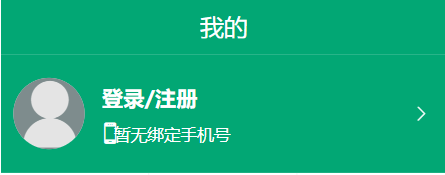
我的(profile)顶部样式
3.1,定义公共组件HeaderTop,利用具名插槽
<template>
  <header class="header">
    <!--插槽作用域,子组件占位,父组件传入结构 -->
    <slot name="left"></slot>
    <span class="header_title">
      <span class="header_title_text ellipsis"
        >{{title}}</span
      >
    </span>
    <!--插槽作用域,子组件占位,父组件传入结构 -->
    <slot name="right"></slot>

  </header>
</template>
接收父组件传递过来的属性
export default {
  name:'HeaderTop',
  props:['title'],
3.2,在首页msite组价,插入子组件,需要两个结构给子组件
    <HeaderTop title="昌平区北七家宏福科技园(337省道北)">
      <template>
        <span class="header_search" slot="left">
          <i class="iconfont icon-sousuo"></i>
        </span>

        <span class="header_login" slot="right">
          <span class="header_login_text">登录|注册</span>
        </span>
      </template>
    </HeaderTop>
在搜索组件(search)插入子组件,不需要结构给子组件
<HeaderTop title="搜索"></HeaderTop>
在订单组件(order)插入子组件,不需要结构给子组件
<HeaderTop title="订单列表"></HeaderTop>
3.3,在msite首页组件添加轮播图插件swiper,
1.安装5版本的swiper, npm i swiper@5 -S 目前最新是6,不稳定
<div class="swiper-container">
        <div class="swiper-wrapper">

          <div class="swiper-slide">
            <a href="javascript:" class="link_to_food">
              <div class="food_container">
                <img src="./images/nav/9.jpg" />
              </div>
              <span>甜品饮品</span>
            </a>
            <a href="javascript:" class="link_to_food">
              <div class="food_container">
                <img src="./images/nav/10.jpg" />
              </div>
              <span>商超便利</span>
            </a>
            <a href="javascript:" class="link_to_food">
              <div class="food_container">
                <img src="./images/nav/11.jpg" />
              </div>
              <span>美食</span>
            </a>
            <a href="javascript:" class="link_to_food">
              <div class="food_container">
                <img src="./images/nav/12.jpg" />
              </div>
              <span>简餐</span>
            </a>
            <a href="javascript:" class="link_to_food">
              <div class="food_container">
                <img src="./images/nav/13.jpg" />
              </div>
              <span>新店特惠</span>
            </a>
            <a href="javascript:" class="link_to_food">
              <div class="food_container">
                <img src="./images/nav/14.jpg" />
              </div>
              <span>准时达</span>
            </a>
            <a href="javascript:" class="link_to_food">
              <div class="food_container">
                <img src="./images/nav/1.jpg" />
              </div>
              <span>预订早餐</span>
            </a>
            <a href="javascript:" class="link_to_food">
              <div class="food_container">
                <img src="./images/nav/2.jpg" />
              </div>
              <span>土豪推荐</span>
            </a>
          </div>
        </div>
        <!-- Add Pagination -->
        <div class="swiper-pagination"></div>
      </div>
 mounted() {
    new Swiper('.swiper-container', {
      loop: true, // 可以循环轮播
      // 如果需要分页器
      pagination: {
        el: '.swiper-pagination'
      }
    })
  }
3.4,在msite首页组件拆分shoplist组件,html,css,图片拆分
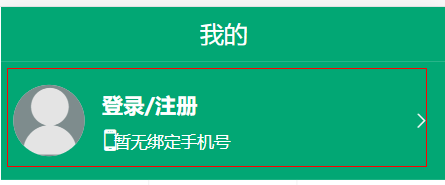
3.5,在我的组件(profile),点击登录|注册链接,跳转到登录页面

配置登录路由组件对象
import Login from '@/views/Login'

const routes = [
  {
    path: '/msite',
    component: Msite,
    meta: {
      showFooterGuider: true
    }
  },
  {
    path: '/order',
    component: Order,
    meta: {
      showFooterGuider: true
    }
  },
  {
    path: '/profile',
    component: Profile,
    meta: {
      showFooterGuider: true
    }
  },
  {
    path: '/search',
    component: Search,
    meta: {
      showFooterGuider: true
    }
  },
  {
    path: '/',
    redirect: '/msite'
  },
  {
    path: '/login',
    component: Login,
    meta: {
      showFooterGuider: false
    }
  }
]
  <section class="profile-number">
        <!-- 路由链家登录 -->
        <router-link to="/login"  class="profile-link">
            <div class="profile_image">
            <i class="iconfont icon-person"></i>
          </div>
          <div class="user-info">
            <p class="user-info-top">登录/注册</p>
            <p>
              <span class="user-icon">
                <i class="iconfont icon-shouji icon-mobile"></i>
              </span>
              <span class="icon-mobile-number">暂无绑定手机号</span>
            </p>
          </div>
          <span class="arrow">
            <i class="iconfont icon-jiantou1"></i>
          </span>
        </router-link>
两个细节问题
1.在登录组件,点击左上角的返回图标,返回到我的组件,利用路由返回函数
       <button class="login_submit">登录</button>
          </form>
          <a href="javascript:;" class="about_us">关于我们</a>
        </div>
        <a href="javascript:" class="go_back" @click="$router.back()">
          <i class="iconfont icon-jiantou2"></i>
        </a>
      </div>
2.在登录页面底部的四个切换栏需要影藏,在路由对象中配置meta属性,布尔值,然后在app组件中v-if判断下
在app.vue中判断判断是否显示footer切换栏
<template>
  <div>
    <router-view></router-view>
    <FooterGuide v-if="$route.meta.showFooterGuider"></FooterGuide>
  </div>
</template>
3.6,axios二次封装,接口函数书写以及发送请求
新建api文件夹,新建ajax.js文件,axios二次封装 Ajax.js, 后台服务器地址http://localhost:4000
// 对axios的二次封装
import axios from 'axios'
const service = axios.create({

  baseURL: 'http://localhost:4000',
  timeout: 2000
})

// 请求拦截器
service.interceptors.request.use(config => {
  return config
})

// 响应拦截器
service.interceptors.response.use(
  response => {
    return response.data
  },
  error => {
    alert('请求出错' + error.message || '未知错误')
    //以后不允许用户继续处理: 中断promise链
    return new Promise(() => {}) //返回pending状态的promise 中断
  }
)

export default service
新建index.js文件,编写接口函数
import ajax from './ajax.js'

// 1、根据经纬度获取位置详情
export const reqAddress = (geohash) => ajax.get(`/position/${geohash}`)
// 2、获取食品分类列表
export const reqFoodCategorys = () => ajax.get('/index_category')
// 3、根据经纬度获取商铺列表
export const reqShops = (longitude, latitude) => ajax.post('/shops', {params:{longitude, latitude}})
// 4、根据经纬度和关键字搜索商铺列表
export const reqSearchShop = (geohash, keyword) => ajax.post('/search_shops', {params:{geohash, keyword}})
// 6、用户名密码登陆
export const reqPwdLogin = ({name, pwd, captcha}) => ajax.post('/login_pwd', {name, pwd, captcha})
// 7、发送短信验证码
export const reqSendCode = (phone) => ajax.get('/sendcode', {params:{phone}})
// 8、手机号验证码登陆
export const reqSmsLogin = (phone, code) => ajax.post('/login_sms', {phone, code})
// 9、根据会话获取用户信息
export const reqUserInfo = () => ajax.get('/userinfo')
// 10、用户登出
export const reqLogout = () => ajax.get('/logout')

/**
 * 获取商家信息
 */
export const reqShopInfo = () => ajax.get('/info')

/**
 * 获取商家评价数组
 */
export const reqShopRatings = () => ajax.get('/ratings')

/**
 * 获取商家商品数组
 */
export const reqShopGoods = () => ajax.get('/goods')
在main.js中测试接口数据
import * as API from '@/api'
API.reqAddress(('40.10038,116.36867')).then(r => {
  console.log(r)
})
此时,控制台报错了,请求跨域了,本机浏览器端口8080请求4000端口,我们需要在vue.config.js 配置代理proxy

module.exports = {
  lintOnSave: false,
  devServer: {
    //需要转发路由的路径
    proxy: {
      '/api': {
        target: 'http://localhost:4000',
        pathRewrite: { '^/api': '' },
        changeOrigin: true
      }
    }
  }
}
然后在封装的ajax中修改下路径,此时再次请求数据,是OK的
// 对axios的二次封装
import axios from 'axios'
const service = axios.create({
  baseURL: 'http://localhost:8080/api',
  // baseURL: 'http://localhost:4000',
  timeout: 2000
})
3.7,利用vuex,发送ajax,状态管理
1.新建store文件夹,新建index.js
import Vue from 'vue'
import Vuex from 'vuex'
Vue.use(Vuex)
// 引入接口函数
import {
  reqAddress,
  reqFoodCategorys,
  reqShops,
  reqUserInfo,
  reqLogout,
  reqShopRatings,
  reqShopGoods,
  reqShopInfo,
  reqSearchShop
} from '@/api'

const state = {
  latitude: 40.10038, // 纬度
  longitude: 116.36867, // 经度
  address: {}, //地址相关信息对象

}

const mutations = {
  RECEIVE_ADDRESS(state, address) {
    state.address = address
  },


}

const actions = {
  // 异步获取地址
  async getAddress({ commit, state }) {
    // 发送异步ajax请求
    const geohash = state.latitude + ',' + state.longitude
    const result = await reqAddress(geohash)
    // 提交一个mutation
    if (result.code === 0) {
      const address = result.data
      commit('RECEIVE_ADDRESS', address)
    }
  },


}

const getters = {}

export default new Vuex.Store({
  state,
  mutations,
  actions,
  getters
})
在main.js中引入store,并注册
import store from '@/store'

Vue.config.productionTip = false

new Vue({
  router,
  render: h => h(App),
  store
}).$mount('#app')
在msite首页组件中从store中获取数据
除了dispatch到store中actions的函数,还可以用mapActions中触发
  mounted(){
    this.$store.dispatch('getAddress')
  },
或者
  methods:{
    ...mapActions(['getAddress'])
  },
 mounted(){
    // this.$store.dispatch('getAddress')
    this.getAddress()
  },
从store中的获取数据
computed:{

    // address(){
    //   return this.$store.state.address
    // }
    ...mapState(['address'])
  },
填充数据
<HeaderTop :title="address.name">
      <template>
        <span class="header_search" slot="left">
          <i class="iconfont icon-sousuo"></i>
        </span>

        <span class="header_login" slot="right">
          <span class="header_login_text">登录|注册</span>
        </span>
      </template>
    </HeaderTop>
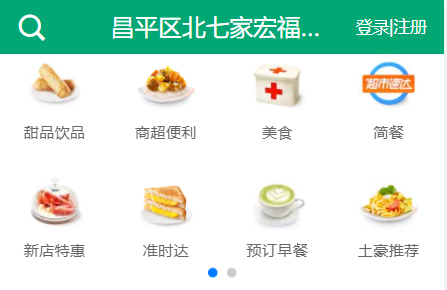
3.8,在msite首页组件中的轮播图中获取动态数据,并填充数据
注:这个轮播图,应该是是一个双重数组遍历,一维数组是有几页,二维数组是有八个数据
然而我们后台返回的数据是一个数组数据,而不是一个二维数组。因此我们需要编写逻辑去实现两个数组嵌套
  mounted() {

    this.$store.dispatch('getCategorys')
  },
computed: {

    ...mapState(['address', 'categorys']),
返回的部分数据
{
  "code": 0,
  data: [
          {
            id: 1,
            is_in_serving: true,
            description: "0元早餐0起送,每天都有新花样。",
            title: "预订早餐",
            link: "",
            image_url: "/d/49/7757ff22e8ab28e7dfa5f7e2c2692jpeg.jpeg",
            icon_url: "",
            title_color: "",
            __v: 0
          },
          {
            id: 65,
            is_in_serving: true,
            description: "",
            title: "土豪推荐",
            image_url: "/d/49/7757ff22e8ab28e7dfa5f7e2c2692jpeg.jpeg",
            link: "",
            icon_url: "",
            title_color: "",
            __v: 0
          },
          ... 共n条数据
        ]
}
// 发送请求返回的数据categorys是一个数组,但是看html,应该要双重遍历,是一个二维数组,将categorys
    // 遍历下,需要将每一项对象添加到嵌套的小数组中
    // 思路;1.需要定义一个大数组,小数组,将小数组嵌套在大数组中,小数组添加categorys的每一个对象
    // 2.小数组只能有八项对象(页面只有八项标签),然后添加一个新的小数组
在computed中计算该数组,重要
categorysArr() {
      // 定义大数组
      let arr = []
      // 定义小数组
      let minArr = []
      this.categorys.forEach(item => {
        // 如果当前小数组已经满了, 创建一个新的
        if (minArr.length === 8) {
          minArr = []
        }

        // 如果minArr是空的, 将小数组保存到大数组中
        if (minArr.length === 0) {
          arr.push(minArr)
        }

        // 将每一项对象添加到小数组中
        minArr.push(item)
      })

      return arr
    }
  }
此时整理得到的数据

将数据填充到模板中
  data() {
    return {
      baseImageUrl: 'https://fuss10.elemecdn.com'
    }
  },
 <div class="swiper-container">
        <div class="swiper-wrapper">
          <div
            class="swiper-slide"
            v-for="(c1, index) in categorysArr"
            :key="index"
          >
            <a
              href="javascript:"
              class="link_to_food"
              v-for="(c2, index) in c1"
              :key="c2.id"
            >
              <div class="food_container">
                <img :src="baseImageUrl + c2.image_url" />
              </div>
              <span>{{ c2.title }}</span>
            </a>
          </div>
        </div>
此时有个bug,swiper轮播图并没有效果,如何有效果呢
1.监视异步请求获取的数据categorys,
2.此时数据回来了,但是页面还没有跟新,需要在下一次dom页面跟新完成执行
 watch: {
      categorys (value) { // categorys数组中有数据了, 在异步更新界面之前执行
        // 使用setTimeout可以实现效果, 但不是太好
        /*setTimeout(() => {
          // 创建一个Swiper实例对象, 来实现轮播
          new Swiper('.swiper-container', {
            loop: true, // 可以循环轮播
            // 如果需要分页器
            pagination: {
              el: '.swiper-pagination',
            },
          })
        }, 100)*/

        // 界面更新就立即创建Swiper对象
        this.$nextTick(() => {// 一旦完成界面更新, 立即调用(此条语句要写在数据更新之后)
          // 创建一个Swiper实例对象, 来实现轮播
          new Swiper('.swiper-container', {
            loop: true, // 可以循环轮播
            // 如果需要分页器
            pagination: {
              el: '.swiper-pagination',
            },
          })

        })

      }
    },