| Topic--订阅/发布 | Queue--点对点 |
| 实时通讯,发布时,若订阅者未连接则消息丢失 | 持久化,消息被消费者消费后才会消失 |
| 需要先订阅,后发布 | 生产了就能收到 |
| 发布的消息所有的订阅者都能收到 | 生产者生产的消息只能被消费者消费一次,故又被称为点对点模式 |
1、添加依赖
<dependency>
    <groupId>org.springframework.boot</groupId>
    <artifactId>spring-boot-starter-activemq</artifactId>
</dependency>
<!--消息队列连接池-->
<dependency>
    <groupId>org.apache.activemq</groupId>
    <artifactId>activemq-pool</artifactId>
    <version>5.15.0</version>
</dependency>
2、项目中 application-dev.yml 的 spring 树下 加上配置
  activemq:
    broker-url: tcp://192.168.111.35:61616
    in-memory: false
    pool:
      enabled: true
      max-connections: 10
      idle-timeout: 30000
      expiry-timeout: 0
3、在项目的启动类上加上
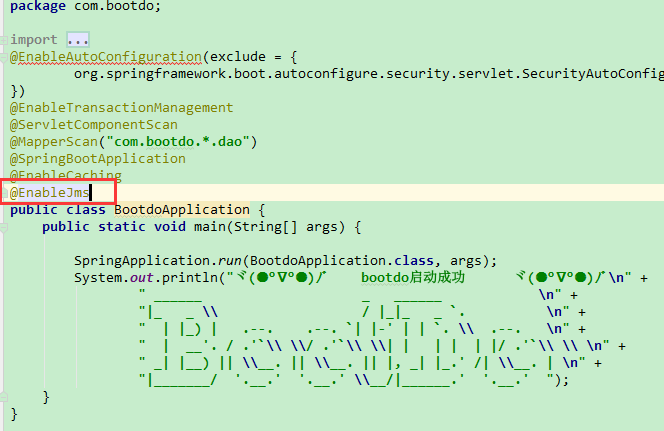
4、项目中加入一个 BeanConfig,用于定义消息队列,如下我建立了两个queue 和 一个topic
package com.bootdo.activemq.config;

import javax.jms.Queue;
import javax.jms.Topic;

import org.apache.activemq.command.ActiveMQQueue;
import org.apache.activemq.command.ActiveMQTopic;
import org.springframework.context.annotation.Bean;
import org.springframework.context.annotation.Configuration;

/*
 * @author wxw
 * @date
 */
@Configuration
public class BeanConfig {

    //定义存放消息的队列
    @Bean
    public Queue queueOne() {
        return new ActiveMQQueue("TestQueueOne");
    }


    //定义存放消息的队列
    @Bean
    public Queue queueTwo() {
        return new ActiveMQQueue("TestQueueTwo");
    }

    @Bean   //将主题对象交给spring管理
    public Topic topic(){
        return new ActiveMQTopic("testTopic");
    }
}
5、新增一个配置类
package com.bootdo.activemq.config;

import org.springframework.context.annotation.Bean;
import org.springframework.context.annotation.Configuration;
import org.springframework.jms.config.DefaultJmsListenerContainerFactory;
import org.springframework.jms.config.JmsListenerContainerFactory;

import javax.jms.ConnectionFactory;


@Configuration
public class MyActiveMqConfig {
   //Topic模式
    @Bean
    public JmsListenerContainerFactory<?> jmsListenerContainerTopic(ConnectionFactory connectionFactory) {
        DefaultJmsListenerContainerFactory bean = new DefaultJmsListenerContainerFactory();
        bean.setPubSubDomain(true);
        bean.setConnectionFactory(connectionFactory);
        return bean;
    }
   //Queue模式
    @Bean
    public JmsListenerContainerFactory<?> jmsListenerContainerQueue(ConnectionFactory  connectionFactory) {
        DefaultJmsListenerContainerFactory bean = new DefaultJmsListenerContainerFactory();
        bean.setConnectionFactory(connectionFactory);
        return bean;
    }

}
6、在项目中建立 消息提供者(provider) 的controller
package com.bootdo.activemq.controller;

import com.bootdo.activemq.config.BeanConfig;
import org.springframework.beans.factory.annotation.Autowired;
import org.springframework.jms.core.JmsMessagingTemplate;
import org.springframework.web.bind.annotation.RequestMapping;
import org.springframework.web.bind.annotation.RestController;


@RestController
public class ProviderController {

    //注入存放消息的队列,用于下列方法一
    @Autowired
    private BeanConfig beanConfig;

    //注入springboot封装的工具类
    @Autowired
    private JmsMessagingTemplate jmsMessagingTemplate;

    @RequestMapping("send")
    public void send(String name) {
        //方法一:添加消息到消息队列
        jmsMessagingTemplate.convertAndSend(beanConfig.queueOne(), name+"111");
        jmsMessagingTemplate.convertAndSend(beanConfig.queueTwo(), name+"222");
    }
}
7、在项目中建立 消息发布者(publisher) 的controller 用于topic模式
package com.bootdo.activemq.controller;

import com.bootdo.activemq.config.BeanConfig;
import org.springframework.beans.factory.annotation.Autowired;
import org.springframework.jms.core.JmsMessagingTemplate;
import org.springframework.web.bind.annotation.RequestMapping;
import org.springframework.web.bind.annotation.RestController;


@RestController
public class ProviderController {

    //注入存放消息的队列,用于下列方法一
    @Autowired
    private BeanConfig beanConfig;

    //注入springboot封装的工具类
    @Autowired
    private JmsMessagingTemplate jmsMessagingTemplate;

    @RequestMapping("send")
    public void send(String name) {
        //方法一:添加消息到消息队列
        jmsMessagingTemplate.convertAndSend(beanConfig.queueOne(), name+"111");
        jmsMessagingTemplate.convertAndSend(beanConfig.queueTwo(), name+"222");
    }
}
8、在项目中加入 点对点模式的 消费者的service
package com.bootdo.activemq.service;

import org.springframework.beans.factory.annotation.Autowired;
import org.springframework.jms.annotation.JmsListener;
import org.springframework.jms.core.JmsMessagingTemplate;
import org.springframework.messaging.handler.annotation.SendTo;
import org.springframework.stereotype.Component;

/*
 * @author uv
 * @date 2018/9/15 18:36
 *
 */
@Component
public class ConsumerService {

    @Autowired
    private JmsMessagingTemplate jmsMessagingTemplate;

    // 使用JmsListener配置消费者监听的队列,其中name是接收到的消息
    @JmsListener(destination = "TestQueueOne")
    // SendTo 会将此方法返回的数据, 写入到 OutQueue 中去.
    @SendTo("SQueue")
    public String handleMessage(String name) {
        System.out.println("成功接受Name111" + name);
        return "成功接受Name1112" + name;
    }


    // 使用JmsListener配置消费者监听的队列,其中name是接收到的消息
    @JmsListener(destination = "TestQueueTwo")
    // SendTo 会将此方法返回的数据, 写入到 OutQueue 中去.
    @SendTo("SQueue")
    public String handleMessage2(String name) {
        System.out.println("成功接受Name222" + name);
        return "成功接受Name2222" + name;
    }


}
9、在项目中加入点对点模式中消费者返回的结果监听service
package com.bootdo.activemq.service;

import org.springframework.jms.annotation.JmsListener;
import org.springframework.stereotype.Component;

/*
 * @author uv
 * @date 2018/9/15 18:36
 *
 */
@Component
public class ProviderService {


    // 使用JmsListener配置消费者监听的队列,其中name是接收到的消息
    @JmsListener(destination = "SQueue")
    public void handleMessage(String name) {
        System.out.println("成功接收到了消息的返回值" + name);
    }


}
10、在项目中加入 topic模式的 订阅者的service
package com.bootdo.activemq.service;

import org.springframework.jms.annotation.JmsListener;
import org.springframework.messaging.handler.annotation.SendTo;
import org.springframework.stereotype.Component;

@Component
public class TopicSubscriberService {

    @JmsListener(destination="testTopic",containerFactory = "jmsListenerContainerTopic")
    public void topic(String text){
        System.out.println("testTopic 消费者:receive1="+text);
    }

    @JmsListener(destination="testTopic",containerFactory = "jmsListenerContainerTopic")
    public void topic2(String text){
        System.out.println("testTopic 消费者:receive2="+text);
    }
}
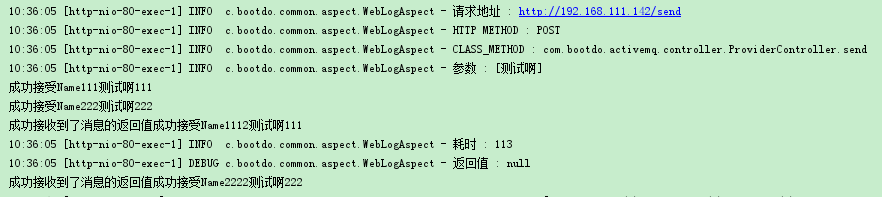
11、运行项目,访问 ip/send
9、查看activemq的管理后台,点击queue栏

- Number Of Pending Messages:消息队列中待处理的消息
- Number Of Consumers:消费者的数量
- Messages Enqueued:累计进入过消息队列的总量
- Messages Dequeued:累计消费过的消息总量