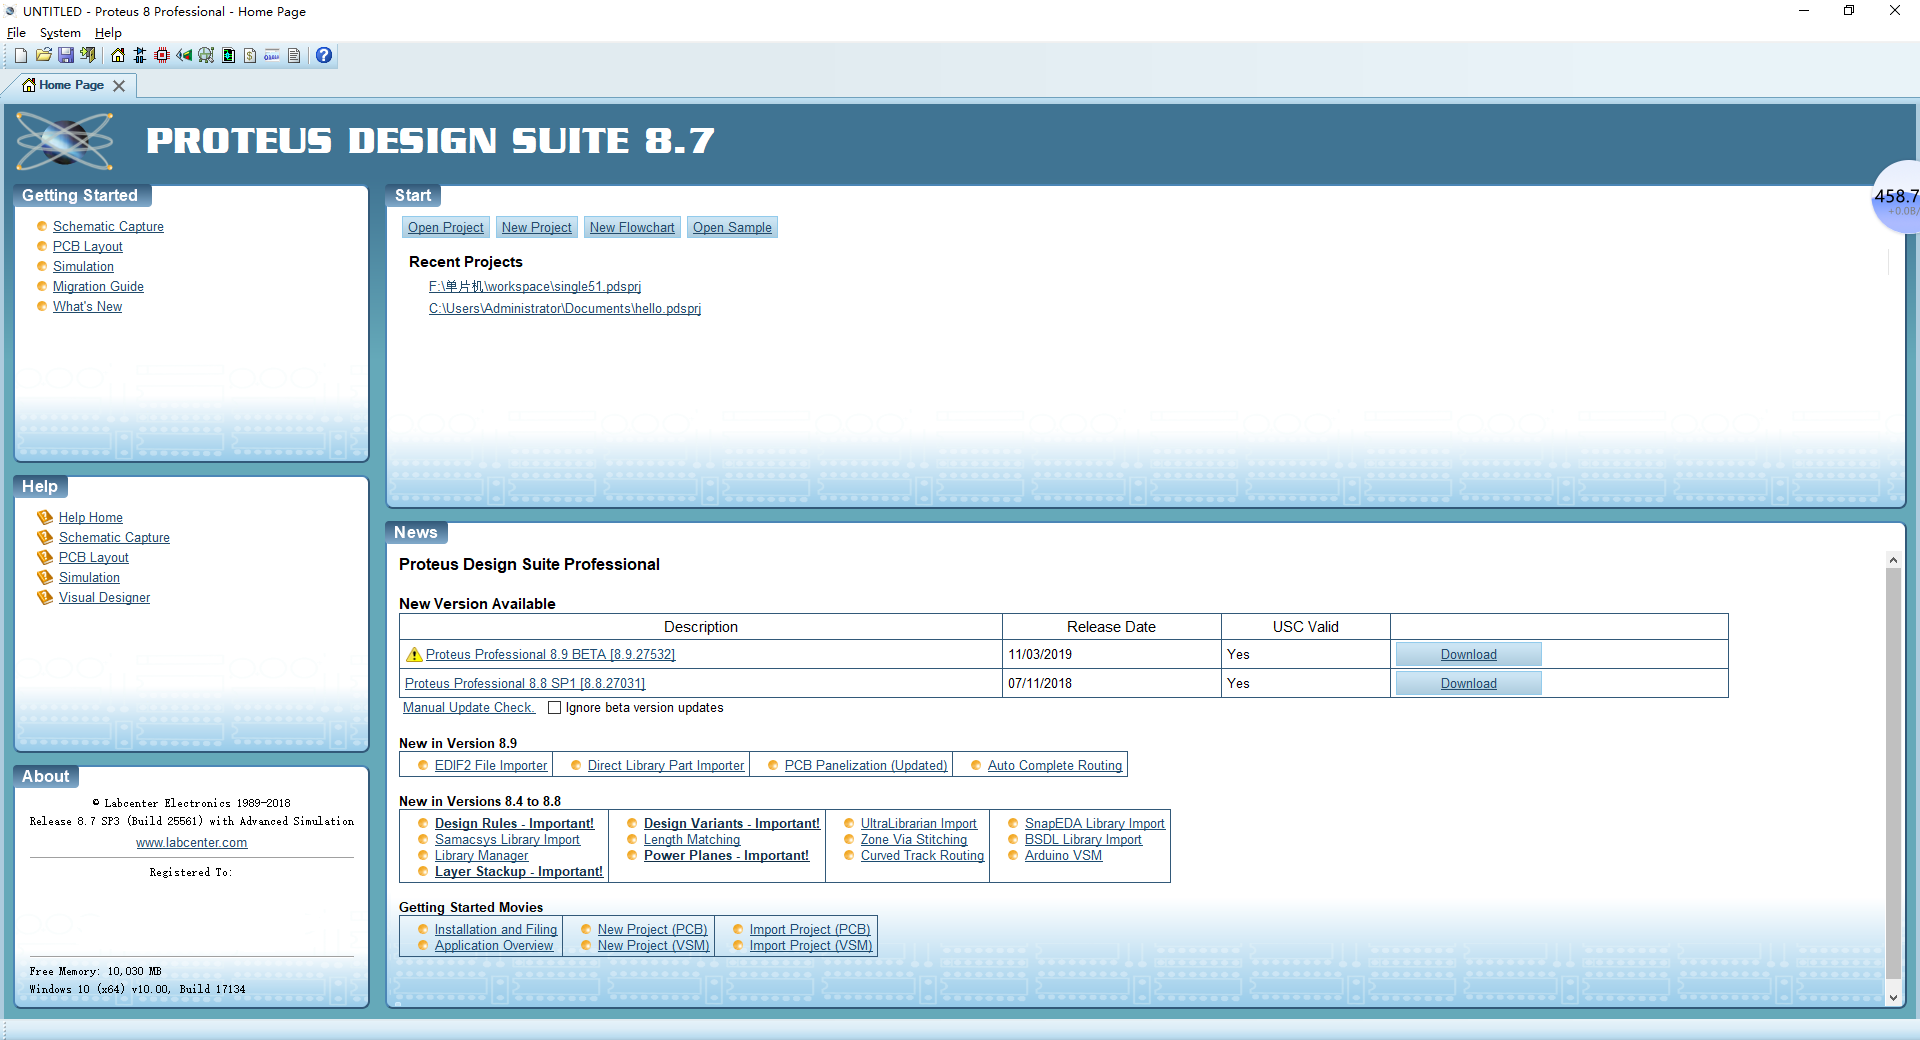
Proteus是一个仿真软件,可以在里面设计电路并模拟测试,也可生成PCB的布线等等,反正就是强大的不行。初学单片机,除了开发板,这个仿真器就是一个很好的调式环境。软件安装信息:
- Proteus 8.7
- Keil uvision4
- Window 10
很多人说window10安装不成功,其他还好,刚开始装Proteus 8.7,出现了一个缺少hhctrl.ocx的组件,下载后注册,就好了。其他安装不再说明,没有什么大问题。目前Keil和Proteus联调成功:
代码如下所示:
/*------------------------------------------------------------------------------
HELLO.C

Copyright 1995-2005 Keil Software, Inc.
------------------------------------------------------------------------------*/

#include <REG52.H>                /* special function register declarations   */
                                  /* for the intended 8051 derivative         */

#include <stdio.h>                /* prototype declarations for I/O functions */


#ifdef MONITOR51                         /* Debugging with Monitor-51 needs   */
char code reserve [3] _at_ 0x23;         /* space for serial interrupt if     */
#endif                                   /* Stop Exection with Serial Intr.   */
                                         /* is enabled                        */


/*------------------------------------------------
The main C function.  Program execution starts
here after stack initialization.
------------------------------------------------*/
void main (void) {

/*------------------------------------------------
Setup the serial port for 1200 baud at 16MHz.
------------------------------------------------*/
#ifndef MONITOR51
    SCON  = 0x50;                /* SCON: mode 1, 8-bit UART, enable rcvr      */
    TMOD |= 0x20;               /* TMOD: timer 1, mode 2, 8-bit reload        */
    TH1   = 221;                /* TH1:  reload value for 1200 baud @ 16MHz   */
    TR1   = 1;                  /* TR1:  timer 1 run                          */
    TI    = 1;                  /* TI:   set TI to send first char of UART    */
#endif

/*------------------------------------------------
Note that an embedded program never exits (because
there is no operating system to return to).  It
must loop and execute forever.
------------------------------------------------*/
  while (1) {
    P1 ^= 0x01;                 /* Toggle P1.0 each time we print */
    printf ("Hello World
");   /* Print "Hello World" */
  }
}
这段代码为安装Keil之后,打开默认显示的代码,我没有修改,就直接用了,它是修改P1口的状态。
先看看Proteus的界面:
新建工程就不说了,建好之后,就是找元件了,如图:
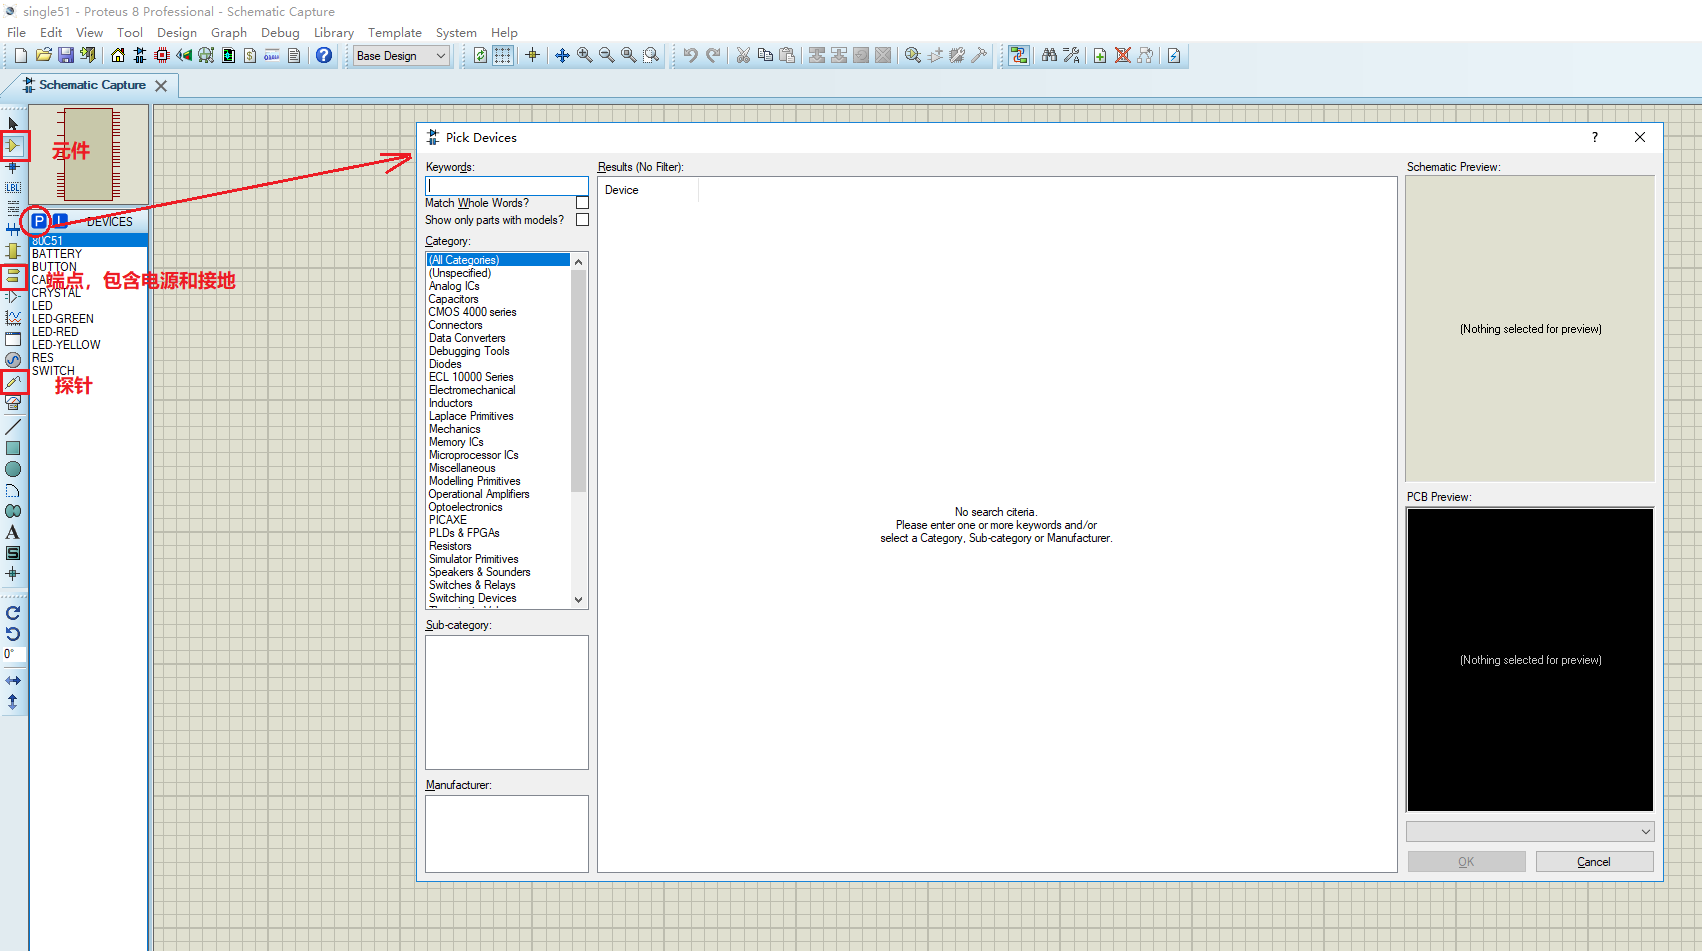
图中标记了几处,元件库,端点POWER和GROUND,探针,其中元件初始化为空,需要自己添加,点P,打开搜索框添加。几个常用的元件名称如下(搜索时用英文名称搜索,右侧可看见符号):
- 电池组BATTERY
- 按键BUTTON
- 电容CAP
- 晶振CEYSTAL
- 发光二极管LED
- 黄色发光二极管LED-YELLOW(其他颜色类似)
- 电阻RES
- 开关SWITCH
- 单片机80C51
 (元件)
(元件) (端点,连线的终端)
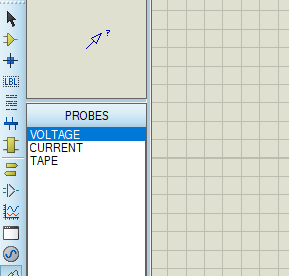 (探针,电流、电压)
在使用POWER的时候,需要设置全局的电压值,如图:
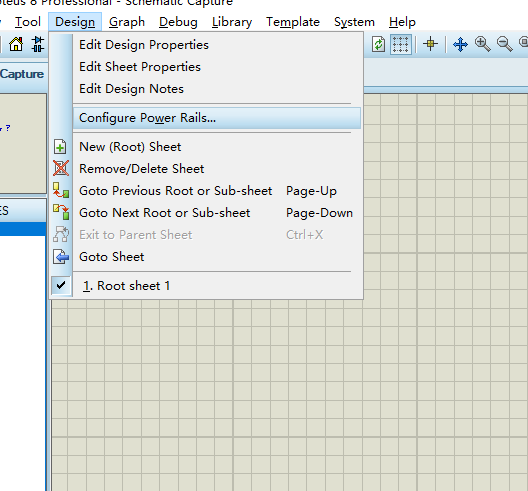 (打开菜单)
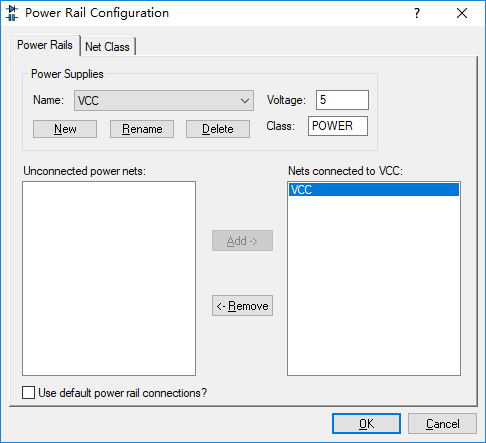 (新增GND和VCC,并设置电压值,在POWER属性上可以选择)
关于探针,在探针使用时不要与线路交叉重叠就行,动态显示探针的值,需要设置:System-》Set Animation Options,右侧Animation Options下面的复选框,全部勾上就行,保存。
关于Keil4与Proteus8联调,配置如下:
1.Proteus中,菜单栏Debug-》Enable Remote Debug Monitor,即允许远程调式;
2.Keil中,打开Target Options  ,即选择模拟器;
3.打开DEBUG页签,如图:
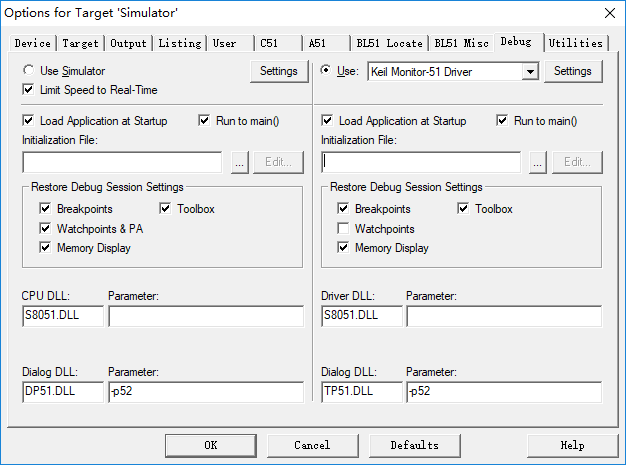
4.在Use下拉框中选择Proteus VSM Simulator模拟器,新安装的如果没有的话,需要给keil安装Proteus的调试插件:vdmagdi.exe,安装时选择Keil的安装路径,会自动修改配置文件:
D:KeilTOOLS.INI
[UV2]
ORGANIZATION="**"
NAME="**", "**"
EMAIL="**"
BOOK0=UV4RELEASE_NOTES.HTM("uVision Release Notes",GEN)
[C51]
PATH="D:KeilC51"
VERSION=V9.00
BOOK0=HLPRelease_Notes.htm("Release Notes",GEN)
BOOK1=HLPC51TOOLS.chm("Complete User's Guide Selection",C)
TDRV0=BINMON51.DLL ("Keil Monitor-51 Driver")
TDRV1=BINISD51.DLL ("Keil ISD51 In-System Debugger")
TDRV2=BINMON390.DLL ("MON390: Dallas Contiguous Mode")
TDRV3=BINLPC2EMP.DLL ("LPC900 EPM Emulator/Programmer")
TDRV4=BINUL2UPSD.DLL ("ST-uPSD ULINK Driver")
TDRV5=BINUL2XC800.DLL ("Infineon XC800 ULINK Driver")
TDRV6=BINMONADI.DLL ("ADI Monitor Driver")
TDRV7=BINDAS2XC800.DLL ("Infineon DAS Client for XC800")
TDRV8=BINUL2LPC9.DLL ("NXP LPC95x ULINK Driver")
RTOS0=Dummy.DLL("Dummy")
RTOS1=RTXTINY.DLL ("RTX-51 Tiny")
RTOS2=RTX51.DLL ("RTX-51 Full")
LIC0=14R8T-R0VMF-C5DT5-GNLT9-76GJH-QEQ8V
TDRV9=BINVDM51.DLL ("Proteus VSM Simulator")
BOOK2=HLPVDMAGDI.HLP ("Proteus VSM AGDI Driver")
[ARM]
TDRV0=BINVDMARM.DLL ("Proteus VSM Simulator")
BOOK0=HLPVDMAGDI.HLP ("Proteus VSM AGDI Driver")
[KARM]
TDRV0=BINVDMARM.DLL ("Proteus VSM Simulator")
BOOK0=HLPVDMAGDI.HLP ("Proteus VSM AGDI Driver")
如果这个配置文件中有Proteus VSM Simulator,说明可用;
5.选择好模拟器,就可以运行程序,会自动运行Proteus的电路,可以点亮LED灯,如出现一下,请检查步骤1:
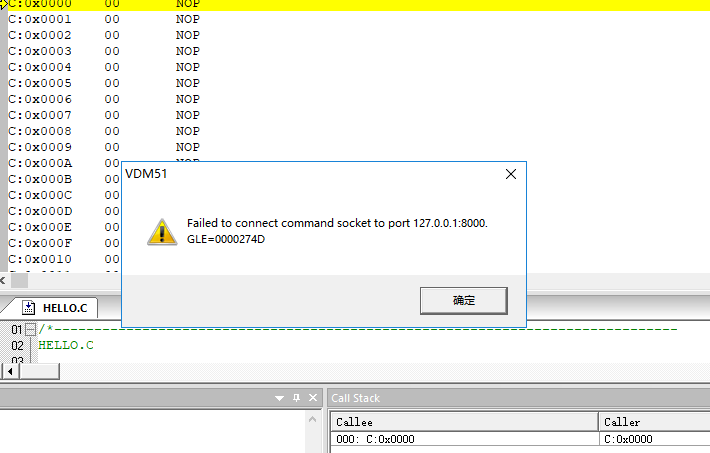
如出现一下情况,则表明没有选对模拟器,如图:

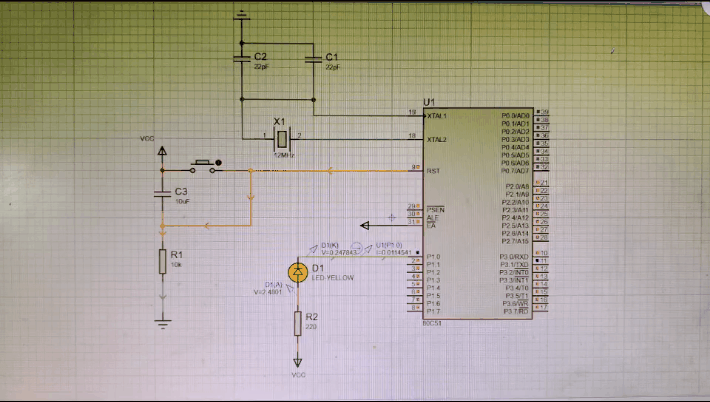
以上就是我的总结,最后,放一张设计的80C51的电路图结束。

转载请注明出处
