使用Zookeeper代替Eureka,为啥要代替,emm,应该关注这一块的都知道【作死的边缘疯狂试探】
CentOS7搭建Zookeeper
既然要使用Zookeeper,那么肯定要先安装,有喜欢Windows的小伙伴也可以安装Windows的,别问我为啥只写Linux的,因为我也不知道
准备一台CentOS7服务器,并连接到服务器,能输入命令即可,推荐可以买一台云ECS,不会装Zookeeper的话,还可以打电话联系客服小姐姐
emm,我这个人比较穷,只能搭建本地的虚拟机,开个玩笑,因为平时使用的虚拟机比较多,所以就直接搭建本地的了
安装JDK8
yum install java-1.8.0-openjdk* -y
java -version
安装Zookeeper
下载
wget https://mirrors.tuna.tsinghua.edu.cn/apache/zookeeper/zookeeper-3.5.9/apache-zookeeper-3.5.9-bin.tar.gz
如果没有wget,就执行一下 yum install wget
解压
tar -zxf apache-zookeeper-3.5.9-bin.tar.gz
修改配置
[root@localhost software]# cd apache-zookeeper-3.5.9-bin
[root@localhost apache-zookeeper-3.5.9-bin]# mkdir data
[root@localhost apache-zookeeper-3.5.9-bin]# mkdir logs
[root@localhost apache-zookeeper-3.5.9-bin]# cd data
[root@localhost data]# pwd
/usr/local/software/apache-zookeeper-3.5.9-bin/data
[root@localhost data]# cd ../logs/
[root@localhost logs]# pwd
/usr/local/software/apache-zookeeper-3.5.9-bin/logs
[root@localhost logs]# cd ../
[root@localhost apache-zookeeper-3.5.9-bin]# cd conf/
[root@localhost conf]# cp zoo_sample.cfg zoo.cfg
[root@localhost conf]# vi zoo.cfg
zoo.cfg
# The number of milliseconds of each tick
tickTime=2000

# The number of ticks that the initial
# synchronization phase can take
initLimit=10

# The number of ticks that can pass between
# sending a request and getting an acknowledgement
syncLimit=5

# the directory where the snapshot is stored.
# do not use /tmp for storage, /tmp here is just
# example sakes.
dataDir=/usr/local/software/apache-zookeeper-3.5.9-bin/data
dataLogDir=/usr/local/software/apache-zookeeper-3.5.9-bin/logs

# the port at which the clients will connect
clientPort=2181

# the maximum number of client connections.
# increase this if you need to handle more clients
#maxClientCnxns=60
#
# Be sure to read the maintenance section of the
# administrator guide before turning on autopurge.
#
# http://zookeeper.apache.org/doc/current/zookeeperAdmin.html#sc_maintenance
#
# The number of snapshots to retain in dataDir
#autopurge.snapRetainCount=3
# Purge task interval in hours
# Set to "0" to disable auto purge feature
#autopurge.purgeInterval=1
退出保存
编辑系统配置文件
[root@localhost bin]# vi /etc/profile
profile
最后三行添加
export ZOOKEEPER_HOME=/usr/local/software/apache-zookeeper-3.5.9-bin
export PATH=$ZOOKEEPER_HOME/bin:$PATH
export PATH
退出保存
重新加载配置文件
[root@localhost bin]# source /etc/profile
启动
[root@localhost conf]# cd ../bin/
[root@localhost bin]# ./zkServer
zkServer.cmd            zkServer-initialize.sh  zkServer.sh
[root@localhost bin]# ./zkServer.sh start
/usr/bin/java
ZooKeeper JMX enabled by default
Using config: /usr/local/software/apache-zookeeper-3.5.9-bin/bin/../conf/zoo.cfg
Starting zookeeper ... STARTED
[root@localhost bin]#
关闭防火墙
[root@localhost bin]# systemctl stop firewalid
Failed to stop firewalid.service: Unit firewalid.service not loaded.
[root@localhost bin]# systemctl stop firewalld
[root@localhost bin]# systemctl status firewalld
● firewalld.service - firewalld - dynamic firewall daemon
   Loaded: loaded (/usr/lib/systemd/system/firewalld.service; enabled; vendor preset: enabled)
   Active: inactive (dead) since 日 2021-08-22 04:02:04 CST; 9s ago
     Docs: man:firewalld(1)
  Process: 791 ExecStart=/usr/sbin/firewalld --nofork --nopid $FIREWALLD_ARGS (code=exited, status=0/SUCCESS)
 Main PID: 791 (code=exited, status=0/SUCCESS)

8月 22 02:26:57 localhost.localdomain systemd[1]: Starting firewalld - dynamic firewall daemon...
8月 22 02:26:58 localhost.localdomain systemd[1]: Started firewalld - dynamic firewall daemon.
8月 22 02:26:58 localhost.localdomain firewalld[791]: WARNING: AllowZoneDrifting is enabled. This is considered an insecure configuration option. It will be removed in a future release. Ple...bling it now.
8月 22 04:02:04 localhost.localdomain systemd[1]: Stopping firewalld - dynamic firewall daemon...
8月 22 04:02:04 localhost.localdomain systemd[1]: Stopped firewalld - dynamic firewall daemon.
Hint: Some lines were ellipsized, use -l to show in full.
[root@localhost bin]#
测试连接
查看Centos IP
[root@localhost bin]# ip addr
1: lo: <LOOPBACK,UP,LOWER_UP> mtu 65536 qdisc noqueue state UNKNOWN group default qlen 1000
    link/loopback 00:00:00:00:00:00 brd 00:00:00:00:00:00
    inet 127.0.0.1/8 scope host lo
       valid_lft forever preferred_lft forever
    inet6 ::1/128 scope host
       valid_lft forever preferred_lft forever
2: ens33: <BROADCAST,MULTICAST,UP,LOWER_UP> mtu 1500 qdisc pfifo_fast state UP group default qlen 1000
    link/ether 00:0c:29:23:d9:c7 brd ff:ff:ff:ff:ff:ff
    inet 192.168.233.128/24 brd 192.168.233.255 scope global noprefixroute dynamic ens33
       valid_lft 1489sec preferred_lft 1489sec
    inet6 fe80::688c:96f9:12d5:9e99/64 scope link noprefixroute
       valid_lft forever preferred_lft forever
[root@localhost bin]#
主机测试
C:Usersext.caiyuanqing>ping 192.168.233.128

正在 Ping 192.168.233.128 具有 32 字节的数据:
来自 192.168.233.128 的回复: 字节=32 时间<1ms TTL=64
来自 192.168.233.128 的回复: 字节=32 时间<1ms TTL=64
来自 192.168.233.128 的回复: 字节=32 时间<1ms TTL=64
来自 192.168.233.128 的回复: 字节=32 时间<1ms TTL=64

192.168.233.128 的 Ping 统计信息:
    数据包: 已发送 = 4,已接收 = 4,丢失 = 0 (0% 丢失),
往返行程的估计时间(以毫秒为单位):
    最短 = 0ms,最长 = 0ms,平均 = 0ms

C:Usersext.caiyuanqing>
测试连接成功!
提供者注册服务到Zookeeper
新建8004工程
新建名为cloud-provider-payment8004的Maven工程
修改POM.xml
<?xml version="1.0" encoding="UTF-8"?>
<project xmlns="http://maven.apache.org/POM/4.0.0"
         xmlns:xsi="http://www.w3.org/2001/XMLSchema-instance"
         xsi:schemaLocation="http://maven.apache.org/POM/4.0.0 http://maven.apache.org/xsd/maven-4.0.0.xsd">
    <parent>
        <artifactId>com.dance.springcloud</artifactId>
        <groupId>com.dance</groupId>
        <version>1.0-SNAPSHOT</version>
    </parent>
    <modelVersion>4.0.0</modelVersion>

    <artifactId>cloud-provider-payment8004</artifactId>

    <properties>
        <maven.compiler.source>8</maven.compiler.source>
        <maven.compiler.target>8</maven.compiler.target>
    </properties>

    <dependencies>
        <!-- SpringBoot整合Web组件 -->
        <dependency>
            <groupId>org.springframework.boot</groupId>
            <artifactId>spring-boot-starter-web</artifactId>
        </dependency>
        <!-- dependent on common modules -->
        <dependency>
            <groupId>com.dance</groupId>
            <artifactId>cloud-api-commons</artifactId>
            <version>1.0-SNAPSHOT</version>
        </dependency>
        <!-- SpringBoot整合zookeeper客户端 -->
        <dependency>
            <groupId>org.springframework.cloud</groupId>
            <artifactId>spring-cloud-starter-zookeeper-discovery</artifactId>
            <!--先排除自带的zookeeper3.5.3 防止与3.4.9起冲突-->
            <exclusions>
                <exclusion>
                    <groupId>org.apache.zookeeper</groupId>
                    <artifactId>zookeeper</artifactId>
                </exclusion>
            </exclusions>
        </dependency>
        <!--添加zookeeper3.4.9版本-->
        <dependency>
            <groupId>org.apache.zookeeper</groupId>
            <artifactId>zookeeper</artifactId>
            <version>3.5.9</version>
        </dependency>
        <dependency>
            <groupId>org.springframework.boot</groupId>
            <artifactId>spring-boot-devtools</artifactId>
            <scope>runtime</scope>
            <optional>true</optional>
        </dependency>
        <dependency>
            <groupId>org.projectlombok</groupId>
            <artifactId>lombok</artifactId>
            <optional>true</optional>
        </dependency>
        <dependency>
            <groupId>org.springframework.boot</groupId>
            <artifactId>spring-boot-starter-test</artifactId>
            <scope>test</scope>
        </dependency>
    </dependencies>

</project>
新建yml配置
#8004表示注册到zookeeper服务器的支付服务提供者端口号
server:
  port: 8004

#服务别名----注册zookeeper到注册中心名称
spring:
  application:
    name: cloud-provider-payment
  cloud:
    zookeeper:
      # 采用自己搭建的Centos的地址 也就是上面搭建的
      connect-string: 192.168.233.128:2181 # 192.168.111.144:2181 #
新建主启动类
package com.dance.springcloud;

import org.springframework.boot.SpringApplication;
import org.springframework.boot.autoconfigure.SpringBootApplication;
import org.springframework.cloud.client.discovery.EnableDiscoveryClient;

@SpringBootApplication
@EnableDiscoveryClient//该注解用于向使用consul或者zookeeper作为注册中心时注册服务
public class PaymentMain8004 {

    public static void main(String[] args) {
        SpringApplication.run(PaymentMain8004.class, args);
    }

}
新建Controller
package com.dance.springcloud.controller;

import lombok.extern.slf4j.Slf4j;
import org.springframework.beans.factory.annotation.Value;
import org.springframework.web.bind.annotation.RequestMapping;
import org.springframework.web.bind.annotation.RestController;

import java.util.UUID;

@RestController
@Slf4j
public class PaymentController {

    @Value("${server.port}")
    private String serverPort;

    @RequestMapping(value = "/payment/zk")
    public String paymentzk() {
        return "springcloud with zookeeper: " + serverPort + "	" + UUID.randomUUID().toString();
    }

}
测试
- 启动ZK-> ./zkServer.sh start
- 连接ZK -> ./zkCli.sh
- 启动8004项目
- 在ZK客户端查看
[zk: 127.0.0.1:2181(CONNECTED) 12] ls /
[services, zookeeper]
[zk: 127.0.0.1:2181(CONNECTED) 13] ls /services
[cloud-provider-payment]
[zk: 127.0.0.1:2181(CONNECTED) 14] ls /services/cloud-provider-payment
[9db4abc6-588a-4702-888b-94e6cfa16273]
[zk: 127.0.0.1:2181(CONNECTED) 15] ls /services/cloud-provider-payment/9db4abc6-588a-4702-888b-94e6cfa16273
[]
[zk: 127.0.0.1:2181(CONNECTED) 16] get /services/cloud-provider-payment/9db4abc6-588a-4702-888b-94e6cfa16273
{"name":"cloud-provider-payment","id":"9db4abc6-588a-4702-888b-94e6cfa16273","address":"ZB-PF2P9QVH.360buyAD.local","port":8004,"sslPort":null,"payload":{"@class":"org.springframework.cloud.zookeeper.discovery.ZookeeperInstance","id":"application-1","name":"cloud-provider-payment","metadata":{}},"registrationTimeUTC":1629578746692,"serviceType":"DYNAMIC","uriSpec":{"parts":[{"value":"scheme","variable":true},{"value":"://","variable":false},{"value":"address","variable":true},{"value":":","variable":false},{"value":"port","variable":true}]}}
[zk: 127.0.0.1:2181(CONNECTED) 17]
浏览器测试
http://localhost:8004/payment/zk

测试成功!
服务节点是临时节点还是持久节点
ZooKeeper的服务节点是临时节点,没有Eureka的自我保护机制,在服务停止后,只要超过心跳时间就会移除服务
测试
- 停止服务
- ZK客户端查看
[zk: localhost:2181(CONNECTED) 30] ls /services
[cloud-provider-payment]
[zk: localhost:2181(CONNECTED) 31] ls /services
[cloud-provider-payment]
[zk: localhost:2181(CONNECTED) 32] ls /services
[]
[zk: localhost:2181(CONNECTED) 33]
50秒的超时时间,超时后就会移除
消费者注册服务到Zookeeper
新建80工程
新建cloud-consumerzk-order80工程
修改POM.xml
<?xml version="1.0" encoding="UTF-8"?>
<project xmlns="http://maven.apache.org/POM/4.0.0"
         xmlns:xsi="http://www.w3.org/2001/XMLSchema-instance"
         xsi:schemaLocation="http://maven.apache.org/POM/4.0.0 http://maven.apache.org/xsd/maven-4.0.0.xsd">
    <parent>
        <artifactId>com.dance.springcloud</artifactId>
        <groupId>com.dance</groupId>
        <version>1.0-SNAPSHOT</version>
    </parent>
    <modelVersion>4.0.0</modelVersion>

    <artifactId>cloud-consumerzk-order80</artifactId>

    <properties>
        <maven.compiler.source>8</maven.compiler.source>
        <maven.compiler.target>8</maven.compiler.target>
    </properties>

    <dependencies>
        <!-- SpringBoot整合Web组件 -->
        <dependency>
            <groupId>org.springframework.boot</groupId>
            <artifactId>spring-boot-starter-web</artifactId>
        </dependency>
        <!-- dependent on common modules -->
        <dependency>
            <groupId>com.dance</groupId>
            <artifactId>cloud-api-commons</artifactId>
            <version>1.0-SNAPSHOT</version>
        </dependency>
        <!-- SpringBoot整合zookeeper客户端 -->
        <dependency>
            <groupId>org.springframework.cloud</groupId>
            <artifactId>spring-cloud-starter-zookeeper-discovery</artifactId>
            <!--先排除自带的zookeeper3.5.3 防止与3.5.9起冲突-->
            <exclusions>
                <exclusion>
                    <groupId>org.apache.zookeeper</groupId>
                    <artifactId>zookeeper</artifactId>
                </exclusion>
            </exclusions>
        </dependency>
        <!--添加zookeeper3.5.9版本-->
        <dependency>
            <groupId>org.apache.zookeeper</groupId>
            <artifactId>zookeeper</artifactId>
            <version>3.5.9</version>
        </dependency>
        <dependency>
            <groupId>org.springframework.boot</groupId>
            <artifactId>spring-boot-devtools</artifactId>
            <scope>runtime</scope>
            <optional>true</optional>
        </dependency>
        <dependency>
            <groupId>org.projectlombok</groupId>
            <artifactId>lombok</artifactId>
            <optional>true</optional>
        </dependency>
        <dependency>
            <groupId>org.springframework.boot</groupId>
            <artifactId>spring-boot-starter-test</artifactId>
            <scope>test</scope>
        </dependency>
    </dependencies>

</project>
新建yml配置
server:
  port: 80

#服务别名----注册zookeeper到注册中心名称
spring:
  application:
    name: cloud-consumer-order
  cloud:
    zookeeper:
      # 自己搭建的CentOs的地址# 192.168.111.144:2181 #
      connect-string: 192.168.233.128:2181
新建主启动类
package com.dance.springcloud;

import org.springframework.boot.SpringApplication;
import org.springframework.boot.autoconfigure.SpringBootApplication;
import org.springframework.cloud.client.discovery.EnableDiscoveryClient;

@SpringBootApplication
@EnableDiscoveryClient
public class OrderZKMain80 {

    public static void main(String[] args) {
        SpringApplication.run(OrderZKMain80.class, args);
    }

}
新建配置类
package com.dance.springcloud.config;

import org.springframework.cloud.client.loadbalancer.LoadBalanced;
import org.springframework.context.annotation.Bean;
import org.springframework.context.annotation.Configuration;
import org.springframework.web.client.RestTemplate;

@Configuration
public class ApplicationContextConfig {

    @Bean
    @LoadBalanced
    public RestTemplate getRestTemplate() {
        return new RestTemplate();
    }

}
新建Controller
package com.dance.springcloud.controller;

import lombok.extern.slf4j.Slf4j;
import org.springframework.web.bind.annotation.GetMapping;
import org.springframework.web.bind.annotation.RestController;
import org.springframework.web.client.RestTemplate;
import javax.annotation.Resource;

@RestController
@Slf4j
public class OrderZKController {

    public static final String INVOKE_URL = "http://cloud-provider-payment";

    @Resource
    private RestTemplate restTemplate;

    @GetMapping(value = "/consumer/payment/zk")
    public String paymentInfo() {
        return restTemplate.getForObject(INVOKE_URL + "/payment/zk", String.class);
    }

}
测试
- 启动ZK服务器 -> ./zkServer.sh start
- 连接ZK服务器 -> ./zkCli.sh
- 启动提供者和消费者服务
- 客户端测试
[zk: 127.0.0.1:2181(CONNECTED) 66] ls /
[services, zookeeper]
[zk: 127.0.0.1:2181(CONNECTED) 67] ls /services
[cloud-consumer-order, cloud-provider-payment]
[zk: 127.0.0.1:2181(CONNECTED) 68]
浏览器测试
http://localhost/consumer/payment/zk
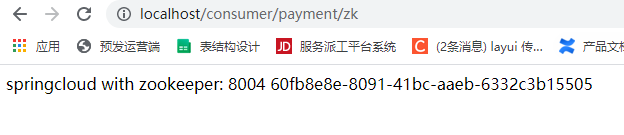
测试成功!
zookeeper完成了,一般市面上用这个的并不多,一般银行用的还可以,至于集群配置和Eureka差不多,也是多个地址用逗号分割,至于Zookeeper的集群搭建,等到学Zookeeper的时候再写吧~完结撒花
作者:彼岸舞
时间:2021�822
内容关于:Spring Cloud H版
本文属于作者原创,未经允许,禁止转发