SpringBoot之SpringBoot整合Thymeleaf模板引擎
添加Thymeleaf场景启动器
<dependency>
    <groupId>org.springframework.boot</groupId>
    <artifactId>spring-boot-starter-thymeleaf</artifactId>
</dependency>
编写控制器代码
如果之前有引入过别的模板引擎,可以先注释掉,防止出现冲突什么的一些不明错误
新增一个Thymeleaf的控制器
ThymeleafIndexController.java
package com.springboot.demo.controller;

import com.springboot.demo.model.Flower;
import org.springframework.beans.factory.annotation.Autowired;
import org.springframework.stereotype.Controller;
import org.springframework.web.bind.annotation.RequestMapping;

import java.util.Map;

/**
 * @author ZYGisComputer
 */
@Controller
public class ThymeleafIndexController {

    @Autowired
    private Flower flower;

    @RequestMapping("/thymeleaf")
    public String thymeleafIndex(Map<String,Object> result){
        result.put("flower",flower);
        return "thymeleaf";
    }

}
注意:不明白Flower的可以看一下《SpringBoot之读取配置文件中自定义的值》,这次放入一个对象进去
编写模板
为了防止向上次整合FreeMarker翻车,这次配置一下Thymeleaf的一些信息
在application.yml中配置Thymeleaf的配置
spring:
  thymeleaf:
    #prefix:指定模板所在的目录
    prefix: classpath:/templates/
    #check-tempate-location: 检查模板路径是否存在
    check-template-location: true
    #cache: 是否缓存,开发模式下设置为false,避免改了模板还要重启服务器,线上设置为true,可以提高性能。
    cache: false
    #suffix 配置模板后缀名
    suffix: .html
    encoding: UTF-8
    mode: HTML5
这次直接指定为.html不再翻车
在templates文件夹下创建thymeleaf.html文件
<!DOCTYPE html>
<html lang="en" xmlns:th="http://www.thymeleaf.org">
<head>
    <meta charset="UTF-8">
    <title>Title</title>
</head>
<body>
    姓名:<span th:text="${flower.getName()}"></span>
    年龄:<span th:text="${flower.getAge()}"></span>
</body>
</html>
注意:其中在 html标签上增加了 命名空间 xmlns:th="http://www.thymeleaf.org" 然后在下面就能写Thymeleaf的语法了
启动项目访问一下:
希望不翻车..
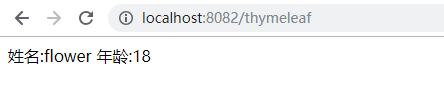
一举成功..舒服
作者:彼岸舞
时间:2021�121
内容关于:SpringBoot
本文来源于网络,只做技术分享,一概不负任何责任