(1)虚拟主机
(2)部署
部署完成后刷新页面会看到笑脸,在Home分组下控制器Application/Home/Controller/IndexController.class.php下定义显示
(3)前后台创建Admin后台分组文件,方便分组Admin和Home
(4)处理后台登录页面
创建控制器IndexController.class.php,加载模板
<?php
namespace AdminController;
use ThinkController;
class IndexController extends Controller {
    public function index(){
        $this->display();
    }
}
接下来处理模板相关
(5)模板引入Admin/View/Index/index.html
(6)数据库blog、数据表
文章数据表:
create table blog_article(
    id mediumint not null auto_increment comment'文章id',
    title varchar(60) not null comment'文章标题',
    des varchar(255) not null comment'文章描述',
    pic varchar(100) not null comment'文章缩略图',
    content text not null comment'文章内容',
    cateid mediumint not null comment'文章所属栏目id',
    time int(12) not null comment'文章发布时间',
    primary key(id)
)engine=myisam default charset=utf8;
栏目数据表:
create table blog_cate(
    id mediumint not null auto_increment comment'栏目id',
    catename varchar(60) not null comment'栏目名称',
    primary key(id)
)engine=myisam default charset=utf8;
管理员数据表:
create table blog_admin(
    id mediumint not null auto_increment comment'管理员id',
    username varchar(60) not null comment'管理员用户名',
    password char(32) not null comment'管理员密码',
    primary key(id)
)engine=myisam default charset=utf8;
友情链接数据表:
create table blog_link(
    id mediumint not null auto_increment comment'友情链接id',
    title varchar(60) not null comment'友情链接名',
    url varchar(100) not null comment'链接地址',
    des varchar(255) not null comment'链接描述',
    primary key(id)
)engine=myisam default charset=utf8;
(7)文章分类控制器
<?php
    namespace AdminController;
    use ThinkController;
    class CateController extends Controller{
        public function lst(){
            //列表
            $this->display();
        }
        public function add(){
            $this->display();
        }
        public function edit(){
            $this->display();
        }
        public function del(){

        }
    }
?>
(8)增加对应模板
(9)模板分离
View下创建Public文件夹,存放head.html、side.html、foot.html
<include file="Public/side" />
【二】
(1)栏目添加
控制器编写添加方法
public function add(){
            if(IS_POST){
                //处理提交
                $data = I('post.');
                $model = M('cate');
                if($model->add($data)){
                    $this->success('添加成功',U('lst'),3);
                }else{
                    $this->error('添加失败');
                }
            }else{
                $this->display();
            }
        }
此时刷新会报错
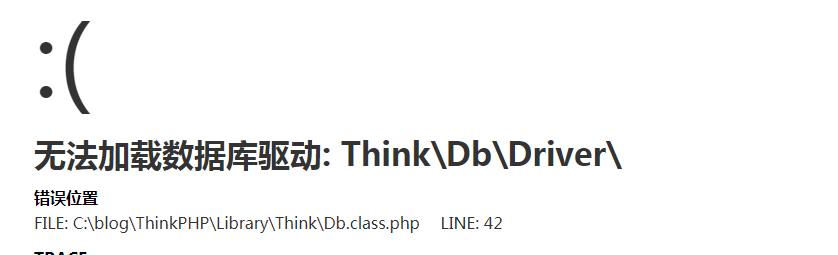
此时需要去应用级别配置文件Application/Common/Conf/config.php配置数据库
<?php
return array(
    //'配置项'=>'配置值'
    /* 数据库设置 */
    'DB_TYPE'               =>  'mysql',     // 数据库类型,除此外还有可能用到access,oracle,sqlite,db2
    'DB_HOST'               =>  'localhost', // 服务器地址,若是远程服务器,则填写远程IP
    'DB_NAME'               =>  'blog',          // 数据库名
    'DB_USER'               =>  'root',      // 用户名
    'DB_PWD'                =>  'root',          // 密码
    'DB_PORT'               =>  '3306',        // 端口
    'DB_PREFIX'             =>  'blog_',    // 数据库表前缀,设置时必须加下划线
    'DB_CHARSET'            =>  'utf8',     //字符集编码
    // 'DB_DEBUG'                =>  'true',     //数据库调试模式,开启后可以记录50条SQL日志
    //显示跟踪信息
    'SHOW_PAGE_TRACE'       =>   true,//默认为false关闭
);
(2)栏目后端验证
创建模型CateModel.class.php,添加后端验证
参考手册:http://document.thinkphp.cn/manual_3_2.html#auto_validate

代码:
<?php
    namespace AdminModel;
    use ThinkModel;
    class CateModel extends Model{
        protected $_validate = array(
             array('catename','require','不能为空',1,'regesx',3), //默认情况下用正则进行验证
             array('catename','','该名称已经存在!',0,'unique',3), // 在新增的时候验证name字段是否唯一
          );
    }
?>
对应修改控制器CateController.class.php代码:
public function add(){
            if(IS_POST){
                //处理提交
                $data = I('post.');
                $cate = D('cate');
                if ($cate->create($data)) {
                    if($cate->add()){
                        $this->success('添加成功',U('lst'),3);
                    }else{
                        $this->error('添加失败');
                    }
                }else{
                    $this->error($cate->getError());
                }
            }else{
                $this->display();
            }
        }
(3)栏目显示及排序
数据表新增排序字段,默认为10
alter table blog_cate modify sort mediumint default '10';
修改模板文件,让排序对应上id
<input class="common-input sort-input" name="{$vol.id}" value={$vol.sort} type="text">
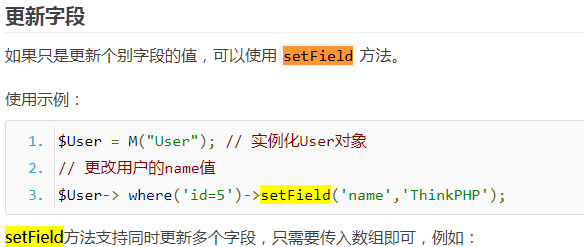
控制器编写排序方法
//分类排序
        public function sort(){
            $cate = D('cate');
            foreach ($_POST as $id => $sort) {
                $cate->where(array('id'=>$id))->setField('sort',$sort); //setField系统函数排序字段,id对应sort
            }
            $this->success('排序成功',U('lst'),3);
        }
(4)栏目的删除
删除操作一般需要二次确认,简单写法
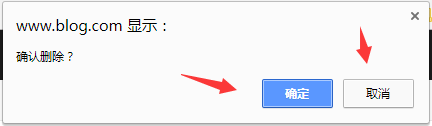
<a class="link-del" href="__CONTROLLER__/del/id/{vol.id}" onclick="return confirm('确认删除?');">删除</a>
点击删除后会弹出浏览器自带的确认框,然后点击确认便会跳到href对应的方法中去
注意:一定要传参id
(5)栏目修改
//修改栏目
        public function edit(){
            $cate = D('cate');
            $cater = $cate->find(I('id'));
            $this->assign('cater',$cater);
            if(IS_POST){
                //处理提交
                $data['id'] = I('id');
                $data['catename'] = I('catename');
                // 【注意一:传id和catename,不然对应不到数据,会提示修改失败】
                //后端验证
                if ($cate->create($data)) {
                    $result = $cate->save();
                    //【注意二:保存更新时,判断条件里不能直接写保存过程,无法执行判断一起做】
                    //所以要先执行保存,后判断
                    if($result){
                        $this->success('修改成功',U('lst'),3);
                    }else{
                        $this->error('修改失败');
                    }
                }else{
                    $this->error($cate->getError());
                }
                return;
            }
            $this->display();
        }
注意:1. 一定加隐藏域,且更新前需要将id和修改字段一起传入,否则会提示修改失败;
(6)制作链接
(7)添加分页
(8)链接的删除和修改
【三】
(1)引入文章编辑器