websocket的即时通信非常的强大,这里我用node启动了一个服务进行websocket链接,然后再vue的view里面进行了链接,进行通信,废话不多说,直接上代码吧,
首先,我需要用到node的nodejs-websocket模块
使用yarn进行安装
|
1
|
yarn add nodejs-websocket --save |
当然,你也可以用npm进行安装
|
1
|
npm i nodejs-websocket --save |
安装完毕之后,我们开始写服务端的代码,首先,我用node在本地起了一个node服务器用来开启websocket服务
sock.js:
|
1
2
3
4
5
6
7
8
9
10
11
12
13
14
15
|
let ws = require("nodejs-websocket");console.log("开始建立链接");ws.createServer(function (conn) { conn.on("text", function (str) { console.log("收到的信息为", str); conn.send(`${str}(机器人`) }); conn.on("close", function (code, reason) { console.log("关闭连接") }); conn.on("error", function (code, reason) { console.log("异常关闭") })}).listen(8001);console.log("链接建立完毕"); |
服务端主要是用nodejs-websocket用来开启服务,以及返回前端需要的值,这里我只是做了一个简单的处理,在接受值得后面加了一个‘机器人’的string,
然后,我们需要开启这个node服务,

命令后面的路径一定要找对,我是把sock.js放在了根目录的socket文件夹下面
执行
|
1
|
yarn socket |
最后,看我们的客户端,客户端我是想有一个输入框,然后有个聊天框:
|
1
2
3
4
5
6
7
8
9
10
11
12
13
14
15
16
17
18
19
20
21
22
23
24
25
26
27
28
29
30
31
32
33
34
35
36
37
38
39
40
41
42
43
44
45
46
47
48
49
50
51
52
53
54
55
56
57
58
59
60
61
62
63
64
65
66
67
68
69
70
71
72
73
74
75
76
77
78
79
80
81
82
83
84
85
86
87
88
89
90
91
92
93
94
95
96
97
98
99
100
101
102
103
104
105
106
107
108
109
110
111
112
113
114
|
<template> <div class="test3"> <div class="msg" ref="box"> <div v-for="item in list" :class="[item.type,'msg-item']"> <p> {{item.content}} </p> </div> </div> <div class="input-group"> <input type="text" v-model="contentText"> <button @click="sendText">发送</button> </div> </div></template><script> export default { name: "index3", data() { return { list: [],//聊天记录的数组 contentText: "",//input输入的值 } }, methods: { //发送聊天信息 sendText() { let that = this; this.list = [...this.list, {type: "mine", content: this.contentText}];//通过type字段进行区分是自己(mine)发的还是系统(robot)返回的 this.backText(function () { that.contentText = "";//加回调在得到返回数据的时候清除输入框的内容 }); }, backText(callback) { let that = this; if (window.WebSocket) { let ws = new WebSocket("ws://192.168.11.169:8001"); ws.onopen = function (e) { console.log("链接服务器成功"); console.log("that.contentText is", that.contentText); ws.send(that.contentText); callback(); }; ws.onclose = function (e) { console.log("服务器关闭") }; ws.onerror = function () { console.log("服务器出错") }; ws.onmessage = function (e) { that.list = [...that.list, {type: "robot", content: e.data}] } } } }, watch: { //监听list,当有修改的时候进行div的屏幕滚动,确保能看到最新的聊天 list: function () { let that = this; setTimeout(() => { that.$refs.box.scrollTop = that.$refs.box.scrollHeight; }, 0); //加setTimeout的原因:由于vue采用虚拟dom,我每次生成新的消息时获取到的div的scrollHeight的值是生成新消息之前的值,所以造成每次都是最新的那条消息被隐藏掉了 } }, mounted() { } };</script><style scoped lang="scss"> .test3 { text-align: center; } .msg { 100px; height: 100px; overflow: auto; padding-top: 5px; border: 1px solid red; display: inline-block; margin-bottom: 6px; .msg-item { position: relative; overflow: hidden; p { display: inline-block; border-radius: 40px; background: #3C3D5A; color: white; float: left; padding: 2px 12px; margin: 0 0 2px 0; max- 70%; text-align: left; box-sizing: border-box; } &.mine { p { float: right; background: aquamarine; color: white; } } } }</style> |
看一下最终效果:
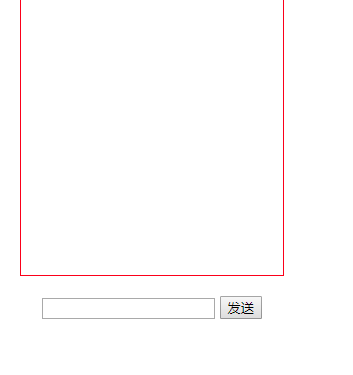

.