一、创建项目并导入依赖
<dependency>
<groupId>org.springframework.boot</groupId>
<artifactId>spring-boot-starter-activemq</artifactId>
</dependency>
<dependency>
<groupId>org.springframework.boot</groupId>
<artifactId>spring-boot-starter-web</artifactId>
</dependency>
二、相关配置和代码
2.1)application.properties
spring.activemq.broker-url=tcp://192.168.21.136:61616
#发消息的时候可以是字符串也可以是对象,如果是对象就需要设置为true
spring.activemq.packages.trust-all=true
spring.activemq.user=admin
spring.activemq.password=admin
2.2)创建ActiveMQConfig配置
@Component
public class ActiveMQConfig{
@Bean
Queuequeue(){
//消息服务的名字|方便根据名字接受
return new ActiveMQQueue("hello.fernfei");
}
}
2.3)创建JmsComponet用于收发消息
注:我这里为了方便收发写在一起,真实业务收发各一个项目
@Component
public class JmsComponent{
@Autowired
JmsMessagingTemplate jmsMessagingTemplate;//SpringBoot提供的操作activemq模板
@Autowired
Queuequeue;
public void send(Message msg){
//第一个参数是目标,第二个是信息
jmsMessagingTemplate.convertAndSend(queue,msg);
}
//根据这个目标去监听
@JmsListener(destination="hello.fernfei")
public void receive(Messagemsg){
System.out.println(msg);
}
}
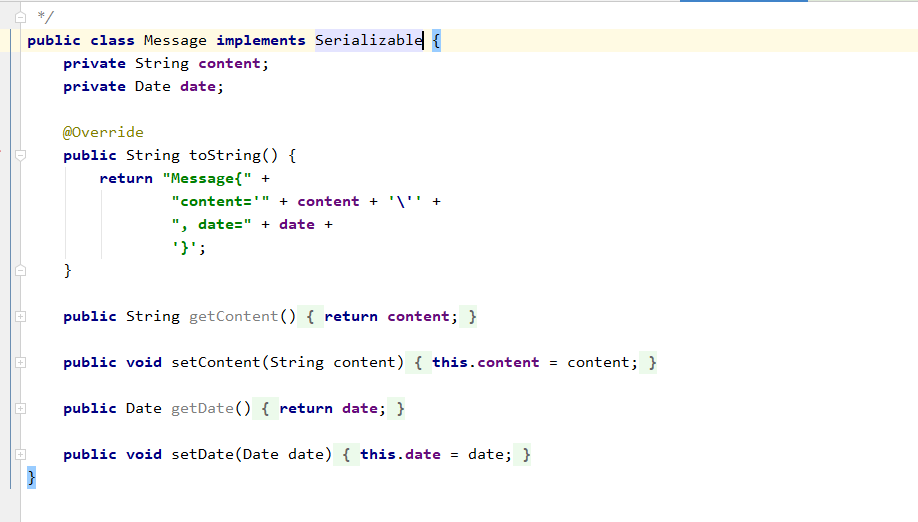
2.4)bean Message存储信息的类
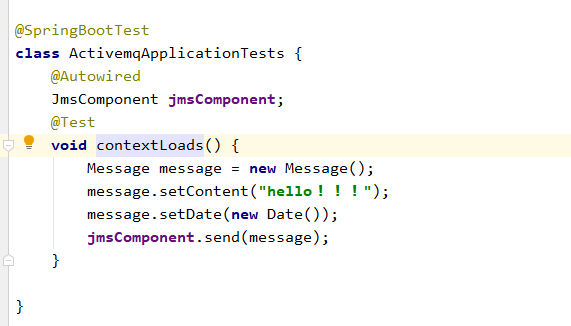
2.5)测试