布局和事件
1、布局
首先看下下面的图片:
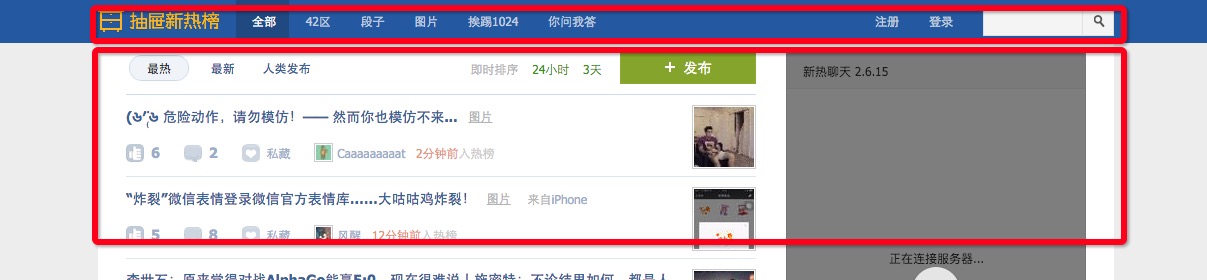
上面的内容都是居中的,怎么实现这个效果呢,第一种方法是通过float的方式,第二种是通过“div居中的方式”
第一种方式不在复述了,直接看第二种方式:
1、首先根据上面的图片我们可以把整个页面分为,“上”、“下”两部分
2、然后在在上下两部分中设置div并让他居中
3、居中的div不需要给他设置高度可以让内容给他吧高度顶起来
代码如下:
<!DOCTYPE html>
<html lang="en">
<head>
    <meta charset="UTF-8">
    <title>shuaige</title>
    <style>
        .heander{
            height: 48px;
            background-color:red;
        }
        .body{
            background-color: blue;
        }

    </style>

</head>
<body>
    <!--定义上部分-->
    <div class="heander">
                    <!--margin:0 auto 1000px 这里我们设置一个宽度并居中,他的对象是自己的父标签的区中位置-->
        <div style="margin:0 auto; 1000px;background-color:green;">heander</div>
    </div>

    <!--定义下部分-->
    <div class="body">
        <div style="margin:0 auto; 1000px;background-color:green">body</div>
    </div>
</body>
</html>
效果图如下:

从上面可以看出在我们定义的div内内容总是居中显示的!
2、关闭Bootstrap模态对话框
bootstrap官方文档里有给我们提供了很多的功能,比如模态对话框,我们不需要去看他的源码当然有空余的时间的也可以看下。
在官方文档中很多功能都给我们提供了方法了,我们就看他的方法即可。如下图:
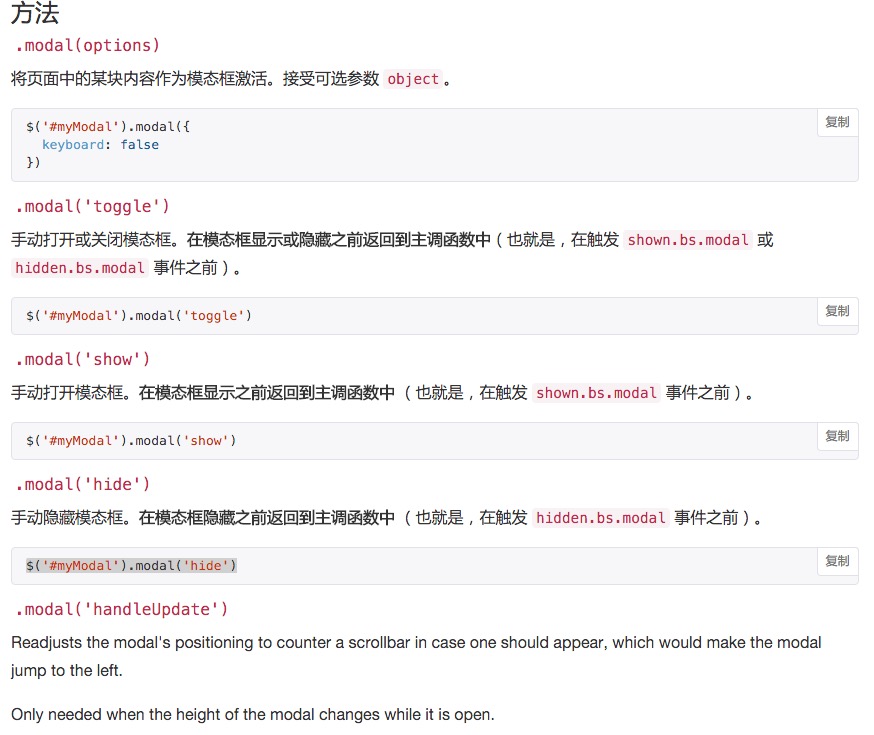
通过官方文档,里的方法操作即可,首先我们看一个例子:
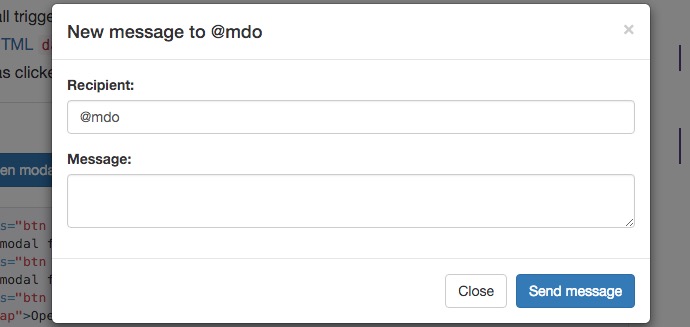
我想关闭这个模态对话框!看上面有一个方法:
$('#myModal').modal('hide')
然后我们找到这个模态对话框的ID,然后在console执行命令即可隐藏,我们在使用的时候直接绑定事件即可:

3、A标签其他属性
3.1、在给连接和跳转的标签时候,当鼠标移动上去之后要显示小手,这个很简单就是通过:cursor:pointer;来实现的这个在css博客中就有
3.2、还有就是A标签上,当你鼠标放上去,有个下划线怎么取消他呢? 同样:text-decoration:none;来实现即可
4、z-index值
简单标注:合理的使用z-index值,来设计整个页面的合理的层级。
5、圆角
首先我们定义了一个div,默认他是方形的,不是圆形的,看下面的代码:
  <!--这里radius:半径,相当于给div设置边框的圆润程度-->
    <div style=" 50px;height: 50px;background-color:blue;border-radius:50%">

    </div>
伪类和伪元素
先看下面的效果:
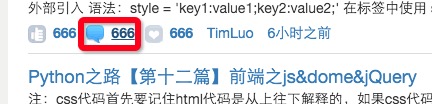
当我鼠标移动到这个图标上之后变更颜色(我使用的是图片,“从窗户看东西,移动窗户看到不同的景色”),我的做法是通过js来做代码如下:
$('.change_style1').hover(function () {
    //滑进去的操作
    $(this).children('div').css("background-position","0px -18px");
},function () {
    //划出后的操作
    $(this).children('div').css("background-position","0px -38px");
});

//信息操作
$('.change_style2').hover(function () {
    //滑进去的操作
    $(this).children('div').css("background-position","0px -78px");
},function () {
    //划出后的操作
    $(this).children('div').css("background-position","0px -58px");
});

//收藏操作
$('.change_style3').hover(function () {
    //滑进去的操作
    $(this).children('div').css("background-position","0px -138px");
},function () {
    //划出后的操作
    $(this).children('div').css("background-position","0px -158px");
});
上面的方式实现就挺好的,CSS也可以完成类似的操作。
CSS实现
看下面的效果图和代码:

代码:
<!DOCTYPE html>
<html lang="en">
<head>
    <meta charset="UTF-8">
    <title>shuaige</title>
    <style>
        .heander{
            height: 48px;
            background-color:red;
        }

        .heander a {
            cursor:pointer;
            padding: 10px;;
        }
    </style>

</head>
<body>
    <div class="heander">
        <div style="background-color: red; 1000px;margin:0 auto">
            <div style="padding-top: 15px">
                <a>菜单一</a>
                <a>菜单二</a>
                <a>菜单三</a>
                <a>菜单四</a>
                <a>菜单五</a>
                <a>菜单六</a>
            </div>

        </div>
    </div>
</body>
</html>
那怎么实现呢?
代码如下:
    /*给a标签架一个hover,当手表移动上去之后就会修改*/
        .heander a:hover{
            background-color:blue;
        }
效果如下:

这里需要注意,并不是仅仅A标签生效,是所有的标签都可以使用。
伪类和为元素解释:
cSS伪类 用于向某些选择器添加特殊的效果。CSS伪元素 用于将特殊的效果添加到某些选择器。
可以明确两点,第一两者都与选择器相关,第二就是添加一些“特殊”的效果。这里特殊指的是两者描述了其他 css 无法描述的东西。
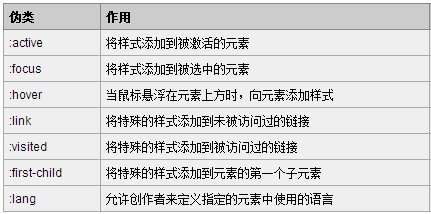
伪类种类
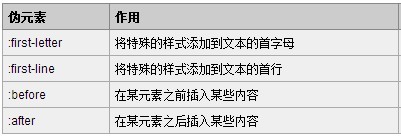
伪元素种类
在伪类中我们最常用的就是::hover
在伪元素中我们最常用的是::before & :after
在看伪元素的:before & :after的时候,我们先回顾下:float
看下面的代码:
<body>
    <div style="background-color:red">
        <div style="float:left"> 123 </div>
        <div style="float: left;"> 456 </div>
    </div>
</body>
我们都给他float起来,那么他的背景颜色都没有了,为什么?
首先div是一个块级标签,如果div内没有内容的时候,他是没有背景颜色的。那我们的拿内容给他撑起来才有颜色。
那如果我们给内容为:123 & 456的标签float起来之后,他们就脱离文档了,就相当于,他们的父标签已经关不住这“俩儿子”了!
那怎么能让他管住呢?在这个父标签的最底部加一个:
<body>
    <div style="background-color:red">
        <div style="float:left"> 123 </div>
        <div style="float: left;"> 456 </div>
        <!--在最底部加一个标签,就可以管住了-->
        <div style="clear: both"></div>
    </div>
</body>
上面的这种方法可以解决float 管不住的问题,这种方法比较笨。
假如:CSS可以自动在标签内部追加一个样式。
这里就用到了CSS伪类::before & :after
首先看下面的代码:
<!DOCTYPE html>
<html lang="en">
<head>
    <meta charset="UTF-8">
    <title>shuaige</title>
    <style>
        .cl{
            background-color:red;
        }
    </style>

</head>
<body>
    <div class="cl">
        <div>alex</div>
        <div>wusir</div>
    </div>
</body>
</html>
效果一看就明白,不在贴图了
在看下面的代码:
<style>
        .cl{
            background-color:red;
        }
        /*使用after在后面新增了一个内容为teacher的*/
        .cl:after{
            content: 'teacher';
        }
    </style>
效果如下:
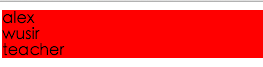
在使用了.cl 类的div底部增加了一个内容为teacher的东西,那么他加的是什么呢?
在其他网站的时候经常会看到这个::after具体他有什么用呢?咱们看下下面的场景!给他float起来,那么现在脱离了控制了,并且里面没有内容
<!DOCTYPE html>
<html lang="en">
<head>
    <meta charset="UTF-8">
    <title>shuaige</title>
    <style>
        .cl{
            background-color:red;
        }
    </style>

</head>
<body>
    <div class="cl">
        <div style="float:left;">alex</div>
        <div style="float:left;">wusir</div>
    </div>
</body>
</html>
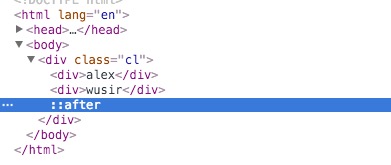
在看下面的代码:
<!DOCTYPE html>
<html lang="en">
<head>
    <meta charset="UTF-8">
    <title>shuaige</title>
    <style>
        .cl{
            background-color:red;
        }
        /*使用after在后面新增了一个内容为teacher的*/
        .cl:after{
            /*我们给他一个内容,但是我们给他隐藏看不到,把div撑起来看下*/
            content: ".";
            visibility: hidden;
        }
    </style>

</head>
<body>
    <div class="cl">
        <div style="float:left;">alex</div>
        <div style="float:left;">wusir</div>
    </div>
</body>
</html>
float第二种方法,问题解决:
总结:
我们平时经常使用float,肯定会导致背景丢失,那么我们可以使用:after来定义一个公共的模块当我们使用float的时候就可以调用它!
例子(非常重要,以后布局经常用到float的时候,我们肯定用的到他):
.clearfix:after{
            /*我们给他一个内容,但是我们给他隐藏看不到,把div撑起来看下*/
            content: "."; /*定义一个内容*/
            visibility: hidden; /*内容不可见*/
            display: block; /*默认他是一个内联标签,我们给他改为块级标签*/
            clear:both; /*加上clear:both*/
            height: 0;/*我们给他定义高度为0*/

        }
当我们使用的时候,直接调用就行了,整体例子代码如下:
<!DOCTYPE html>
<html lang="en">
<head>
    <meta charset="UTF-8">
    <title>shuaige</title>
    <style>
        .cl{
            background-color:red;
        }
        /*使用after在后面新增了一个内容为teacher的*/
        .clearfix:after{
            /*我们给他一个内容,但是我们给他隐藏看不到,把div撑起来看下*/
            content: "."; /*定义一个内容*/
            visibility: hidden; /*内容不可见*/
            display: block; /*默认他是一个内联标签,我们给他改为块级标签*/
            clear:both; /*加上clear:both*/
            height: 0;/*我们给他定义高度为0*/

        }
    </style>

</head>
<body>
    <!--这里直接调用一下clearfix即可,娃哈哈~~-->
    <div class="cl clearfix">
        <div style="float:left;">alex<a>test</a></div>
        <div style="float:left;">wusir</div>
    </div>
</body>
</html>
注以后再写CSS代码的时候可以参考下面的方式:
公共的css样式放到:
common.css
比如login的css到:
account.css
名称可以自己定义,方便自己查看和其他人查看
返回顶部终极版
<!DOCTYPE html>
<html>
<head lang="en">
    <meta charset="UTF-8">
    <title>返回顶部</title>
    <style>
        .hide{
            display: none;
        }
        .icon{
            /*这里是一个图片通过挖墙来显示不同的图标*/
            background: url(images/index-bg_20160225.png) no-repeat;
            background-position: -40px -385px;
            width: 16px;
            height: 16px;
            display: inline-block;
            overflow: hidden;
        }

        .back{
            /*定义返回顶部的出现位置在右下角*/
            position: fixed;
            right: 80px;
            bottom: 100px;
            width: 50px;
        }
        .gotop{
            /*定义gotop的样式*/
            position: relative;
            width: 48px;
            height: 38px;
            border: 1px solid #ccd3e4;
            color: #fff;
            text-align: center;

        }
        .gotop .icon{
            margin-top: 10px;
        }

        .gotop:hover:after {
            top: 0;
            left: 0;
            width: 100%;
            height: 100%;
            content: " ";
            position: absolute;
            background-color: #3b5998;
        }

        .content {
            visibility: hidden;
            width: 30px;
            height: 32px;
            padding: 3px 10px;
            cursor: pointer;
            font-size: 12px;
            z-index: 1;
            text-align: center;
            line-height: 16px;
            top: 0;
            position: absolute;

        }

        .gotop:hover .content {
            visibility: visible;
        }
    </style>
</head>
<body>

<div style="height: 2000px;">

    页面内容
</div>

<div class="back hide">
    <div class="gotop" onclick="GoTop();">
        <a class="icon"></a>
        <div class="content">
            <span>返回顶部</span>
        </div>
    </div>
</div>


<script type="text/javascript" src="js/jquery-1.8.2.min.js"></script>
<script type="text/javascript">

    function GoTop(){
        //返回顶部
        $(window).scrollTop(0);
    }

    $(function(){

        $(window).scroll(function(){
            //当滚动滑轮时,执行函数体

            //获取当前滑轮滚动的高度
            var top = $(window).scrollTop();

            if(top>0){
                //展示“返回顶部”
                $('.back').removeClass('hide');
            }else{
                //隐藏“返回顶部”
                $('.back').addClass('hide');
            }
        });
    });

</script>

</body>
</html>
这里有几点需要注意:
.gotop:hover:after {
            top: 0;
            left: 0;
            width: 100%;
            height: 100%;
            content: " ";
            position: absolute;
            background-color: #3b5998;
        }

        .content {
            visibility: hidden;
            width: 30px;
            height: 32px;
            padding: 3px 10px;
            cursor: pointer;
            font-size: 12px;
            z-index: 1;
            text-align: center;
            line-height: 16px;
            top: 0;
            position: absolute;

        }

        .gotop:hover .content {
            visibility: visible;
        }
看上面的代码:
默认.content是隐藏的,当鼠标移动过去之后执行了:
.gotop:hover:after & .gotop:hover .content
气泡实现
<!DOCTYPE html>
<html lang="en">
<head>
    <meta charset="UTF-8">
    <title>shuaige</title>
    <style>

        .arrow{
            display: inline-block; /* 内联标签但是有块级标签的特性*/
            border-top:10px solid;
            border-right:10px solid;
            border-bottom: 10px solid;
            border-left:10px solid;


            /*把其他的颜色设置为透明色*/
            border-top-color:transparent;
            border-right-color:red;
            border-left-color:transparent;
            border-bottom-color:transparent;
        }
        /*使用after在后面新增了一个内容为teacher的*/
        .clearfix:after{
            /*我们给他一个内容,但是我们给他隐藏看不到,把div撑起来看下*/
            content: "."; /*定义一个内容*/
            visibility: hidden; /*内容不可见*/
            display: block; /*默认他是一个内联标签,我们给他改为块级标签*/
            clear:both; /*加上clear:both*/
            height: 0;/*我们给他定义高度为0*/

        }
    </style>

</head>
<body>
    <div class="arrow"></div>
</body>
</html>
效果如下:

实现代码:
<!DOCTYPE html>
<html lang="en">
<head>
    <meta charset="UTF-8">
    <title>shuaige</title>
    <style>

        .arrow{
            display: inline-block; /* 内联标签但是有块级标签的特性*/
            border-top:10px solid;
            border-right:10px solid;
            border-bottom: 10px solid;
            border-left:10px solid;


            /*把其他的颜色设置为透明色*/
            border-top-color:transparent;
            border-right-color:red;
            border-left-color:transparent;
            border-bottom-color:transparent;
            float: left;
            margin-top: 7px;
        }
        .content{
            background-color: red;
            width: 120px;
            height: 35px;
            float: left;
            border-radius:10px;
        }
        /*使用after在后面新增了一个内容为teacher的*/
        .clearfix:after{
            /*我们给他一个内容,但是我们给他隐藏看不到,把div撑起来看下*/
            content: "."; /*定义一个内容*/
            visibility: hidden; /*内容不可见*/
            display: block; /*默认他是一个内联标签,我们给他改为块级标签*/
            clear:both; /*加上clear:both*/
            height: 0;/*我们给他定义高度为0*/

        }
    </style>

</head>
<body>
    <div class="clearfix">
        <div class="arrow"></div>
        <div class="content"><div style="margin-top: 10px;margin-left: 5px;">Hello Shuaige</div></div>
    </div>

</body>
</html>
显示效果:
完美~
参考链接:
https://segmentfault.com/a/1190000000484493
本人骚师:http://www.cnblogs.com/wupeiqi/ http://www.cnblogs.com/alex3714/ 感恩~