MySQL基本操作
一、登录数据库
# mysql -u root -p -P 3306 -h localhost -S /data/3306/mysql.sock
选项: -u root #指定登录用户
-p 123456 #用密码登录,不建议在命令行打密码,如果非要这样用,记得#history –c 清除历史记录
-P 端口号 #在指定端口号登录
-h 主机名 #登录的主机
-S 套接字文件位置 #指定登录的套接字文件位置
下面操作的数据库为MySQL多实例
二、创建数据库用户
1、mysql> create user 'wdd'@'192.168.131.%' identified by '123456';

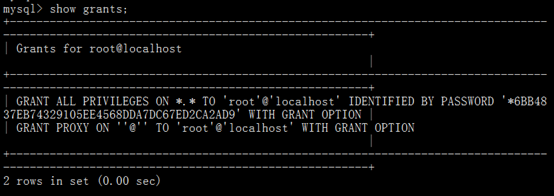
2、 mysql> show grants; #查看当前用户的授权
3、mysql> show grants for 'wdd'@'192.168.131.%';#查看指定用户的授权

三、修改用户密码
1、# mysqladmin -uwdd -p123456 -S /data/3306/mysql.sock password '123';

2、进入MySQL登录界面
# mysql -uwdd -p123 -S /data/3306/mysql.sock
mysql> set password=password('123456'); #修改自己的密码

mysql> set password for 'wdd'@'192.168.131.%' =password('123456');
#修改指定用户的登录密码

3、修改user表,必须得具有root权限
mysql> use mysql;
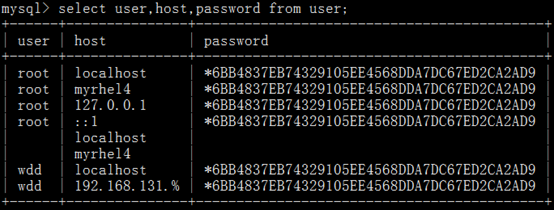
mysql> select user,host,password from user; #查看用户相关信息
mysql> update user set password=password('123') where host='localhost' and user='wdd';

四、查看数据库和数据表
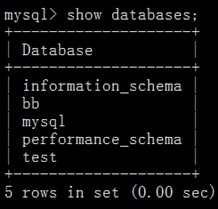
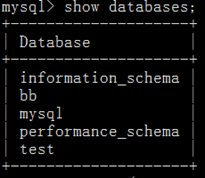
1、mysql> show databases;
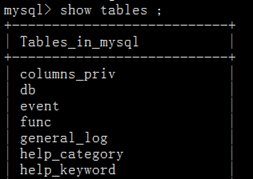
2、mysql> use mysql;
mysql> show tables ;
五、创建数据库
mysql> create database wdd;

六、创建数据表
create table 表名 (字段1 值,字段2 值 ……);
1、创建表books,设置序号、书名、作者、价格、发布日期、说明,第几集
mysql> use wdd;
mysql> create table books(
-> id int(10) unsigned not null auto_increment,
-> author char(20),
-> bookname char(50) not null,
-> price int(20) not null,
-> time year,
-> description char(100),
-> pagenum int(10),
-> primary key(id));
mysql> describe books;

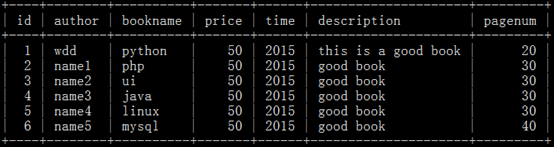
2、不指定字段名称,插入第一集的书籍。
mysql> insert into books values (1,"wdd","python",50,2015,"this is a good book",20);
3、同时插入多条数据(不指定集数,自动分配) auto_increment
mysql> insert into books (author,bookname,price,time,description,pagenum) values ('name1','php',50,2015,'good book',40)
mysql> insert into books (author,bookname,price,time,description,pagenum) values ('name2','ui',50,2015,'good book',30);
mysql> insert into books (author,bookname,price,time,description,pagenum) values ('name3','java',50,2015,'good book',30);
mysql> insert into books (author,bookname,price,time,description,pagenum) values ('name4','linux',50,2015,'good book',30);
mysql> insert into books (author,bookname,price,time,description,pagenum) values ('name5','mysql',50,2015,'good book',40);
mysql> select * from books;
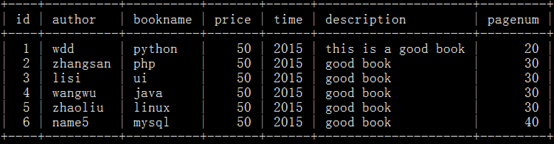
4、修改第2集到第5集的作者
mysql> update books set author='zhangsan' where id=2;
mysql> update books set author='lisi' where id=3;
mysql> update books set author='wangwu' where id=4;
mysql> update books set author='zhaoliu' where id=5;
mysql> select * from books;
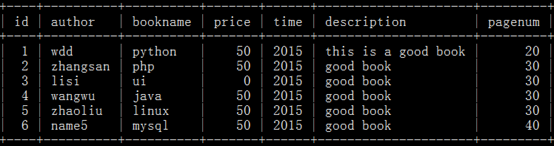
5、将第三集的价格改为0
mysql> update books set price=0 where id=3;
mysql> select * from books;
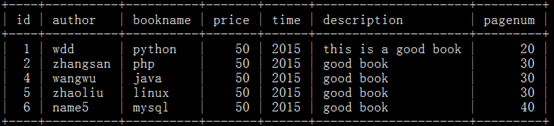
6、删除价格为0的书籍
mysql> delete from books where price=0;
mysql> select * from books;
七、删除数据表
mysql> drop table books;
八、删除数据库
drop table 表名;
mysql> drop database wdd;
mysql> show databases;
九、插入数据
insert into 表名 (字段1,字段2……) values (数据1,数据2……);
CREATE TABLE person(
id INT UNSIGNED NOT NULL AUTO_INCREMENT,
name CHAR(40) NOT NULL DEFAULT '',
age INT NOT NULL DEFAULT 0,
info CHAR(50) NULL,
PRIMARY KEY (id));
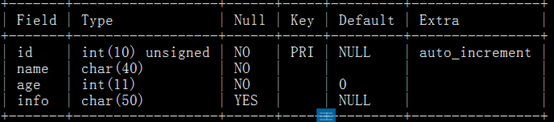
mysql> desc person;
- 在person表中,插入一条新记录,id值为3,name值为Green,age值为21
mysql> insert into person (id,name,age) values (3,'Green',21);
- 在person表中,插入一条新记录,id值为4,name值为Suse,age值为22,info值为dancer
mysql> insert into person (id,name,age,info) values (4,'Suse',22,'dancer');
- 在person表中,插入一条新记录,name值为Mary,age值为24
mysql> insert into person (name,age) values ('Mary',24);
- 在person表中,插入一条新记录,name值为Willam,age值为20,info值为sports man:
mysql> insert into person (name,age,info) values ('Willam',20,'sports man');
- 在person表中,插入一条新记录,name值为laura,age值为25
mysql> insert into person (name,age) values ('laura',25);
- 在person表中,不指定插入列表,同时插入2条新记录
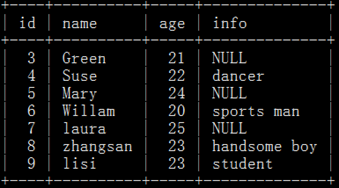
mysql> insert into person values (8,'zhangsan',23,'handsome boy'), (9,'lisi',23,'student');
- 在person表中,在name、age和info字段指定插入值,同时插入3条新记录
mysql> insert into person values (10,'jack',27,'teacher'),(11,'lusi',20,'boss'),(12,'zhaoliu',29,'super man');
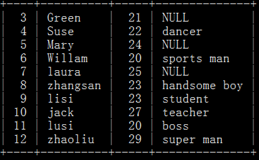
mysql> select * from person;
十、查看数据
select 字段 from 表名;
mysql> select name,age,info from person;

十一、修改数据
update 表名 set 字段1 where 字段2
- 在person表中,更新id值为10的记录,将age字段值改为15,将name字段值改为LiMing,
mysql> update person set name='LiMing'and age=15 where id=10;
- 在person表中,更新age值为10到12的记录,将info字段值都改为student
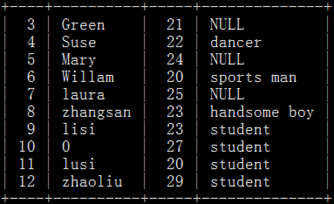
mysql> update person set info='student' where id=10 or id=11 or id=12;
mysql> select * from person;
十二、删除数据
delete from 表名 where 字段
- 在person表中,删除id等于10的记录
mysql> delete from person where id=10;
- 在person表中,使用DELETE语句同时删除多条记录,在前面UPDATE语句中将age字段值在11到12之间的记录的info字段值修改为student,在这里删除这些记录
mysql> delete from person where id=11 or id=12;
mysql> select * from person;
十三、修改字段
CREATE TABLE person(
id INT UNSIGNED NOT NULL AUTO_INCREMENT,
name CHAR(40) NOT NULL DEFAULT '',
age INT NOT NULL DEFAULT 0,
info CHAR(50) NULL,
PRIMARY KEY (id));
- 将数据表person改名为ps
mysql> alter table person rename ps;
- 将数据表ps中name字段的数据类型由CHAR(40)的修改成CHAR(50)
mysql> alter table ps modify name CHAR(50) NOT NULL DEFAULT '';
- 将数据表ps中的info字段名称改为information,数据类型保持不变
mysql> alter table ps change info infomation CHAR(50) NULL;
- 将数据表ps中的information字段名称改为info,同时将数据类型保持变为char(60)
mysql> alter table ps change infomation info CHAR(60) NULL;
- 数据表ps中添加一个字段time,输入SQL语句如下:
mysql> alter table ps add time year;
- 在数据表ps中添加一个字段nian。输入如下SQL语句:
mysql> alter table ps add nian year;
- 在数据表ps中name列后添加一个字段sex
mysql> alter table ps add sex char(10) after name;
- 删除数据表ps表中的nian字段
mysql> alter table ps drop nian;
- 将age字段插入到sex字段后
mysql> alter table ps modify age int(11) not null default 0 after sex;
注:如果希望插入的字段位于行首,可以用first,比如:
mysql> alter table ps modify age int(11) not null default 0 first;
十四、授权
grant 权限 on 数据库.数据表 to '用户'@'地址';
1使用GRANT语句创建一个新的用户zhangsan,密码为'grantpwd'。用户zhangsan对所有的数据有查询、插入权限。并授于GRANT权限
mysql> grant select,insert on *.* to 'zhangsan'@'192.168.131.%' identified by 'grantpwd';
mysql> show grants for 'zhangsan'@'192.168.131.%';

十五、取消权限
revoke 权限1,权限2 on 数据库.数据表 from '用户'@'地址';
1.取消zhangsan的create、drop、delete权限。
mysql> revoke create,drop,delete on *.* from 'zhangsan'@'192.168.131.%';
十六、查看权限
mysql> SHOW GRANTS FOR 'zhangsan'@'192.168.131.%';
