1.starter机制
SpringBoot中的starter是一种非常重要的机制,能够抛弃以前繁杂的配置,将其统一集成进starter,应用者只需要在maven中引入starter依赖,SpringBoot就能自动扫描到要加载的信息并启动相应的默认配置。starter让我们摆脱了各种依赖库的处理,需要配置各种信息的困扰。SpringBoot会自动通过classpath路径下的类发现需要的Bean,并注册进IOC容器。SpringBoot提供了针对日常企业应用研发各种场景的spring-boot-starter依赖模块。所有这些依赖模块都遵循着约定成俗的默认配置,并允许我们调整这些配置,即遵循“约定大于配置”的理念。
2.为什么要自定义starter
在我们的日常开发工作中,经常会有一些独立于业务之外的配置模块,比如对时间的处理,对字符串的处理。我们经常将其放到一个特定的包下,然后如果另一个工程需要复用这块功能的时候,需要将代码硬拷贝到另一个工程,重新集成一遍,麻烦至极。如果我们将这些可独立于业务代码之外的功配置模块封装成一个个starter,复用的时候只需要将其在pom中引用依赖即可,SpringBoot为我们完成自动装配,简直不要太爽。
3.自定义starter的案例
以下案例由笔者工作中遇到的部分场景
▲ 动态数据源。
▲ 登录模块。
▲ 基于AOP技术实现日志切面。
。。。。。。
4、自定义starter的命名规则
SpringBoot提供的starter以spring-boot-starter-xxx的方式命名的。官方建议自定义的starter使用xxx-spring-boot-starter命名规则。以区分SpringBoot生态提供的starter。
5.starter实现
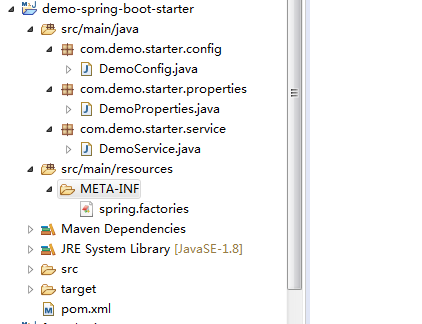
1).先看目录结构
2).pom.xml文件
 1 <project xmlns="http://maven.apache.org/POM/4.0.0" xmlns:xsi="http://www.w3.org/2001/XMLSchema-instance" xsi:schemaLocation="http://maven.apache.org/POM/4.0.0 http://maven.apache.org/xsd/maven-4.0.0.xsd">
 2   <modelVersion>4.0.0</modelVersion>
 3   <groupId>com.demo</groupId>
 4   <artifactId>demo-spring-boot-starter</artifactId>
 5   <version>0.0.1-SNAPSHOT</version>
 6   <name>demo-spring-boot-starter</name>
 7   <description>Demo project for Spring Boot</description>
 8
 9    <parent>
10         <groupId>org.springframework.boot</groupId>
11         <artifactId>spring-boot-starter-parent</artifactId>
12         <version>2.0.4.RELEASE</version>
13    </parent>
14
15    <properties>
16          <java.version>1.8</java.version>
17    </properties>
18
19    <dependencies>
20         <dependency>
21              <groupId>org.springframework.boot</groupId>
22              <artifactId>spring-boot-configuration-processor</artifactId>
23              <optional>true</optional>
24         </dependency>
25
26          <dependency>
27              <groupId>org.springframework.boot</groupId>
28              <artifactId>spring-boot-starter</artifactId>
29          </dependency>
30      </dependencies>
31 </project>
其中:spring默认使用yml中的配置,但有时候要用传统的xml或properties配置,就需要使用spring-boot-configuration-processor依赖了。
3).定义一个实体类映射配置信息
 1 @ConfigurationProperties(prefix = "demo")
 2 public class DemoProperties {
 3     private String sayWhat;
 4     private String toWho;
 5
 6     public String getSayWhat() {
 7         return sayWhat;
 8     }
 9
10     public void setSayWhat(String sayWhat) {
11         this.sayWhat = sayWhat;
12     }
13
14     public String getToWho() {
15         return toWho;
16     }
17
18     public void setToWho(String toWho) {
19         this.toWho = toWho;
20     }
21 }
4).定义一个服务service
 1 public class DemoService {
 2     public String sayWhat;
 3     public String toWho;
 4     public DemoService(String sayWhat, String toWho){
 5         this.sayWhat = sayWhat;
 6         this.toWho = toWho;
 7     }
 8     public String say(){
 9         return this.sayWhat + "!  " + toWho;
10     }
11
12     public String getString(String a) {
13         return a+"1234";
14     }
15 }
5).定义一个配置类
 1 @Configuration
 2 @EnableConfigurationProperties(DemoProperties.class)
 3 @ConditionalOnProperty(
 4         prefix = "demo",
 5         name = "isopen",
 6         havingValue = "true"
 7 )
 8 public class DemoConfig {
 9     @Autowired
10     private DemoProperties demoProperties;
11
12     @Bean(name = "demo")
13     public DemoService demoService(){
14         return new DemoService(demoProperties.getSayWhat(), demoProperties.getToWho());
15     }
16 }
这里,我们将DemoService类定义为一个Bean,交给Ioc容器。
@Configuration表示这是一个配置类
@EnableConfigurationProperties 确保SpringBoot支持@ConfigurationProperties注解的Bean对象。让springboot在初始化容器的时候,能够也将@ConfigurationProperties注解的Bean对象初始化到容器中。
当然了,也可以在上面 DemoProperties 类上面加上@Configuration注解或者@Component注解。
@ConditionalOnProperty 注解控制 @Configuration 是否生效。简单来说也就是我们可以通过在yml配置文件中控制 @Configuration 注解的配置类是否生效
6).spring.factories文件
1 #-------starter自动装配---------
2 org.springframework.boot.autoconfigure.EnableAutoConfiguration=com.demo.starter.config.DemoConfig
在该文件中加入这个配置,该配置指定上步骤中定义的配置类为自动装配的配置。让springboot注解关键三个之一的@EnableAutoConfiguration注解去工作。
测试
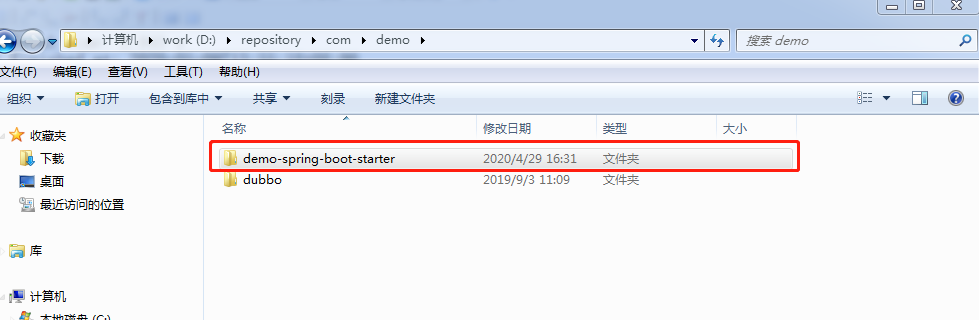
1.选中项目-右击- run as - maven install

本地仓库中就有了我们自定义的starter依赖。
2.然后在测试项目中添加上依赖
      <dependency>
               <groupId>com.demo</groupId>
                  <artifactId>demo-spring-boot-starter</artifactId>
                  <version>0.0.1-SNAPSHOT</version>
         </dependency>
配置文件
demo.isopen=true
demo.sayWhat=hello
demo.toWho= fengyuduke
写个测试类
 1 @RestController
 2 public class HelloController {
 3     @GetMapping("/hello")
 4     public String hello() {
 5         return "hello";
 6     }
 7
 8     @Autowired
 9     private DemoService demoService;
10
11     @GetMapping("/say")
12     public String sayWhat(){
13         return demoService.say();
14     }
15     @GetMapping("/getString")
16     public String getString() {
17         return demoService.getString("风雨渡客");
18     }
19 }
访问测试
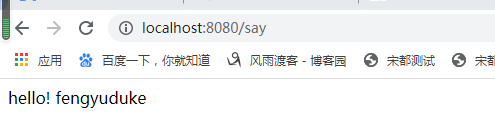

这时候,你如果把xml文件中的demo.isopen设置为false 或者注掉。
#demo.isopen=false
demo.sayWhat=hello
demo.toWho=fengyuduke
服务是起不来的,控制台报错信息也很明显。
Description:

Field demoService in org.javaboy.formlogin.HelloController required a bean of type 'com.demo.starter.service.DemoService' that could not be found.

The injection point has the following annotations:
    - @org.springframework.beans.factory.annotation.Autowired(required=true)

The following candidates were found but could not be injected:
    - Bean method 'demoService' in 'DemoConfig' not loaded because @ConditionalOnProperty (demo.isopen=true) found different value in property 'isopen'


Action:

Consider revisiting the entries above or defining a bean of type 'com.demo.starter.service.DemoService' in your configuration.