前言
项目某个新需求的交互要求仿照淘宝上拉从下网上弹出宝贝详情。今天打开淘宝APP仔细看了看,然后自己写了写,现在感觉效果差不多了,记录一下。
分析
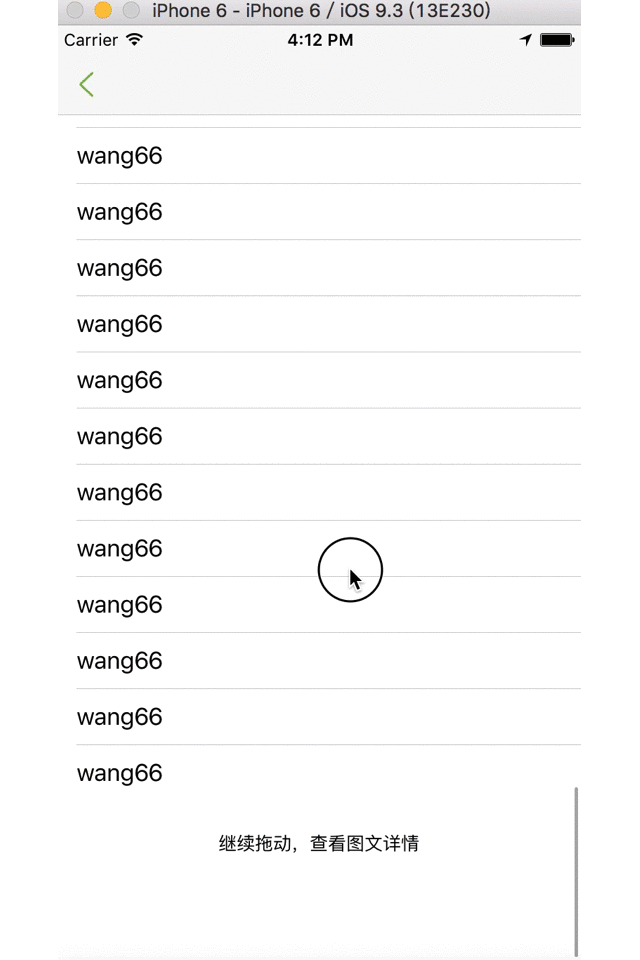
可以看到,该页面是分为两部分的,一部分是一开始就能看到的商品信息,然后我们上拉屏幕,屏幕不断往上滚动,滚动到第一部分结束时可以看到底部有“继续拖动,查看图文详情”一行文本出现。继续上拉到一个临界点便触发了翻页,此时第二部分以动画的形式从底部涌出占满整个屏幕。而且效果是该页面整体上移了,即第一部分和第二部分都是上移的。
此时,第二部分占满着整个屏幕,若我们下拉屏幕,则在屏幕顶部淡出“下拉,返回宝贝详情”的文本提示,并且达到一个临界值后文本变为“释放,返回宝贝详情”,此时松开手指,页面又滚动到第一部分的尾部。

实现
在自己写的demo中,第一部分是个tableView,展示商品基本信息。第二部分是个webView,展示商品图文详情。
第一步首先加载需要的视图。主要是第一部分的tableView和第二部分的webView,还有第二部分顶部显示上拉返回文本提示的headLab。为了节省资源,其实可以在上拉触发时再加载第二部分视图的,但是这里仅作示例,所以并没有懒加载。
- (void)loadContentView
{
    // first view
    [self.contentView addSubview:self.tableView];

    // second view
    [self.contentView addSubview:self.webView];

    UILabel *hv = self.headLab;
    // headLab
    [self.webView addSubview:hv];
    [self.headLab bringSubviewToFront:self.contentView];
}


- (UILabel *)headLab
{
    if(!_headLab){
        _headLab = [[UILabel alloc] init];
        _headLab.text = @"上拉,返回详情";
        _headLab.textAlignment = NSTextAlignmentCenter;
        _headLab.font = FONT(13);

    }

    _headLab.frame = CGRectMake(0, 0, PDWidth_mainScreen, 40.f);
    _headLab.alpha = 0.f;
    _headLab.textColor = PDColor_button_Gray;


    return _headLab;
}


- (UITableView *)tableView
{
    if(!_tableView){
        _tableView = [[UITableView alloc] initWithFrame:CGRectMake(0, 0, PDWidth_mainScreen, self.contentView.bounds.size.height) style:UITableViewStylePlain];
        //    _tableView.contentSize = CGSizeMake(PDWidth_mainScreen, 800);
        _tableView.dataSource = self;
        _tableView.delegate = self;
        _tableView.rowHeight = 40.f;
        UILabel *tabFootLab = [[UILabel alloc] initWithFrame:CGRectMake(0, 0, PDWidth_mainScreen, 60)];
        tabFootLab.text = @"继续拖动,查看图文详情";
        tabFootLab.font = FONT(13);
        tabFootLab.textAlignment = NSTextAlignmentCenter;
//        tabFootLab.backgroundColor = PDColor_Orange;
        _tableView.tableFooterView = tabFootLab;
    }

    return _tableView;
}


- (UIWebView *)webView
{
    if(!_webView){
        _webView = [[UIWebView alloc] initWithFrame:CGRectMake(0, _tableView.contentSize.height, PDWidth_mainScreen, PDHeight_mainScreen)];
        _webView.delegate = self;
        _webView.scrollView.delegate = self;
        [_webView loadRequest:[NSURLRequest requestWithURL:[NSURL URLWithString:@"https://www.baidu.com"]]];
    }

    return _webView;
}然后实现滚动视图UIScrollView的代理方法,在里面完成滚动到达临界值后,触发翻页动画的处理。包括了上拉翻到第二页和下拉翻回第一页两部分,即要在该方法里通过判断scrollView的类型做相应的处理。
#pragma mark ---- scrollView delegate

-(void)scrollViewDidEndDragging:(UIScrollView *)scrollView willDecelerate:(BOOL)decelerate
{
    CGFloat offsetY = scrollView.contentOffset.y;

    if([scrollView isKindOfClass:[UITableView class]]) // tableView界面上的滚动
    {
        // 能触发翻页的理想值:tableView整体的高度减去屏幕本省的高度
        CGFloat valueNum = _tableView.contentSize.height -PDHeight_mainScreen;
        if ((offsetY - valueNum) > _maxContentOffSet_Y)
        {
            [self goToDetailAnimation]; // 进入图文详情的动画
        }
    }

    else // webView页面上的滚动
    {
        NSLog(@"-----webView-------");
        if(offsetY<0 && -offsetY>_maxContentOffSet_Y)
        {
            [self backToFirstPageAnimation]; // 返回基本详情界面的动画
        }
    }
}
再看看两个翻页的动画,其实很简单,就是移动它们的位置。
// 进入详情的动画
- (void)goToDetailAnimation
{
    [UIView animateWithDuration:0.3 delay:0.0 options:UIViewAnimationOptionLayoutSubviews animations:^{
        _webView.frame = CGRectMake(0, 0, PDWidth_mainScreen, PDHeight_mainScreen);
        _tableView.frame = CGRectMake(0, -self.contentView.bounds.size.height, PDWidth_mainScreen, self.contentView.bounds.size.height);
    } completion:^(BOOL finished) {

    }];
}


// 返回第一个界面的动画
- (void)backToFirstPageAnimation
{
    [UIView animateWithDuration:0.3 delay:0.0 options:UIViewAnimationOptionLayoutSubviews animations:^{
        _tableView.frame = CGRectMake(0, 0, PDWidth_mainScreen, self.contentView.bounds.size.height);
        _webView.frame = CGRectMake(0, _tableView.contentSize.height, PDWidth_mainScreen, PDHeight_mainScreen);

    } completion:^(BOOL finished) {

    }];
}然后还有个在第二页下拉时屏幕顶部的文本提示的动画呢。这个我我们通过KVO来监听webView的scrollView的偏移量,只要其偏移量发生变化,便会实时执行KVO的代理方法,然后我们在方法内根据其偏移量的变动完成动画即可(随着偏移量变大字体变得非透明,达到某个临界点后,字体变为红色,文本内容也变为“释放,返回详情”)。
开始监听webView滚动的偏移量
    // 开始监听_webView.scrollView的偏移量
    [_webView.scrollView addObserver:self forKeyPath:@"contentOffset" options:NSKeyValueObservingOptionNew|NSKeyValueObservingOptionOld context:nil];
在KVO的代理方法里,根据偏移量完成提示文本的动画
- (void)observeValueForKeyPath:(NSString *)keyPath ofObject:(id)object change:(NSDictionary<NSString *,id> *)change context:(void *)context
{
    if(object == _webView.scrollView && [keyPath isEqualToString:@"contentOffset"])
    {
        NSLog(@"----old:%@----new:%@",change[@"old"],change[@"new"]);
        [self headLabAnimation:[change[@"new"] CGPointValue].y];
    }else
    {
        [super observeValueForKeyPath:keyPath ofObject:object change:change context:context];
    }

}
提示文本的动画的实现代码:
// 头部提示文本动画
- (void)headLabAnimation:(CGFloat)offsetY
{
    _headLab.alpha = -offsetY/60;
    _headLab.center = CGPointMake(PDWidth_mainScreen/2, -offsetY/2.f);
    // 图标翻转,表示已超过临界值,松手就会返回上页
    if(-offsetY>_maxContentOffSet_Y){
        _headLab.textColor = [UIColor redColor];
        _headLab.text = @"释放,返回详情";
    }else{
        _headLab.textColor = PDColor_button_Gray;
        _headLab.text = @"上拉,返回详情";
    }
}
demo的最终效果: