一、web服务器
1、创建磁盘
[root@localhost ~]# fdisk -l
Disk /dev/sda: 42.9 GB, 42949672960 bytes, 83886080 sectors
Units = sectors of 1 * 512 = 512 bytes
Sector size (logical/physical): 512 bytes / 512 bytes
I/O size (minimum/optimal): 512 bytes / 512 bytes
Disk label type: dos
Disk identifier: 0x00091554
Device Boot Start End Blocks Id System
/dev/sda1 * 2048 1026047 512000 83 Linux
/dev/sda2 1026048 83886079 41430016 8e Linux LVM
Disk /dev/sdb: 21.5 GB, 21474836480 bytes, 41943040 sectors
Units = sectors of 1 * 512 = 512 bytes
Sector size (logical/physical): 512 bytes / 512 bytes
I/O size (minimum/optimal): 512 bytes / 512 bytes
Disk /dev/sdc: 21.5 GB, 21474836480 bytes, 41943040 sectors
Units = sectors of 1 * 512 = 512 bytes
Sector size (logical/physical): 512 bytes / 512 bytes
I/O size (minimum/optimal): 512 bytes / 512 bytes
Disk /dev/sdd: 21.5 GB, 21474836480 bytes, 41943040 sectors
Units = sectors of 1 * 512 = 512 bytes
Sector size (logical/physical): 512 bytes / 512 bytes
I/O size (minimum/optimal): 512 bytes / 512 bytes
Disk /dev/mapper/centos-root: 40.2 GB, 40227569664 bytes, 78569472 sectors
Units = sectors of 1 * 512 = 512 bytes
Sector size (logical/physical): 512 bytes / 512 bytes
I/O size (minimum/optimal): 512 bytes / 512 bytes
Disk /dev/mapper/centos-swap: 2147 MB, 2147483648 bytes, 4194304 sectors
Units = sectors of 1 * 512 = 512 bytes
Sector size (logical/physical): 512 bytes / 512 bytes
I/O size (minimum/optimal): 512 bytes / 512 bytes
[root@localhost ~]# fdisk /dev/sdb
Welcome to fdisk (util-linux 2.23.2).
Changes will remain in memory only, until you decide to write them.
Be careful before using the write command.
Device does not contain a recognized partition table
Building a new DOS disklabel with disk identifier 0x8f8e5a63.
Command (m for help): n
Partition type:
p primary (0 primary, 0 extended, 4 free)
e extended
Select (default p): p
Partition number (1-4, default 1):
First sector (2048-41943039, default 2048):
Using default value 2048
Last sector, +sectors or +size{K,M,G} (2048-41943039, default 41943039):
Using default value 41943039
Partition 1 of type Linux and of size 20 GiB is set
Command (m for help): w
The partition table has been altered!
Calling ioctl() to re-read partition table.
Syncing disks.
[root@localhost ~]# fdisk /dev/sdc
Welcome to fdisk (util-linux 2.23.2).
Changes will remain in memory only, until you decide to write them.
Be careful before using the write command.
Device does not contain a recognized partition table
Building a new DOS disklabel with disk identifier 0xf373c35d.
Command (m for help): n
Partition type:
p primary (0 primary, 0 extended, 4 free)
e extended
Select (default p): p
Partition number (1-4, default 1):
First sector (2048-41943039, default 2048):
Using default value 2048
Last sector, +sectors or +size{K,M,G} (2048-41943039, default 41943039):
Using default value 41943039
Partition 1 of type Linux and of size 20 GiB is set
Command (m for help): w
The partition table has been altered!
Calling ioctl() to re-read partition table.
Syncing disks.
[root@localhost ~]# fdisk /dev/sdd
Welcome to fdisk (util-linux 2.23.2).
Changes will remain in memory only, until you decide to write them.
Be careful before using the write command.
Device does not contain a recognized partition table
Building a new DOS disklabel with disk identifier 0xc466a0fe.
Command (m for help): n
Partition type:
p primary (0 primary, 0 extended, 4 free)
e extended
Select (default p): p
Partition number (1-4, default 1):
First sector (2048-41943039, default 2048):
Using default value 2048
Last sector, +sectors or +size{K,M,G} (2048-41943039, default 41943039):
Using default value 41943039
Partition 1 of type Linux and of size 20 GiB is set
Command (m for help): w
The partition table has been altered!
Calling ioctl() to re-read partition table.
Syncing disks.
[root@localhost ~]# partprobe /dev/sdb
[root@localhost ~]# partprobe /dev/sdc
[root@localhost ~]# partprobe /dev/sdd
2、安装软Riad工具mdadm,创建ride5
[root@localhost ~]# yum -y install mdadm #安装md5dm
[root@localhost ~]# mdadm -C /dev/md5 -l 5 -n 3 /dev/sdb1 /dev/sdc1 /dev/sdd1 #创建ride5
mdadm: Defaulting to version 1.2 metadata
mdadm: array /dev/md5 started.
3、建立逻辑卷,格式化
[root@localhost ~]# pvcreate -y /dev/md5 #创建物理卷
Physical volume "/dev/md5" successfully created
[root@localhost ~]# vgcreate -y myvg /dev/md5 #创建卷组
Volume group "myvg" successfully created
[root@localhost ~]# lvcreate -y -L 35G -n mylv myvg #创建逻辑卷
Logical volume "mylv" created.
[root@localhost ~]# mkfs.xfs /dev/myvg/mylv #格式化卷组
log stripe unit (524288 bytes) is too large (maximum is 256KiB)
log stripe unit adjusted to 32KiB
meta-data=/dev/myvg/mylv isize=256 agcount=16, agsize=573312 blks
= sectsz=512 attr=2, projid32bit=1
= crc=0 finobt=0
data = bsize=4096 blocks=9172992, imaxpct=25
= sunit=128 swidth=256 blks
naming =version 2 bsize=4096 ascii-ci=0 ftype=0
log =internal log bsize=4096 blocks=4480, version=2
= sectsz=512 sunit=8 blks, lazy-count=1
realtime =none extsz=4096 blocks=0, rtextents=0
4、安装httpd
[root@localhost ~]# yum -y install gcc gcc-c++ make #安装编译软件
已加载插件:fastestmirror
Loading mirror speeds from cached hostfile
软件包 gcc-4.8.3-9.el7.x86_64 已安装并且是最新版本
软件包 gcc-c++-4.8.3-9.el7.x86_64 已安装并且是最新版本
软件包 1:make-3.82-21.el7.x86_64 已安装并且是最新版本
无须任何处理
[root@localhost ~]# cd /usr/src/httpd-2.2.17/
[root@localhost httpd-2.2.17]#./configure --prefix=/usr/local/httpd #指定安装位置
[root@localhost httpd-2.2.17]# make && make install #编译安装
[root@localhost ~]# vim /usr/local/httpd/conf/httpd.conf #修改配置文件
[root@localhost ~]# /usr/local/httpd/bin/apachectl start #开启服务
httpd (pid 3915) already running
5、挂载硬盘开启配额
[root@localhost ~]# echo "/dev/myvg/mylv /usr/local/httpd/htdocs/ xfs defaults,usrquota 0 0" >> /etc/fstab #修改配置文件
[root@localhost ~]# tail -1 /etc/fstab
/dev/myvg/mylv /usr/local/httpd/htdocs/ xfs defaults,usrquota 0 0
[root@localhost ~]# mount -a #挂载
[root@localhost ~]# mount | tail -1
/dev/mapper/myvg-mylv on /usr/local/httpd/htdocs type xfs (rw,relatime,seclabel,attr2,inode64,sunit=1024,swidth=2048,usrquota)
6、配额并测试
配额
[root@localhost ~]# useradd web #创建web用户
[root@localhost ~]# yum -y install quota #安装配额工具
[root@localhost ~]# /usr/sbin/quotacheck -auvg
quotacheck: Skipping /dev/mapper/myvg-mylv [/usr/local/httpd/htdocs]
quotacheck: Cannot find filesystem to check or filesystem not mounted with quota option.
==================
[root@localhost ~]# quotaon -auvg
[root@localhost ~]# edquota -u web
Disk quotas for user web (uid 1000):
Filesystem blocks soft hard inodes soft hard
/dev/mapper/myvg-mylv 0 80000 100000 0 80 100
[root@localhost ~]# su web
[web@localhost htdocs]$ dd if=/dev/zero of=/usr/local/httpd/htdocs/aa bs=1M count=101
dd: error writing ‘/usr/local/httpd/htdocs/aa’: Disk quota exceeded
98+0 records in
97+0 records out
102400000 bytes (102 MB) copied, 1.2308 s, 83.2 MB/s
[web@localhost htdocs]$ touch {1..102}
touch: cannot touch ‘101’: Disk quota exceeded
touch: cannot touch ‘102’: Disk quota exceeded
[web@localhost htdocs]$ ls
1 11 14 17 2 22 25 28 30 33 36 39 41 44 47 5 52 55 58 60 63 66 69 71 74 77 8 82 85 88 90 93 96 99
10 12 15 18 20 23 26 29 31 34 37 4 42 45 48 50 53 56 59 61 64 67 7 72 75 78 80 83 86 89 91 94 97 index.html
100 13 16 19 21 24 27 3 32 35 38 40 43 46 49 51 54 57 6 62 65 68 70 73 76 79 81 84 87 9 92 95 98
7、创建网页文件
[root@localhost ~]# cd /usr/local/httpd/htdocs/
[root@localhost htdocs]# vim index.html
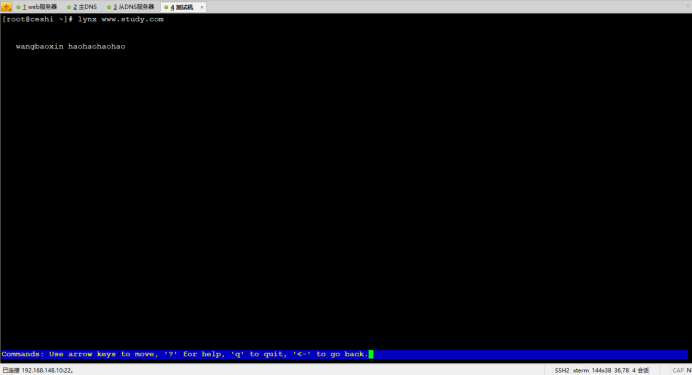
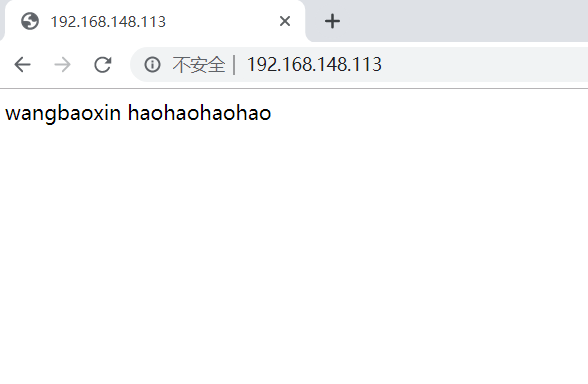
wangbaoxin haohaohaohao
8、开启80端口并测试
[root@localhost ~]# firewall-cmd --zone=public --add-port=80/tcp --permanent
success
二、主DNS服务器配置
[root@ns1 ~]# vim /etc/resolv.conf
# Generated by NetworkManager
nameserver 192.168.148.111
nameserver 192.168.148.112
~
[root@ns1 ~]# vim /etc/hosts
127.0.0.1 localhost localhost.localdomain localhost4 localhost4.localdomain4
::1 localhost localhost.localdomain localhost6 localhost6.localdomain6
192.168.148.111 ns1.study.com.
192.168.148.112 ns2.study.com.
[root@localhost ~]# yum -y install bind
主配置文件
[root@localhost ~]# vim /etc/named.conf
options {
directory "/var/named";
allow-query { any; };
forwarders { 114.114.114.114; };
recursion yes;
};
zone "study.com" IN {
type master;
file "study.com.zone";
allow-transfer { 192.168.148.112; };
};
zone "148.168.192.in-addr.arpa" IN {
type master;
file "192.168.148.arpa";
allow-transfer { 192.168.148.112; };
};
zone "." IN {
type hint;
file "named.ca";
};
正向配置文件
[root@ns1 ~]# vim /var/named/study.com.zone
$TTL 1D
@ IN SOA study.com. mail.study.com. (
20190817
3H
20M
1W
1D
)
IN NS ns1.study.com.
IN NS ns2.study.com.
IN MX 10 mail.study.com.
ns1 IN A 192.168.148.111
ns2 IN A 192.168.148.112
www IN A 192.168.148.113
反向配置文件
[root@ns1 ~]# vim /var/named/192.168.148.arpa
$TTL 1D
@ IN SOA study.com. mail.study.com. (
20190817
3H
20M
1W
1D
)
IN NS ns1.study.com.
IN NS ns2.study.com.
IN MX 10 mail.study.com.
111 IN PTR ns1.study.com.
112 IN PTR ns2.study.com.
113 IN PTR www.study.com.
权限
[root@ns1 ~]# chown :named /var/named/study.com.zone /var/named/192.168.148.arpa
[root@ns1 ~]# ll /var/named/
总用量 24
-rw-r--r--. 1 root named 251 8月 15 00:01 192.168.148.arpa
drwxrwx---. 2 named named 6 3月 6 2015 data
drwxrwx---. 2 named named 6 3月 6 2015 dynamic
-rw-r-----. 1 root named 2076 1月 28 2013 named.ca
-rw-r-----. 1 root named 152 12月 15 2009 named.empty
-rw-r-----. 1 root named 152 6月 21 2007 named.localhost
-rw-r-----. 1 root named 168 12月 15 2009 named.loopback
drwxrwx---. 2 named named 6 3月 6 2015 slaves
-rw-r--r--. 1 root named 248 8月 14 23:58 study.com.zone
验证
[root@ns1 ~]# named-checkconf /etc/named.conf
[root@ns1 ~]# named-checkzone study.com /var/named/study.com.zone
zone study.com/IN: study.com/MX 'mail.study.com' has no address records (A or AAAA)
zone study.com/IN: loaded serial 20190817
OK
[root@ns1 ~]# named-checkzone 148.168.192.in-addr.arpa /var/named/192.168.148.arpa
zone 148.168.192.in-addr.arpa/IN: loaded serial 20190817
OK
开启对应防火墙端口
[root@ns1 ~]# firewall-cmd --zone=public --add-port=53/tcp --permanent
success
[root@ns1 ~]# firewall-cmd --zone=public --add-port=53/udp --permanent
success
开启服务
[root@ns1 ~]# systemctl restart firewalld
[root@ns1 ~]# systemctl restart named
三、从DNS服务器配置
从DNS服务器
[root@ns2 ~]# vim /etc/resolv.conf
# Generated by NetworkManager
nameserver 192.168.148.111
nameserver 192.168.148.112
[root@ns2 ~]# vim /etc/hosts
127.0.0.1 localhost localhost.localdomain localhost4 localhost4.localdomain4
::1 localhost localhost.localdomain localhost6 localhost6.localdomain6
192.168.148.111 ns1.study.com.
192.168.148.112 ns2.study.com.
-----
[root@localhost ~]# scp 192.168.148.111:/etc/named.conf /etc/named.conf
root@192.168.148.111's password:
named.conf 100% 388 0.4KB/s 00:00
[root@ns2 ~]# vim /etc/named.conf
options {
directory "/var/named";
};
zone "study.com" IN {
type slave;
file "slaves/study.com.zone";
masters { 192.168.148.111; };
};
zone "148.168.192.in-addr.arpa" IN {
type slave;
file "dlaves/192.168.148.arpa";
masters { 192.168.148.111; };
};
----------------
[root@ns2 ~]# /sbin/iptables -I INPUT -p tcp --dport 53 -j ACCEPT
[root@ns2 ~]# /sbin/iptables -I INPUT -p udp --dport 53 -j ACCEPT
[root@ns2 ~]# /etc/init.d/iptables save
iptables:将防火墙规则保存到 /etc/sysconfig/iptables: [确定]
[root@ns2 ~]# /etc/init.d/iptables restart
iptables:将链设置为政策 ACCEPT:filter [确定]
iptables:清除防火墙规则: [确定]
iptables:正在卸载模块: [确定]
iptables:应用防火墙规则: [确定]
[root@ns2 ~]#
[root@ns2 ~]# /etc/init.d/named restart
停止 named: [确定]
启动 named: [确定]
四、测试机测试
[root@ceshi ~]# nslookup www.study.com
Server: 192.168.148.111
Address: 192.168.148.111#53
Name: www.study.com
Address: 192.168.148.113
[root@ceshi ~]# nslookup ns1.study.com
Server: 192.168.148.111
Address: 192.168.148.111#53
Name: ns1.study.com
Address: 192.168.148.111
[root@ceshi ~]# nslookup 192.168.148.111
Server: 192.168.148.111
Address: 192.168.148.111#53
111.148.168.192.in-addr.arpa name = ns1.study.com.
[root@ceshi ~]# nslookup www.jd.com
Server: 192.168.148.111
Address: 192.168.148.111#53
Non-authoritative answer:
www.jd.com canonical name = www.jd.com.gslb.qianxun.com.
www.jd.com.gslb.qianxun.com canonical name = www.jdcdn.com.
Name: www.jdcdn.com
Address: 150.138.120.1
[root@ceshi ~]# nslookup www.study.com 192.168.148.112
Server: 192.168.148.112
Address: 192.168.148.112#53
Name: www.study.com
Address: 192.168.148.113
[root@ceshi ~]# nslookup ns1.study.com 192.168.148.112
Server: 192.168.148.112
Address: 192.168.148.112#53
Name: ns1.study.com
Address: 192.168.148.111
[root@ceshi ~]# nslookup 192.168.148.111 192.168.148.112
Server: 192.168.148.112
Address: 192.168.148.112#53
111.148.168.192.in-addr.arpa name = ns1.study.com.
[root@ceshi ~]# lynx www.study.com
[root@ceshi ~]# lynx www.jd.com