LinuxCentOS7.6下安装pyenv
Pyenv安装
1、安装Git、python编译依赖
yum install -y git gcc make patch gdbm-devel openssl-devel sqlite-devel readline-devel zlib-devel bzip2-devel
2、创建用户python
useradd python
echo python | passwd python --stdin
3、使用python用户登录后安装pyenv
Pyenv官网 https://github.com/pyenv/pyenv
Pyenv-installer插件 https://github.com/pyenv/pyenv-installer
$ curl -L https://github.com/pyenv/pyenv-installer/raw/master/bin/pyenv-installer | bash
下载的pyenv-installer是一个shell脚本
[updates]
name=updates
baseurl=https://mirrors.aliyun.com/centos/6/os/x86_64/
gpgcheck=0
然后更新nss yum update nss -y
4、在Python用户的~/.bash_profile中追加
vim ~/.bash_profile
export PATH="/home/python/.pyenv/bin:(pyenv init -)"
eval “$(pyenv virtualenv-init -)”
. ~/.bash_profile或者重新登录 使环境变量生效
pyenv的Python版本控制:
安装3.6.6环境
pyenv install 3.6.6/3.5.3 -v
pyenv global 3.6.6 ### 改变全局环境为3.6.6
创建一个目录,cd进去
mkdir -p ~/.pyenv/hx/project/web/
cd ~/.pyenv/hx/project/web/
[python@localhost project]$ pyenv versions


- system (set by /home/python/.pyenv/version)
3.5.3
3.6.6
[python@localhost project]$ cd web/
[python@localhost web]$ pyenv versions - system (set by /home/python/.pyenv/version)
3.5.3
3.6.6
[python@localhost web]$ python -V
Python 2.7.5
[python@localhost web]$ pyenv local 3.5.3
[python@localhost web]$ python -V
Python 3.5.3
[python@localhost web]$ cd …
[python@localhost project]$ python -V
Python 2.7.5
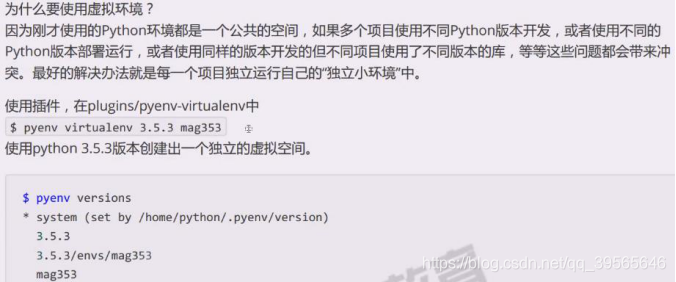
创建虚拟环境:
[python@localhost web]$ pyenv virtualenv 3.5.3 han353
Requirement already satisfied: setuptools in /home/python/.pyenv/versions/3.5.3/envs/han353/lib/python3.5/site-packages
Requirement already satisfied: pip in /home/python/.pyenv/versions/3.5.3/envs/han353/lib/python3.5/site-packages
[python@localhost web]$ pyenv local han366
(han366) [python@localhost web]$
pip通用配置:
(han366) [python@localhost web]$ mkdir ~/.pip
(han366) [python@localhost web]$ cd ~/.pip
[python@localhost .pip]$ vim pip.conf
[global]
index-url=https://mirrors.aliyun.com/pypi/simple/
trusted-host=mirrors.aliyun.com
先安装ipython 在pip list 查看
pip list 看到的就是后面可以输出的
pip freeze > requirements ###冻结当前可使用的所有包,冻结后输出到一个文件里去
回到虚拟环境里 安装python的包
pip install -r …/test/ requirements ### -r 包从哪里来
windows家目录配置: win+r “.” 创建目录pip编辑文件,pip.ini内容如下:
[global]
index-url=https://mirrors.aliyun.com/pypi/simple/
trusted-host=mirrors.aliyun.com
安装jupyter
jupyter是基于web的交互式笔记本,其中可以非常方便的使用Python,安装jupyter会依赖安装于ipython
所以需要先安装ipython,它是增强的交互式Python命令行工具
pip install ipython #安装ipython
ipython ##安装完成后 直接输入ipython即可打开
ipython装完后再继续安装jupyter,命令行输入
pip install jupyter 开始自动下载安装
安装完成后打开
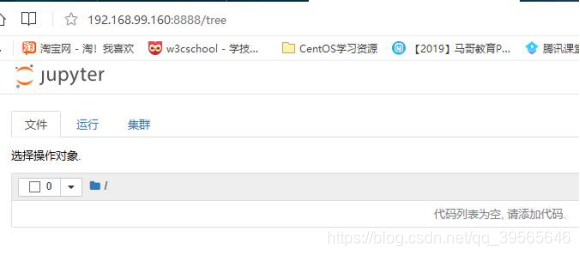
jupyter notebook --ip=0.0.0.0 --port=8888 ##地址输入自己的ip即可
(han366) [python@localhost web]$ jupyter notebook --ip=192.168.99.160 --port=8888 ##打开jupyter服务,浏览器访问下面地址:
http://192.168.99.160:8888/?token=a601628bba093bdd0f94fe86f8127bc0f59afbc8f351811b