
文章目录
1. 前言
生产上对 Web 应用 的监控是十分必要的。我们可以近乎实时来对应用的健康、性能等其他指标进行监控来及时应对一些突发情况。避免一些故障的发生。对于 Spring Boot 应用来说我们可以通过一个轻量级的监控工具 Spring Boot Admin (SBA) 来进行监控。
2. Spring Boot Admin
Spring Boot Admin是由德国软件工程师 Johannes Edmeier 开源的用于管理和监控 Spring Boot 应用程序。已经被收纳入Spring Initializr 截至发文时间的最新正式版本为 2.1.6 ,快照为2.2.0-SNAPSHOT。 C/S 架构风格 。 应用程序作为 Spring Boot Admin Client 向 Spring Boot Admin Server 注册(通过HTTP)或使用 Spring Cloud注册中心(如 Eureka,Consul)发现。SERVER程序采用了 响应式Web框架 Spring Webflux 。 展示UI采用了 Vue.js,展示Spring Boot Admin Client 通过 Spring Boot Actuator 端点上的一些监控。常见的功能或者监控如下:
- 显示健康状况
- 显示应用度量指标详情,例如
- JVM和内存指标
- micrometer度量
- 数据源指标
- 缓存指标
- 显示构建信息编号
- 关注并下载日志文件
- 下载
heapdump - 查看
jvm系统和环境属性 - 查看 Spring Boot 配置属性
- 支持 Spring Cloud 的环境端点和刷新端点 ``
- 支持 K8s
- 易用的日志级别管理
- 与
JMX-beans交互 - 查看线程转储
- 查看
http跟踪 - 查看
auditevents - 查看
http-endpoints - 查看计划任务
- 查看和删除活动会话(使用 Spring Session )
- 查看
Flyway/Liquibase数据库迁移 - 状态变更通知(通过电子邮件,Slack,Hipchat等,支持钉钉)
- 状态更改的事件日志(非持久化)
3. 快速集成
接下来让我们来在 Spring Boot 项目中集成 Spring Boot Admin 。注意版本的兼容性,可通过Spring Initializr 来验证。
3.1 配置 Spring Boot Admin Server
Spring Boot Admin Server 一般推荐独立作为一个 Spring Boot jar应用运行。 只需要将下列依赖添加到你的 pom.xml 中:
 <dependency>
     <groupId>de.codecentric</groupId>
     <artifactId>spring-boot-admin-starter-server</artifactId>
     <version>2.2.0-SNAPSHOT</version>
 </dependency>
 <dependency>
     <groupId>org.springframework.boot</groupId>
     <artifactId>spring-boot-starter-web</artifactId>
 </dependency>
<!-- 生产需要保证监控的安全性-->
 <dependency>
   <groupId>org.springframework.boot</groupId>
   <artifactId>spring-boot-starter-security</artifactId>
 </dependency>
然后通过添加 @EnableAdminServer 到配置中来引入 Spring Boot Admin Server 配置:
 @EnableAdminServer
 @SpringBootApplication
 public class SpringBootAdminApplication {
     public static void main(String[] args) {
         SpringApplication.run(SpringBootAdminApplication.class, args);
     }
 }
3.2 配置 Spring Boot Admin
每个要注册的应用程序都必须包括 Spring Boot Admin Client。为了保护端点,你还应该添加安全依赖 spring-boot-starter-security。
 <dependency>
     <groupId>de.codecentric</groupId>
     <artifactId>spring-boot-admin-starter-client</artifactId>
     <version>2.2.0-SNAPSHOT</version>
 </dependency>
 <dependency>
     <groupId>org.springframework.boot</groupId>
     <artifactId>spring-boot-starter-security</artifactId>
 </dependency>
然后在客户端应用程序的 application.yml 中增加以下配置:
  spring:
     boot:
       admin:
         client:
     # Spring Boot Admin Server 地址   http://localhost:8080  可自定义
             url:  http://localhost:8080
     # 默认情况下,大多数端点都不通过http公开,我们公开了所有端点。对于生产,您应该仔细选择要公开的端点。
  management:
    endpoints:
      web:
        exposure:
          include: '*'
    endpoint:
        health:
          show-details: ALWAYS
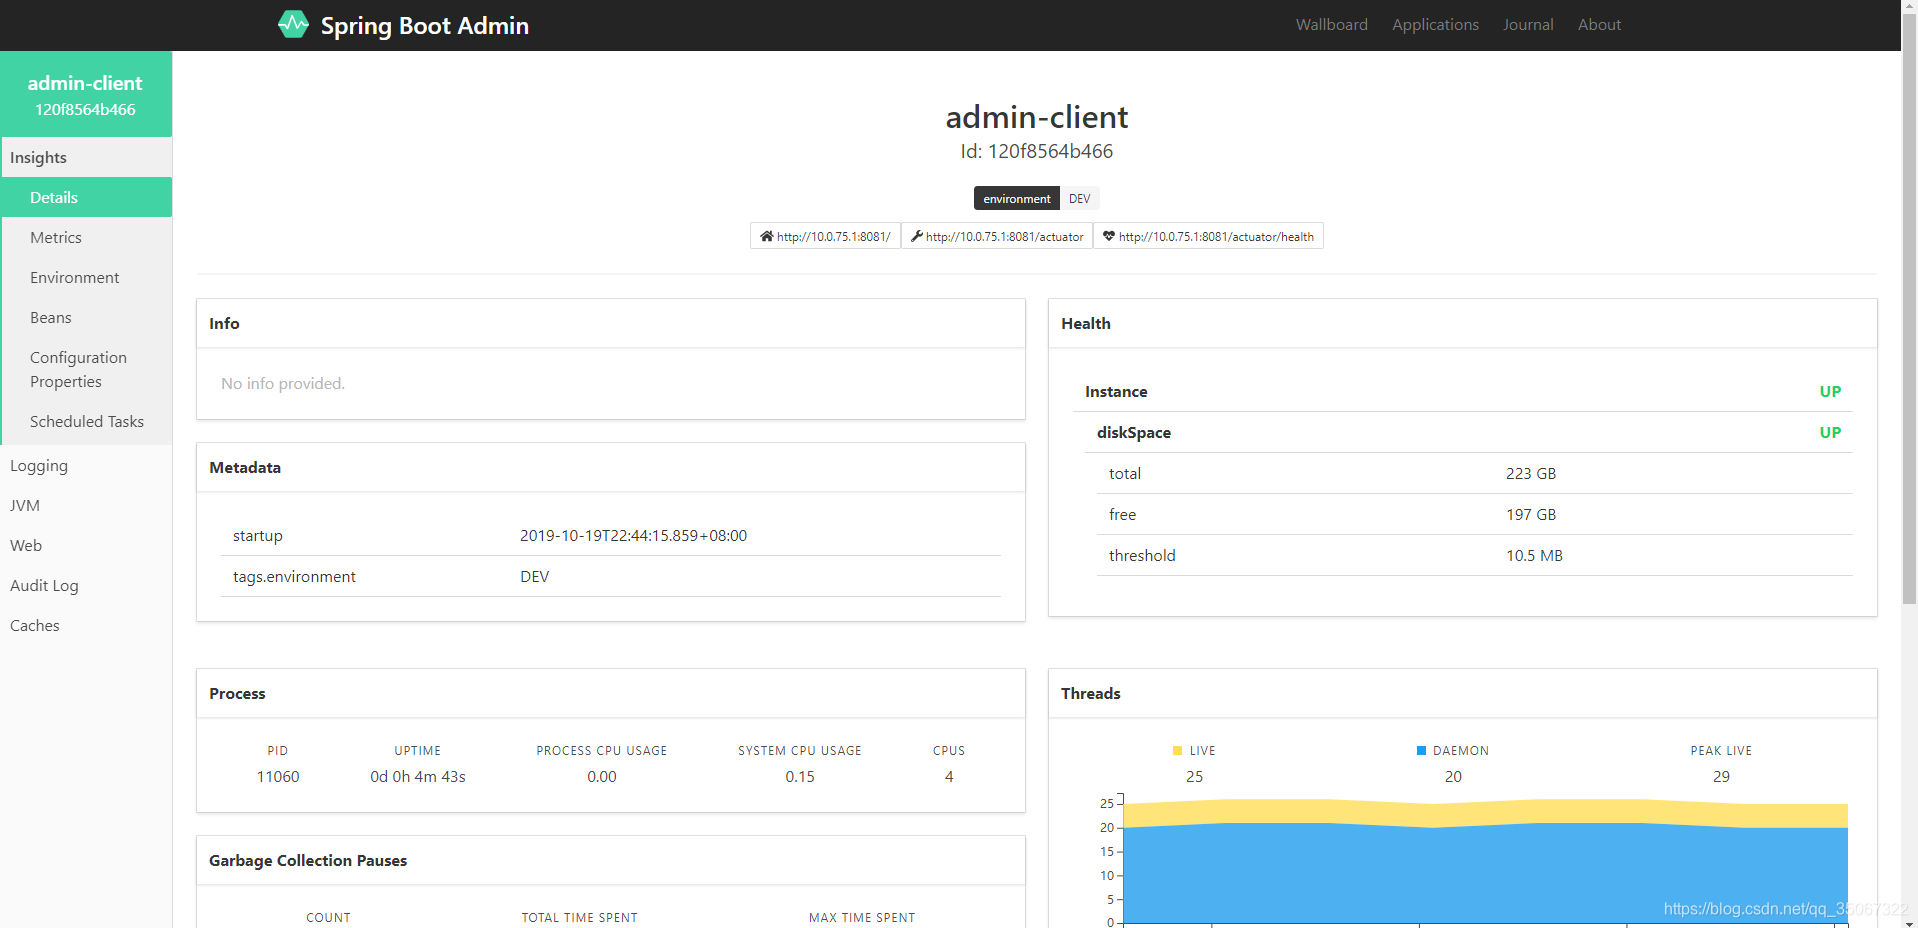
分别启动 SBA 服务端和客户端 。打开服务端页面 http://localhost:8080 将进入以下监控界面:
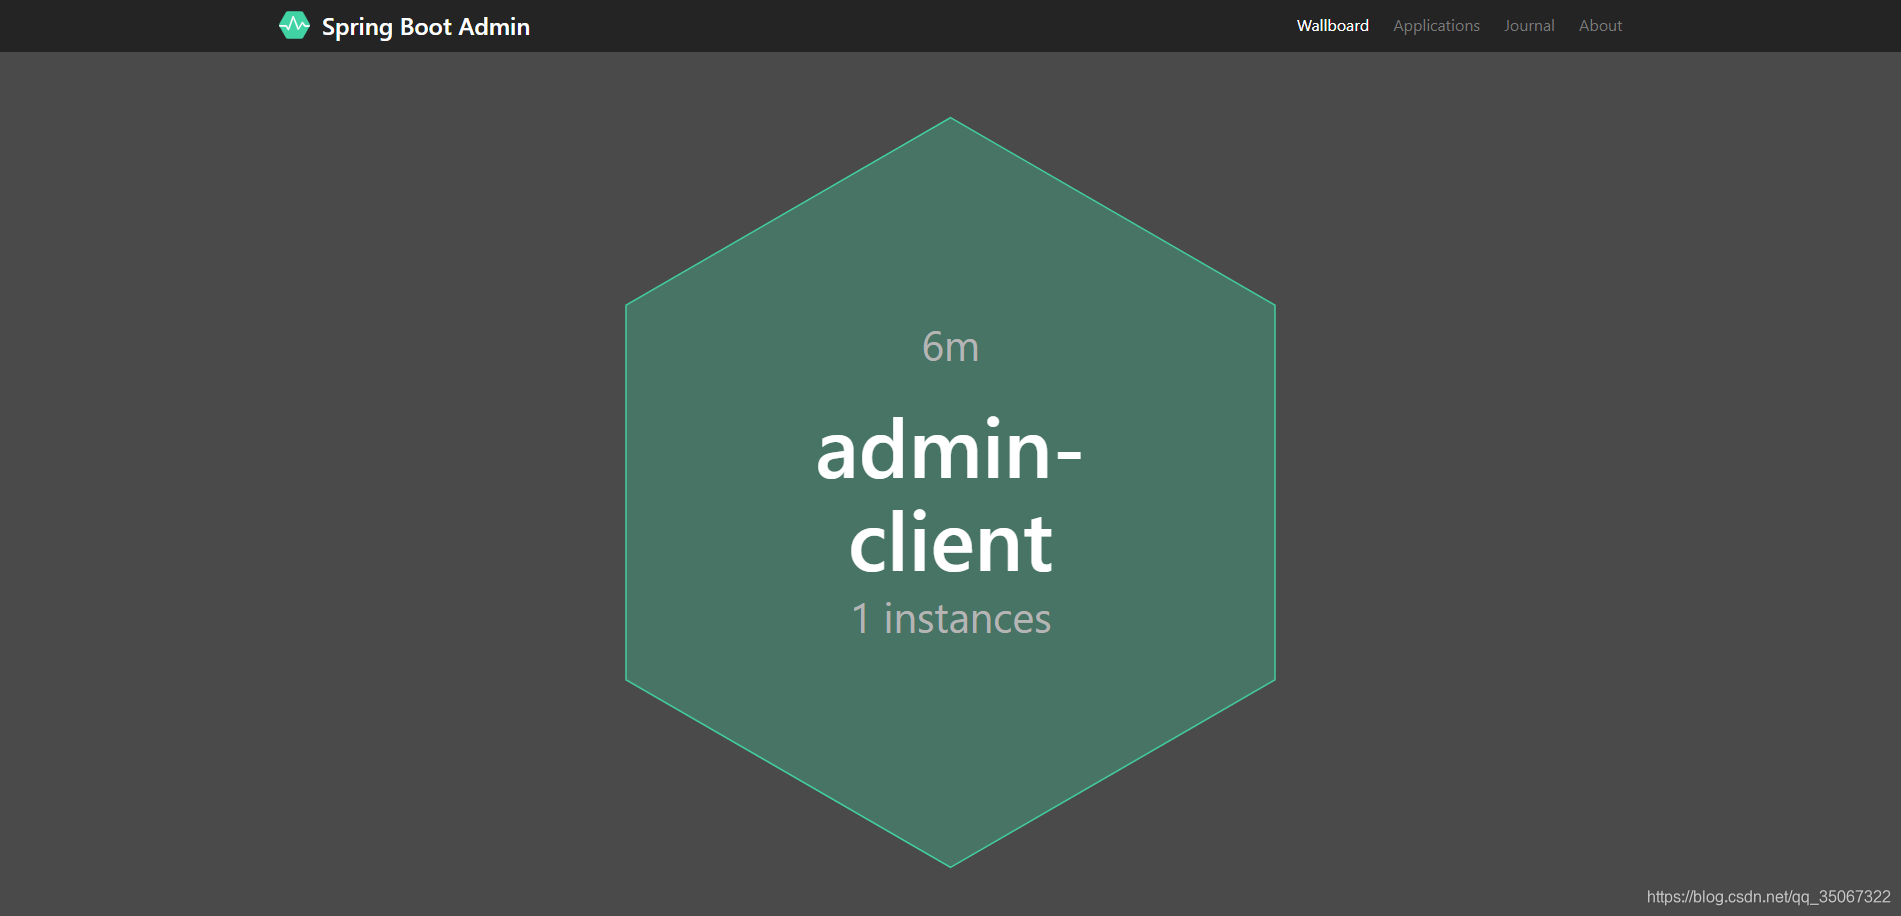
进而也可以获取 admin-client 的具体监控指标:
如果您已经将 Spring Cloud Discovery (eureka、consul等)用于您的应用程序,则不需要 Spring Boot Admin 客户端。只需将 DiscoveryClient 添加到 Spring Boot Admin Server ,其余的事情通过自动配置完成,可通过官方示例来查看。
4. Spring Boot Admin 安全访问控制
应用的监控指标都是极其敏感的数据。所以生产上必须增加安全访问控制以避免发生泄漏事件。你可以使用你擅长的安全框架来做访问控制。这里我们采用 Spring Security 来保护我们的 Spring Boot Admin 。
4.1 保护 Spring Boot Admin Server 服务器
添加 Spring Security Starter 依赖:
 <dependency>
     <groupId>org.springframework.boot</groupId>
     <artifactId>spring-boot-starter-security</artifactId>
 </dependency>
设置管理账户信息
  spring:
    security:
      user:
        name: SBA_admin
        password: SBA_password
        roles: SBA_ADMIN
配置安全路径访问控制
 package cn.felord.admin.server.configuer;

 import de.codecentric.boot.admin.server.config.AdminServerProperties;
 import org.springframework.context.annotation.Configuration;
 import org.springframework.http.HttpMethod;
 import org.springframework.security.config.annotation.web.builders.HttpSecurity;
 import org.springframework.security.config.annotation.web.configuration.WebSecurityConfigurerAdapter;
 import org.springframework.security.web.authentication.SavedRequestAwareAuthenticationSuccessHandler;
 import org.springframework.security.web.csrf.CookieCsrfTokenRepository;
 import org.springframework.security.web.util.matcher.AntPathRequestMatcher;

 import java.util.UUID;

 /**
  * The type Security secure config.
  *
  * @author Felordcn
  * @since 2019 /10/19 23:33
  */
 @Configuration
 public class AdminServerSecurityConfig extends WebSecurityConfigurerAdapter {
     private final AdminServerProperties adminServer;

     /**
      * Instantiates a new Security secure config.
      *
      * @param adminServer the admin server
      */
     public AdminServerSecurityConfig(AdminServerProperties adminServer) {
         this.adminServer = adminServer;
     }

     @Override
     protected void configure(HttpSecurity http) throws Exception {
         // @formatter:off
         SavedRequestAwareAuthenticationSuccessHandler successHandler = new SavedRequestAwareAuthenticationSuccessHandler();
         successHandler.setTargetUrlParameter("redirectTo");
         final String adminServerContextPath = this.adminServer.getContextPath();
         successHandler.setDefaultTargetUrl(adminServerContextPath +"/");

         http.authorizeRequests()
                 .antMatchers(adminServerContextPath +  "/assets/**").permitAll() // <1>
                 .antMatchers(adminServerContextPath

                 + "/login").permitAll()
                 .anyRequest().authenticated() // <2>
                 .and()
                 .formLogin().loginPage(adminServerContextPath  + "/login").successHandler(successHandler).and() // <3>
                 .logout().logoutUrl(adminServerContextPath +  "/logout").and()
                 .httpBasic().and() // <4>
                 .csrf()
                 .csrfTokenRepository(CookieCsrfTokenRepository.withHttpOnlyFalse()) // <5>
                 .ignoringRequestMatchers(
                         new AntPathRequestMatcher(adminServerContextPath +  "/instances", HttpMethod.POST.toString()),  // <6>
                         new AntPathRequestMatcher(adminServerContextPath +  "/instances/*", HttpMethod.DELETE.toString()),  // <6>
                         new AntPathRequestMatcher(adminServerContextPath  + "/actuator/**")  // <7>
                 )
                 .and()
                 .rememberMe().key(UUID.randomUUID().toString()).tokenValiditySeconds(1209600);

     }

 }
然后启动 SBA Server 服务器 http://localhost:8237 会进入登录页面,输入你配置的账密即可:

4.2 保护 Spring Boot Admin Client 端点
服务端端点被访问控制后,客户端注册需要权限,同时客户端的一些 Actuator 端点也必须被保护。
添加 Spring Security Starter 依赖:
 <dependency>
     <groupId>org.springframework.boot</groupId>
     <artifactId>spring-boot-starter-security</artifactId>
 </dependency>
设置安全账户信息
  spring:
    security:
      user:
        name: SBA_admin
        password: SBA_password
        roles: SBA_ADMIN
设置服务端安全账户信息
将我们在Spring Boot Admin服务端配置配置的安全账户配置到以下属性中:
spring:
    boot:
      admin:
         client:
         # Spring Boot Admin Server 管理账户
           username: SBA_admin
           password: SBA_password
保护 Actuator 端点
当使用HTTP Basic身份验证保护执行器端点时,SBA Server 需要凭据才能访问它们。所以我们通过以下来配置以授权服务端访问 Actuator 端点:
 spring:
   boot:
     admin:
       client:
         instance:
           metadata:
 # 这里是我们在 client 设置安全账户信息  步骤中设置的账密
             user.name: ${spring.security.user.name}
             user.password: ${spring.security.user.password}
启动客户端应用就可以了。
请注意:如果你改变了 HTTP BASIC 方式访问端点,上面的配置会失效,你可能会需要定制 HttpHeadersProvider 来满足你的需要。
5. 进阶实战
Spring Boot Admin 还提供了一些我们常用的功能。
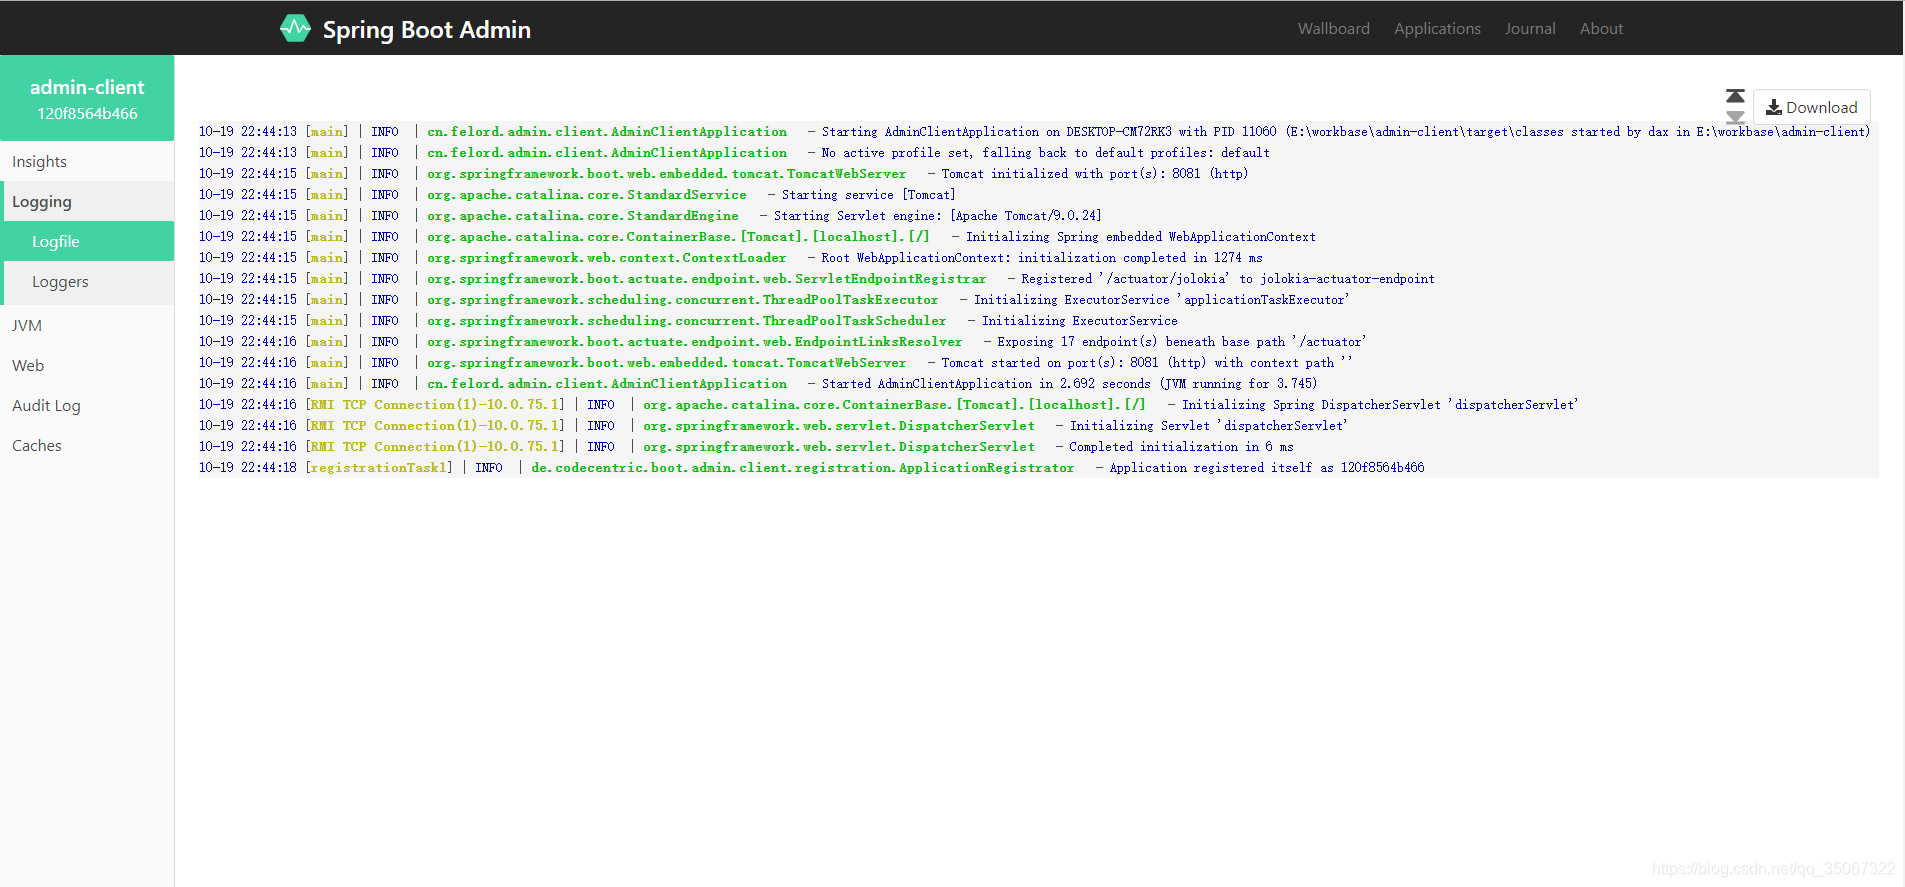
5.1 日志查看
默认情况下,日志文件无法通过执行器端点访问,因此在 Spring Boot Admin 中不可见。为了启用日志文件执行器端点,您需要通过设置logging.path或 logging.file。
Spring Boot Admin 将检测所有看起来像URL的内容,并将其呈现为超链接。还支持ANSI颜色转义。您需要设置一个自定义文件日志模式,因为Spring Boot的默认模式不使用颜色。
以 logging.file 为例, 我们在客户端 application.yml增加以下配置:
 logging:
    file: /application.log
    pattern:
      file: '%clr(%d{yyyy-MM-dd HH:mm:ss.SSS}){faint} %clr(%5p) %clr(${PID}){magenta} %clr(---){faint} %clr([.15t]){faint} %clr(%-40.40logger{39}){cyan} %clr(:){faint} %m%n%wEx'
然后即可在 SBA 控制台显示:
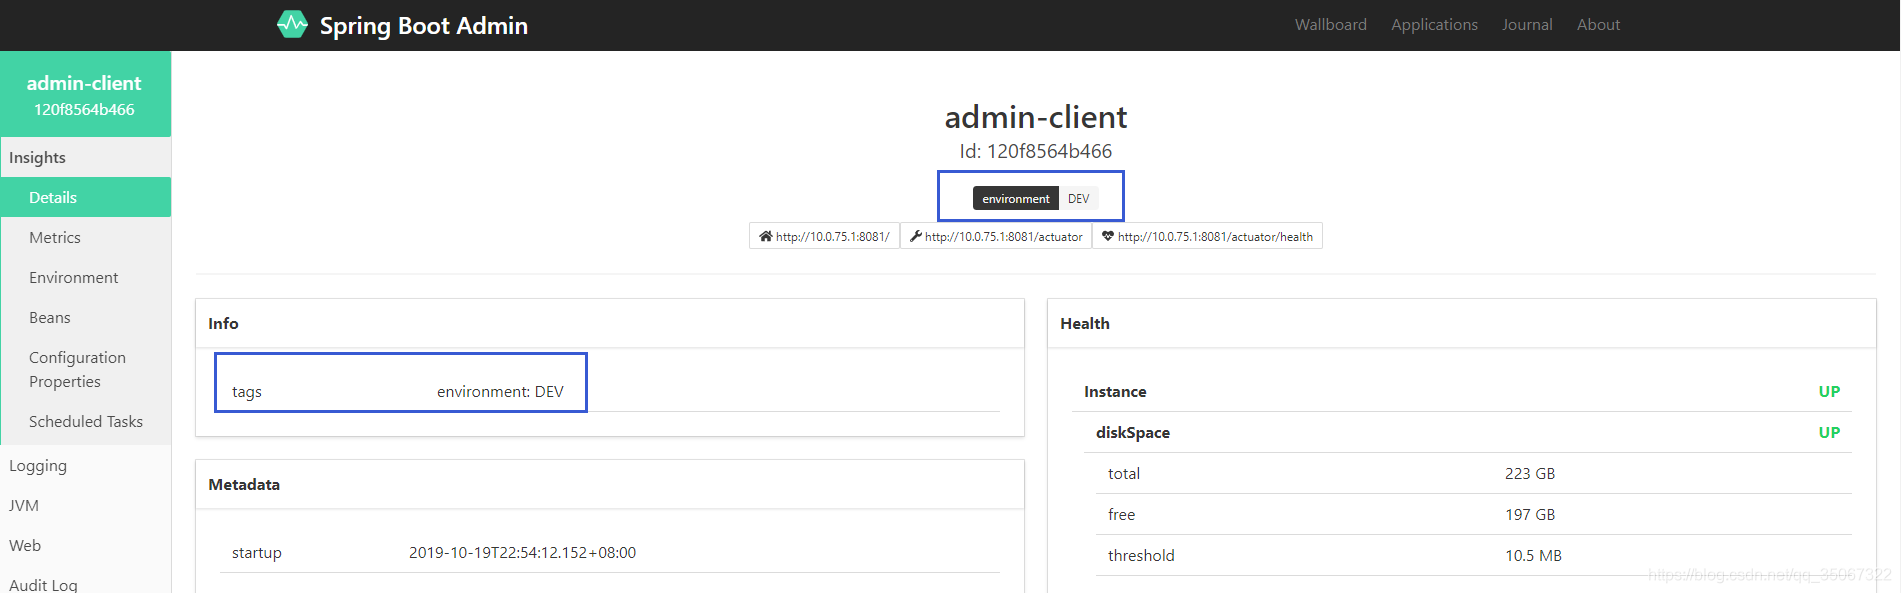
5.2 按应用实例添加标签
Tags 是我们区别同一应用的不同实例的有效方法。比如我们同时使用 SBA 监控了 spring.application.name=admin-client 应用的三个实例,分别是开发(DEV)、测试(TEST)、生产(PROD)。我们可以通过(以开发为例):
使用信息端点/info:
info:
  tags:
    environment: DEV
或者配置 SBA 元数据:
 spring:
    boot:
       admin:
         client:
           instance:
             metadata:
                tags:
                  environment: DEV
然后我们就可以通过详情界面查看到具体的信息:
5.3 邮件通知
Spring Boot Admin 支持配置邮件来发送邮件通知,以便于我们及时处置系统警报。
引入邮件依赖
 <dependency>
     <groupId>org.springframework.boot</groupId>
     <artifactId>spring-boot-starter-mail</artifactId>
 </dependency>
spring boot mail 配置
# spring boot mail 配置
 spring:
   mail:
    host: smtp.qq.com
    username: username@xx.com
    password: password
    properties:
      mail:
       smtp:
         auth: true
         starttls:
           enable: true
           required: true
Spring Boot Admin 邮件配置
 # SBA 邮件配置
spring:
    boot:
     admin:
      notify:
        mail:
          from: from_user@xxx.com
          to: to_admin@xxx.com
这样就可以接收邮件告警了。国内也可以使用钉钉机器人通知功能。
还有其它一些功能,可以通过官方文档进行学习。
6. 总结
今天我们学习了使用 Spring Boot Admin 对 Spring Boot 应用进行监控。也学习了如何对 Spring Boot Admin 进行安全访问控制,还有一些有用的进阶操作。
这里需要说明的是对一些小型应用 Spring Boot Admin 可以完全胜任监控功能,也非常简单好用。
但是对于大型分布式集群应用来说我个人不建议使用 Spring Boot Admin ,需要其它更加专业的 APM 监控,比如开源的 Apache Skywalking 、Prometheus Grafana 等等。
相关 SBA 实战完整代码可关注公众号:Felordcn 回复 admin 获取
关注公众号:Felordcn 获取更多资讯